DLPU034C June 2015 – November 2016 DLP4710 , DLPA3005
6 EVM Setup
The DLP LightCrafter Display 4710 EVM has the DLP4710 chipset comprising of DLP4710 (.47 1080p) DMD, DLPC3439 display controller, DLPA3005 PMIC/LED driver, and supporting components as the Cypress chip, MSP430, and ITE controller all included on one board. Figure 4 shows the locations of these parts. The MSP430 is placed on the bottom of the board and is not shown in Figure 4.
 Figure 4. DLP LightCrafter Display 4710 Board
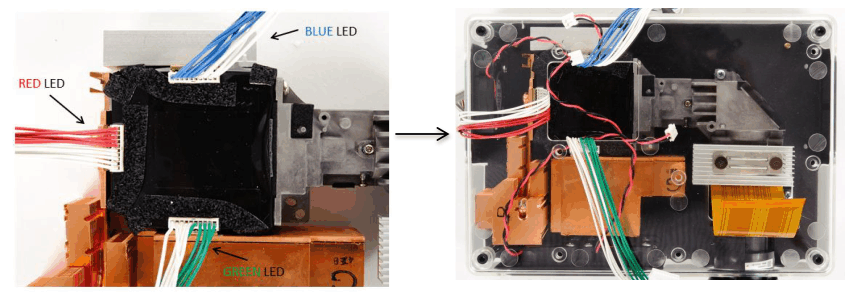
 The DLP LightCrafter Display 4710 board has three LED connectors for red, blue, and green, and one connector for the flex cable to the 0.47-inch 1080p DMD. The connectors for each LED are named on the board as well as on the light engine. Refer to Figure 5 to see the proper setup.
NOTE
Ensure a good connection of the flex cable to the DLP LightCrafter Display 4710 board.
 Figure 5. LED Connection
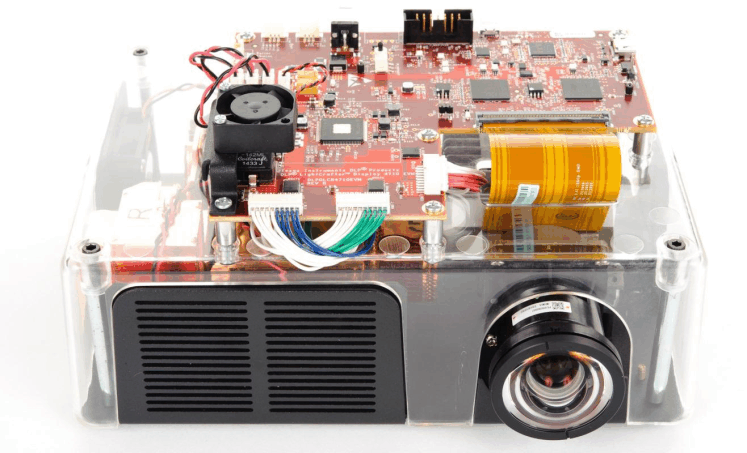
 Figure 6 shows the final setup of all parts.
 Figure 6. DLP LightCrafter Display 4710 EVM
 NOTE
Make sure that everything is setup correctly before continuing. Verify that the flex cable is connected correctly to the LightCrafter Display 4710 board.