SLAAEE3A July 2023 – June 2024 MSPM0L1306
2 Gauge Hardware Introduction
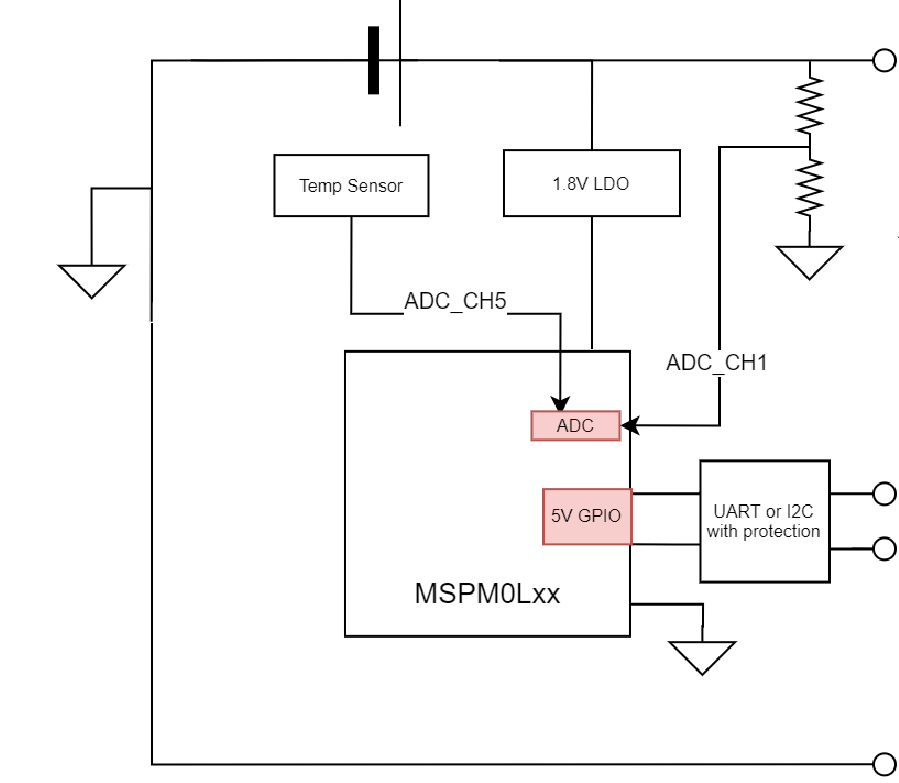
Figure 2-1 shows the hardware high level block diagram. The input parameters are only voltage and temperature tested from ADC channel 1 and ADC channel 5.
 Figure 2-1 MSPM0 Gauge Board Block
Diagram
Figure 2-1 MSPM0 Gauge Board Block
DiagramThis design can use these MSPM0 features:
- High precision 12-bit ADC for temperature and voltage detection
- 5 V tolerant open-drain I/O with universal asynchronous receiver, transmitter (UART) or I2C function to communicate with masters under different power rails
- Lower to 1.62 V working voltage to support single battery full voltage range
- Lower to 1.1 µA STANDBY current with SRAM retention for battery application
Here we give a quick introduction for the hardware board and how to use it. Insert the battery into the default socket or connect it to the backup battery supply input. Debug and UART COM port is used to connect to PC, which can download the code or communicate with the GUI.
Pay attention for the MCU power switch supply jumper. Connect VMCU to VEx for downloading, then the MCU is supplied with 3.3 V, which can provide the voltage matching with the debugger. Connect VMCU to Vin for evaluation, then the MCU is supplied with 1.8 V LDO and can provide the best analog performance.
 Figure 2-2 Gauge Board Instructions