SLOU559 April 2023
6 Hardware Setup
-
Connect the USB cable to J11 of the EVM and a computer.
-
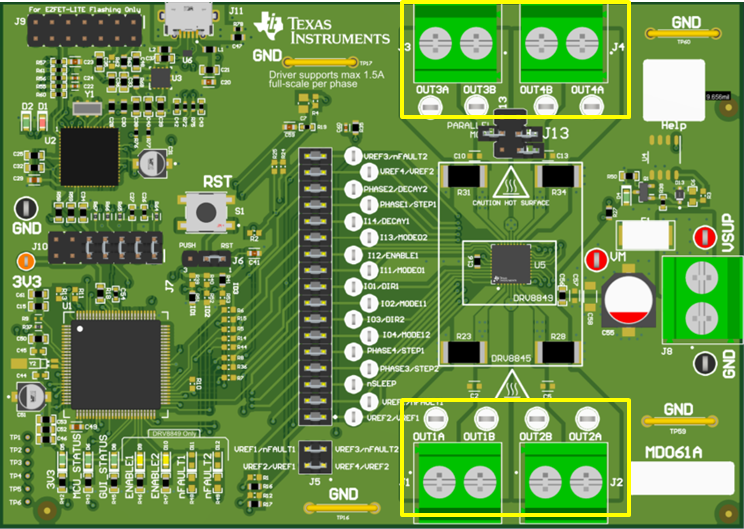
If using a stepper motor connect A-phase to J1 screw terminal connector and B-phase to J2 connector. Repeat the connection using a second stepper motor on J1 and J2 if you wish to spin two stepper motors. (Note: J1, J2 are Stepper 1 outputs and J3, J4 are Stepper 2 outputs).
- On DRV8845EVM you can spin up to
4 brushed DC motors using connectors J1-J4.
 Figure 6-1 DRV8845EVM motor
connectors
 - Observing correct polarity
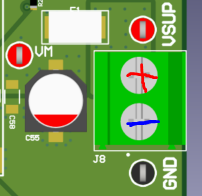
connect the VM power supply to the large screw terminal block J8. In J8 the left
side is positive and right side is GND.
 Figure 6-2 VM power
connector
 - Verify that the EZFET LED D2, 3V3 LED D5 and are illuminated and that the MCU_STATUS LED D6 is blinking at approximately 1Hz. If the STATUS LED is not blinking perform a firmware reset using the push button S1 with jumper J6 in 1-2 RST position.
- The MCU_STATUS LED D6 blinks now if the EVM hardware is functioning normally.
- The EVM is ready to be used with the GUI application. In certain situations, such as while disconnecting and reconnecting VM power before the power supply capacitors are fully discharged a proper firmware reset can fail to happen. A proper reset is indicated by the STATUS LED D6 blinking at a rate of approximately 1 Hz. If the Status LED is not blinking as expected, press the reset push button once with jumper J6 installed in the RST position.
- Do not unplug the USB cable while the VM power is active. If you do, switch off the VM power, wait until the VM power is fully discharged and proceed to step 2.
- The latest version of the GUI application is bundled with the latest version of the EVM firmware.
A firmware update is suggested before selecting and connecting to an EVM variant using the GUI application. The firmware update procedure is described in the updating firmware section of this User's Guide.