SNAU182A March 2021 – May 2022
B.4 Firmware Update
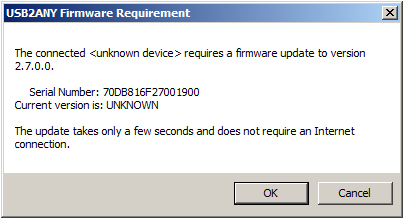
Usually when the Reference PRO board is used at the first time, TICS Pro will request for a firmware update. Simply follow the pop-up instructions to complete the update. This is necessary to ensure that the USB connection between the PC and the Reference PRO board is properly setup, otherwise the programming to LMX2571EPEVM will not be successful.
- When you see this message,
click the OK button.
 Figure 9-4 Firmware
Requirement
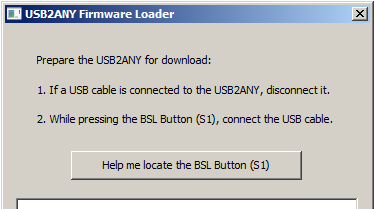
 - Next, follow the on-screen procedure.
 Figure 9-5 Firmware Loader
 - The BSL button is located next to the USB connector.
 Figure 9-6 BSL Button
 - Follow the on-screen procedure until the below screen is pop-up.
 Figure 9-7 Update Firmware
 - Click the Upgrade Firmware button, the
firmware will be upgrading. Click the Close button after the upgrade is
complete.
 Figure 9-8 Firmware Update
Completed
 - Check the USB connection in TICS Pro by clicking
USB communications → Interface. Make sure the USB Connected button is now
green.
 Figure 9-9 USB
Communications