SNAU294 May 2024 LMX1205
3.3 USB2ANY Interface
The on-board USB2ANY interface provides a bridge between TICS Pro software and the LMX1205 device. When the on-board USB2ANY controller is first connected to a PC, or if the firmware revision for the controller does not match with the version used by TICS Pro, a firmware update to the controller is required.
- Connect the USB cable from the PC to the EVM. The USB interface provides the necessary power to enable the on-board USB2ANY controller.
- After Windows has set up a USB device, run TICS Pro in the PC.
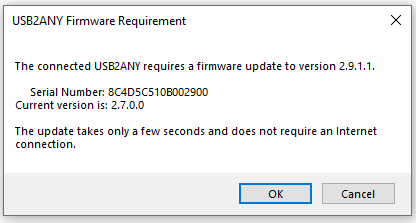
- The next screen looks like the
image below.
 Figure 3-1 Firmware Update
Request
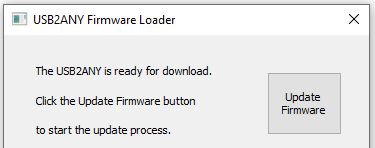
 - Click OK, then the screen
looks like the image below. Click Update Firmware.
 Figure 3-2 Firmware
Loader
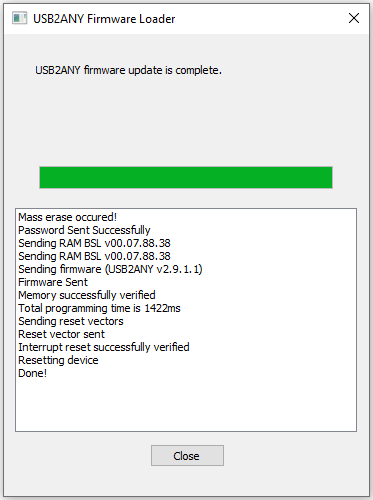
 - Then the
screen below appears.
 Figure 3-3 Firmware Update
Complete
 - Click the Close button to close the window.
- A TICS Pro default device pops
up. Check to make sure that we get a green light on Connection Mode at the
bottom of the GUI.
 Figure 3-4 Connection
Mode
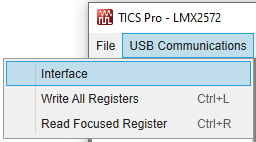
 - Go to the menu bar, click USB
Communications, then select Interface.
 Figure 3-5 USB
Communications
 - Click
the Identify button, the LED in the USB2ANY interface flashes.
 Figure 3-6 Identify USB2ANY
Controller
 - Now, the USB2ANY is ready to use. Click the Close button to close the window.