SNVU870A June 2023 – October 2023
3.2.3 LED Control Page
Set the color and brightness for every RGB LED pixel in the LED control page. To illuminate one LED with default configuration, use the following procedure and see Figure 3-5.
- Click the Enable button to enable the LP5861 in the software.
- Select the LED you want to control.
- Set a color for this LED.
- Click the Set Brightness button to upload PWM value into the device.
- Click the VSync button to active this LED (The default is Mode 3 so the SYNC signal is necessary).
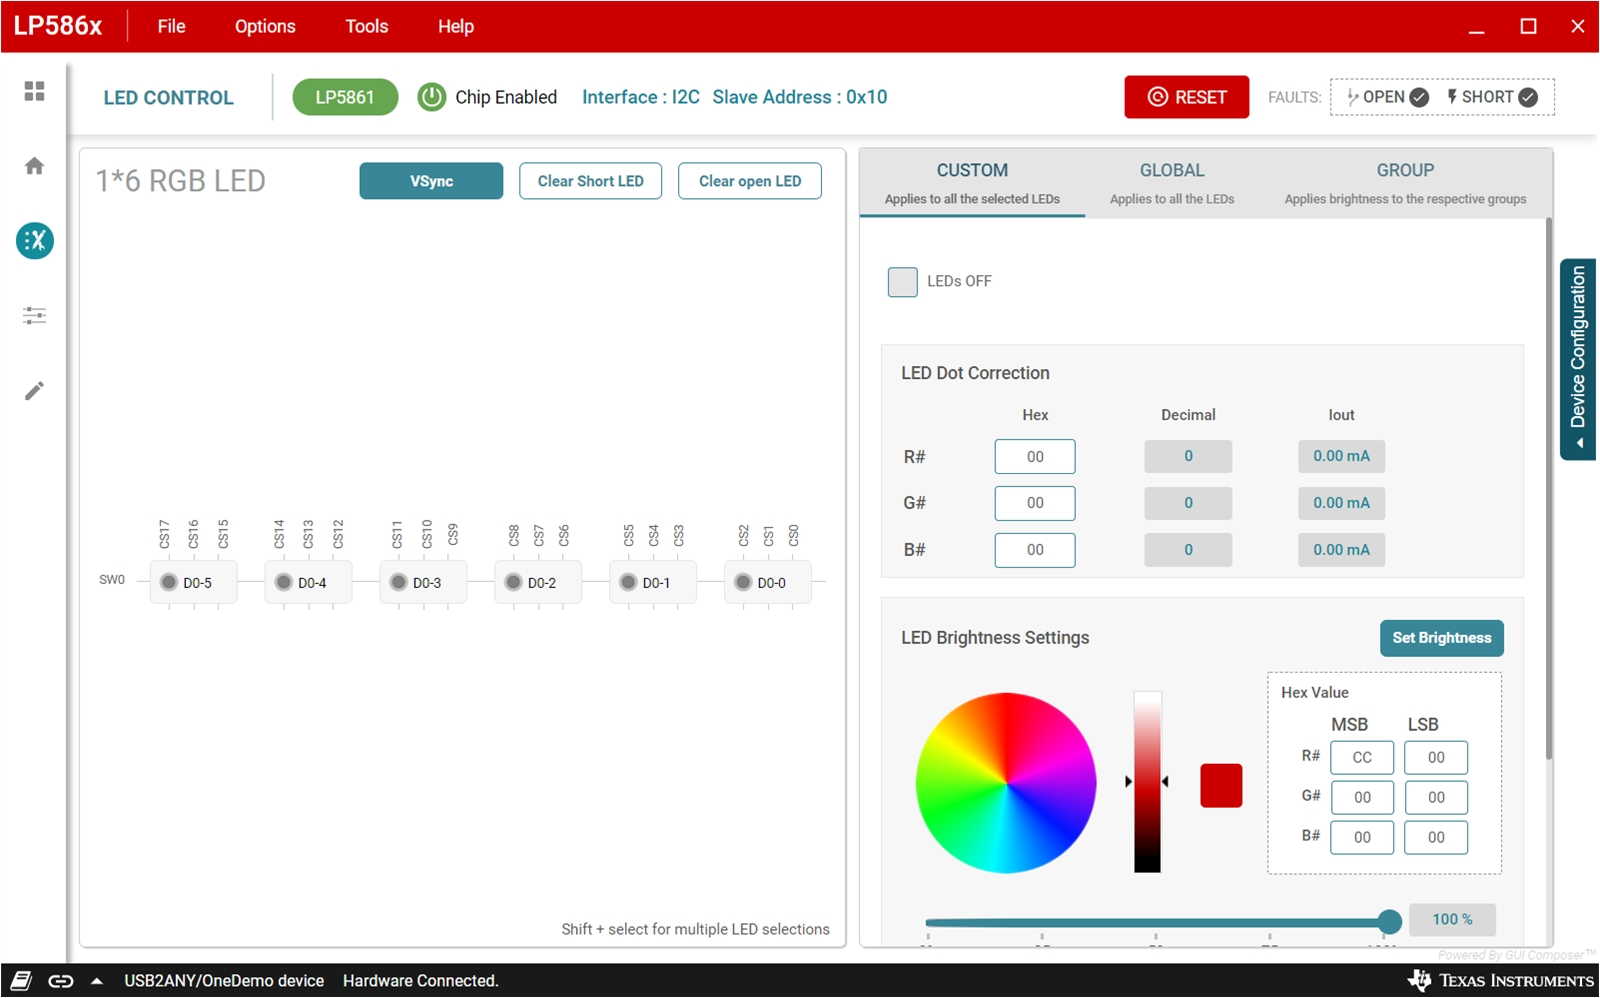 Figure 3-7 LED Control Page and Test Procedure
Device Configuration
To improve performance under different applications, first configure some key settings. Select the DEVICE CONFIGURATION button to show the detail setting slide, which is illustrated in Figure 3-6. Maximum current (MC) is set here.
| Maximum_Current (3-1 bits in Dev_config3 Register) | 0h | 1h | 2h | 3h (default) | 4h | 5h | 6h | 7h |
|---|---|---|---|---|---|---|---|---|
| MC_LP5861 | 3 mA | 5 mA | 10 mA | 15 mA | 20 mA | 30 mA | 40 mA | 50 mA |
| MC_LP5861T | 7.5mA | 12.5mA | 25 mA | 37.5mA | 50 mA | 75 mA | 100 mA | 125 mA |
If a high maximum current is set, then an external VLED supply is recommended. The Data Refresh Mode settings determine whether a SYNC signal is required to synchronize the PWM change for every LED dot. The Max Scan Lines controls select how many scan lines are active. For more information on the functions for other settings, see the LP5861T 18-Channel High-Current LED Driver with 8-Bit Analog and 8-Bit or 16-Bit PWM Dimming.
Evaluating de-ghosting and low brightness compensation are configured here.
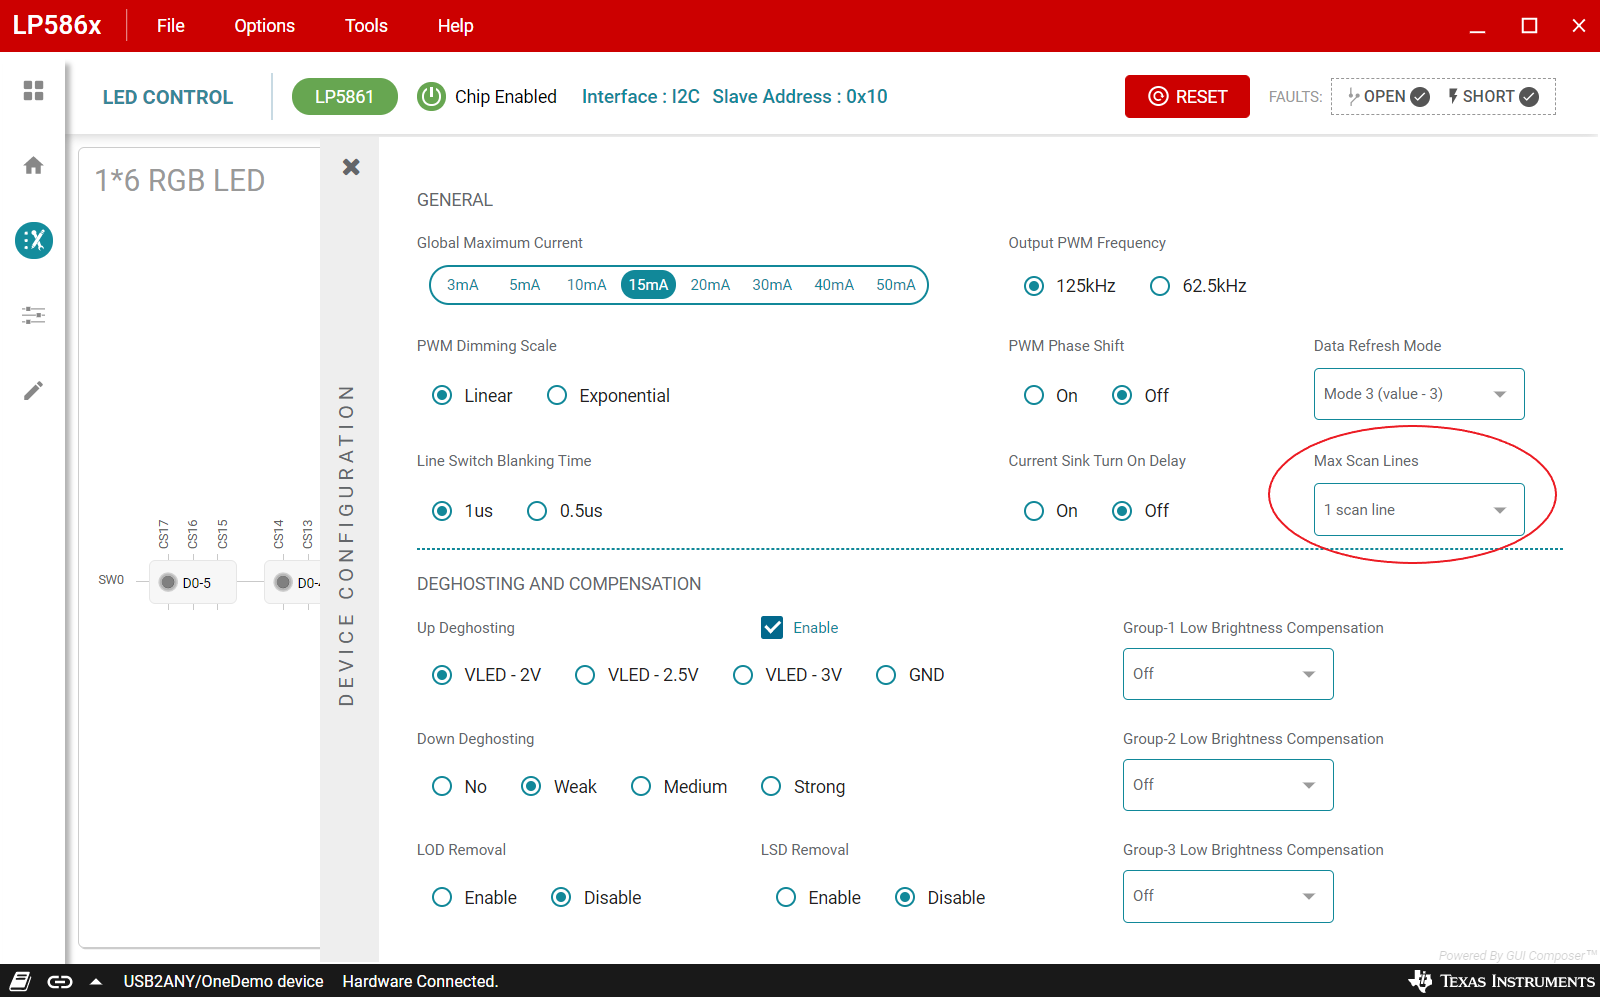 Figure 3-8 Device Configuration
Custom LED Setting
Before setting color and brightness for RGB LED, one or multiple LEDs (Shift + select for multiple LED selections) must first be selected. In the CUSTOM tag, set the color in color selector on the right side, see Figure 3-7. Brightness is used to adjust the PWM for all 3 dots in one RGB LED. For some high requirement applications, dot current can adjust white balance for every RGB LED.
IOUT = (MC_LP5861T / MC_LP5861) × Iout
For the MC_LP5861T and MC_LP5861 value, please see details in Table 3-1.
 Figure 3-9 Custom Setting
Global and Group Setting
Figure 3-8 illustrates the GLOBAL tab where color current for RGB groups and global PWM for all LED dots are set. Figure 3-9 illustrates the GROUP tab where every LED dot can be configured to three groups arbitrarily, while the PWM for the same group can be changed synchronously.
 Figure 3-10 Global Setting
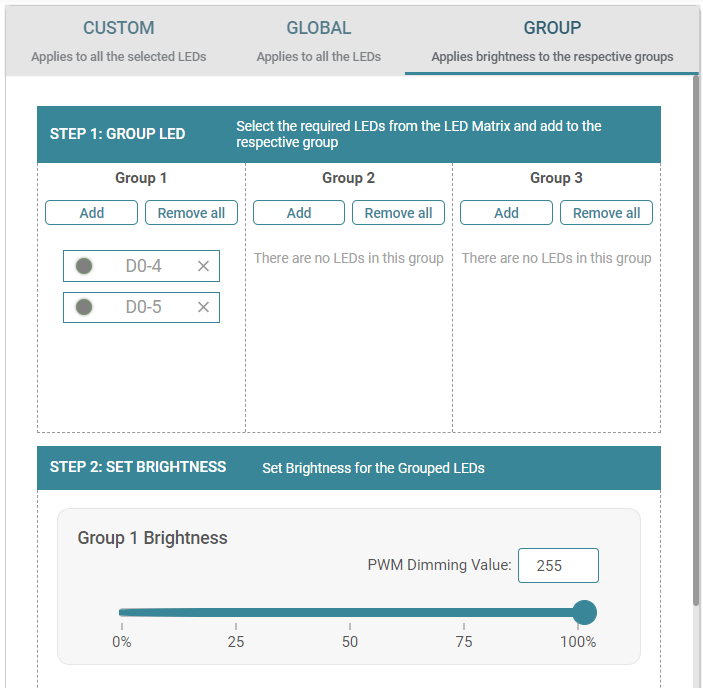 Figure 3-11 Group Setting
Fault Detection
The LP5861T continually detects the status for every LED dot. Once an open or short failure is detected, the fault status is also be monitored on the GUI. Clicking the warning bar near an abnormal LED shows the fault details, as illustrated in Figure 3-10. Clicking the fault summary at the right-top of the GUI shows the summary for all fault status (see Figure 3-11). The Clear Short LED and Clear open LED buttons are used to clear related fault flags when the failures are removed.
To have precise detection results, the current for every LED dot must be set above 0.5 mA and the PWM must be set above 25%, due to the parasitic capacitor induced from the LED. A current that is too small leads to abnormal LSD results.
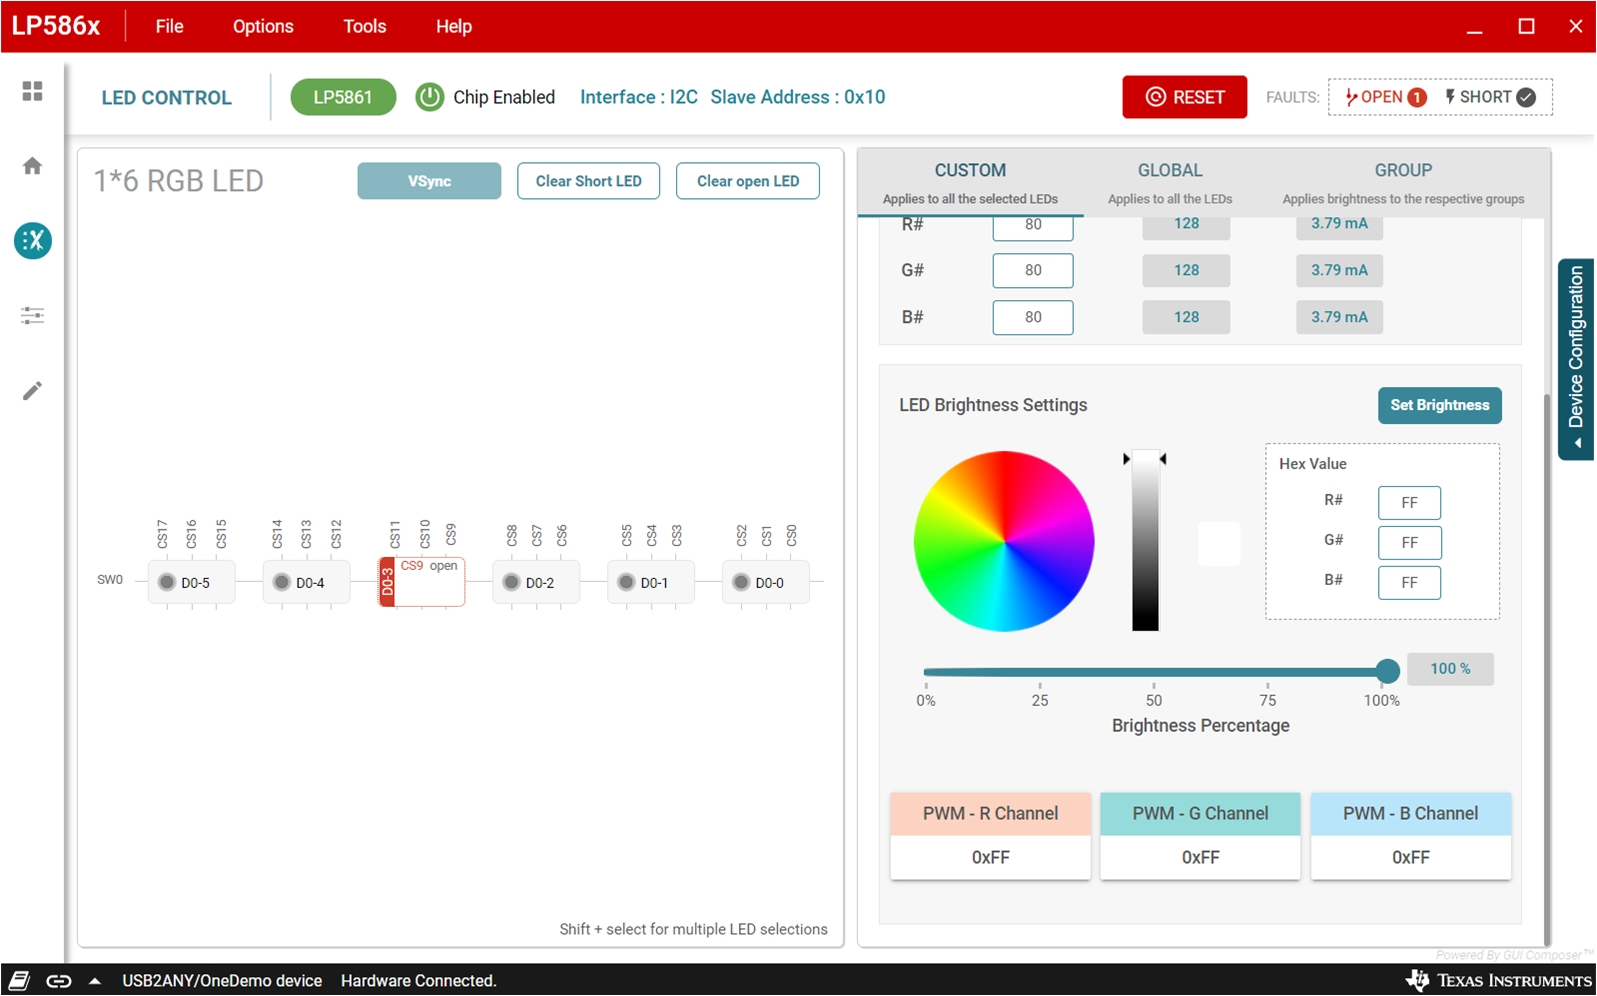 Figure 3-12 Single Fault Alarm
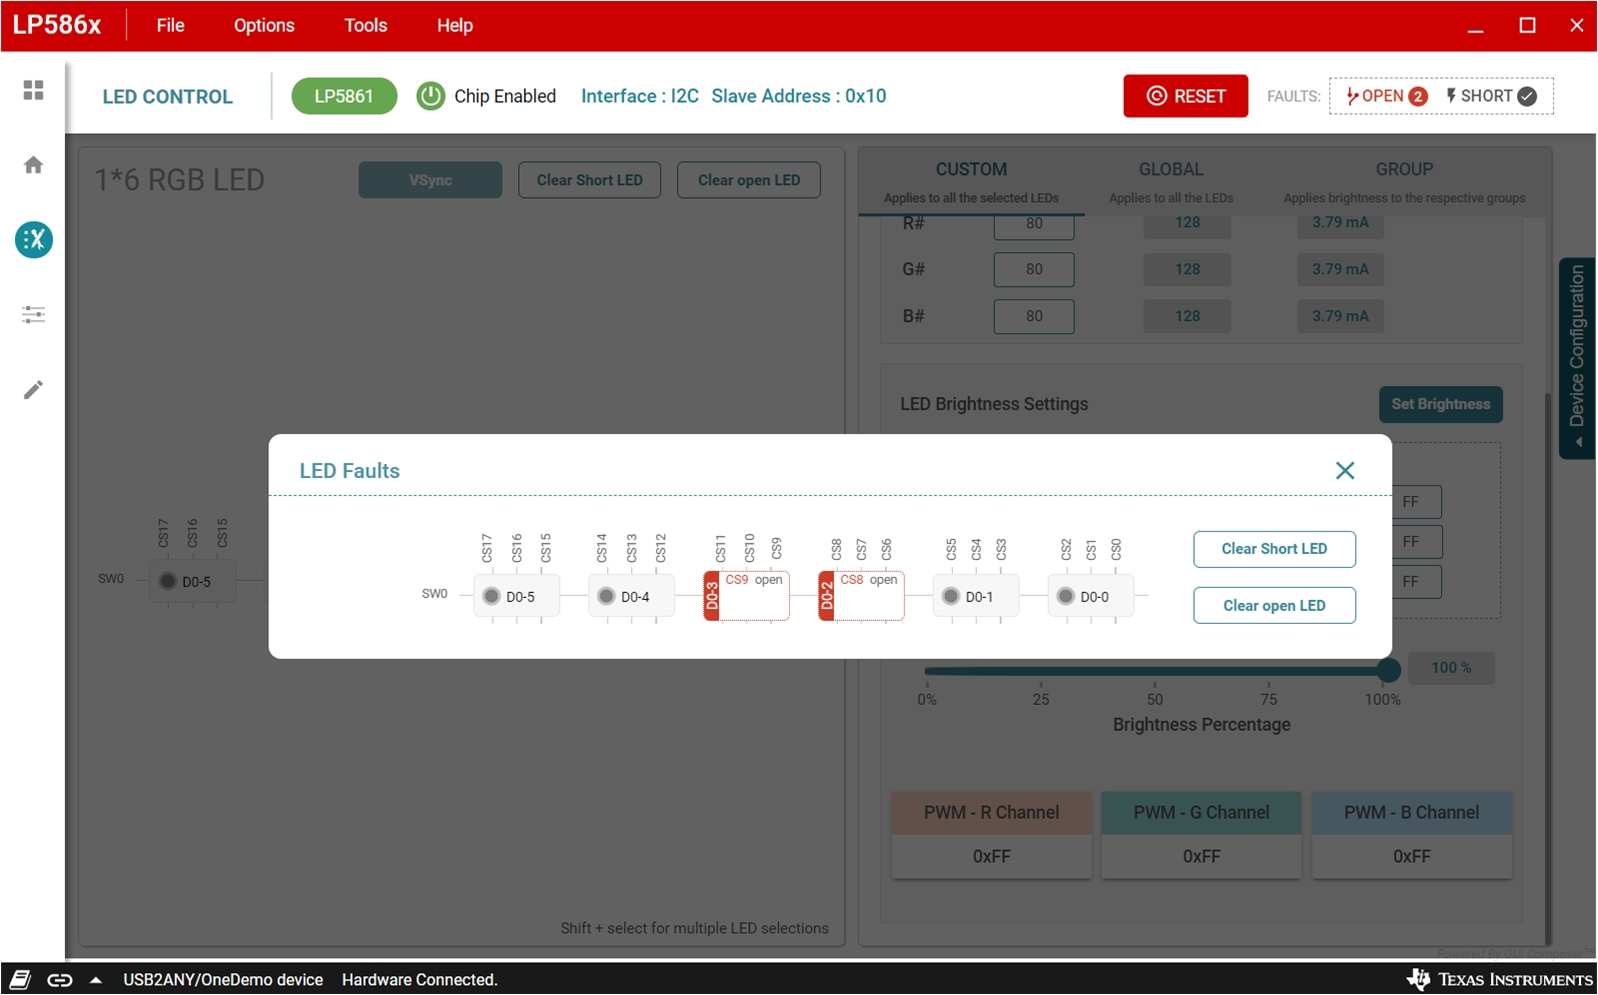 Figure 3-13 Total Fault Summary