SPRADF9 January 2024 AM263P4 , AM263P4-Q1
5.2 Example Project Setup
- Navigate to Project > Import CCS Projects...
- Click "Browse.." and navigate to the
below path:
- C:\ti\mcu_plus_sdk_am263px_09_01_00_20\examples\hello_world\am263px-cc\r5fss0-0_nortos\ti-arm-clang
Build in 1-Click Debug Mode
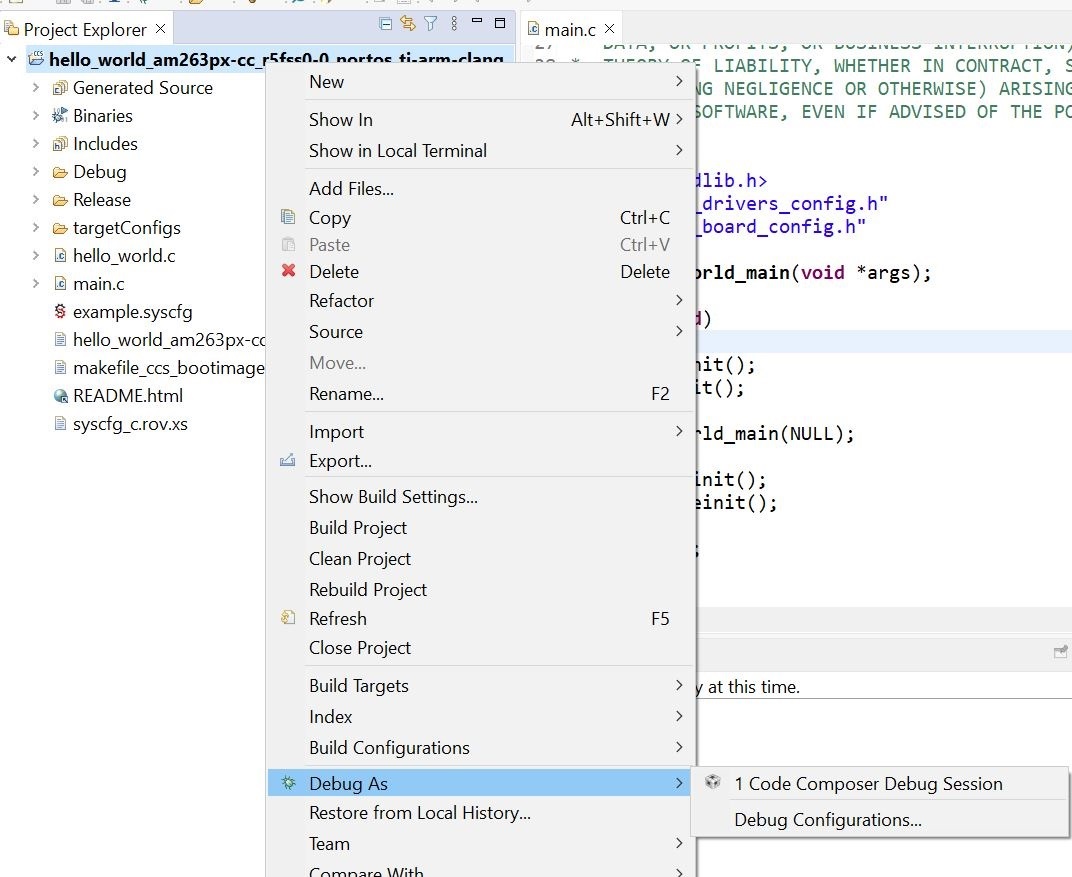
- Right-click on the project name
"hello_world.." and select Debug As > 1 Code Composer Debug
Session.

Figure 5-6 Debug CCS Project - Select "Texas Instruments XDS110 USB Debug Probe/Cortex_R5_0" as the core.
- Wait for the "Build Finished" status in the console.
- Navigate to Run > Resume and click to run the example.
- Open the USB console again by navigating to View > Terminal.
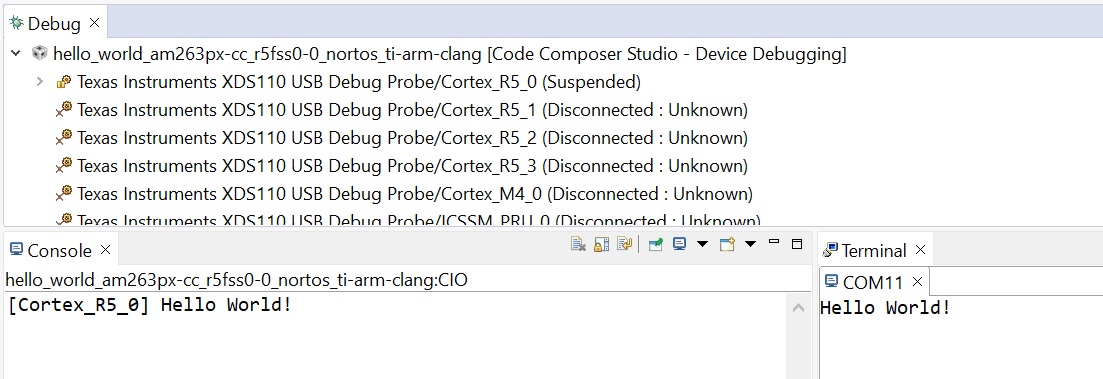
- The program is seen on CCS console and/or UART if enabled.

Figure 5-7 "Hello World" Output