SPRADF9 January 2024 AM263P4 , AM263P4-Q1
5.1.2 Setup UART Terminal
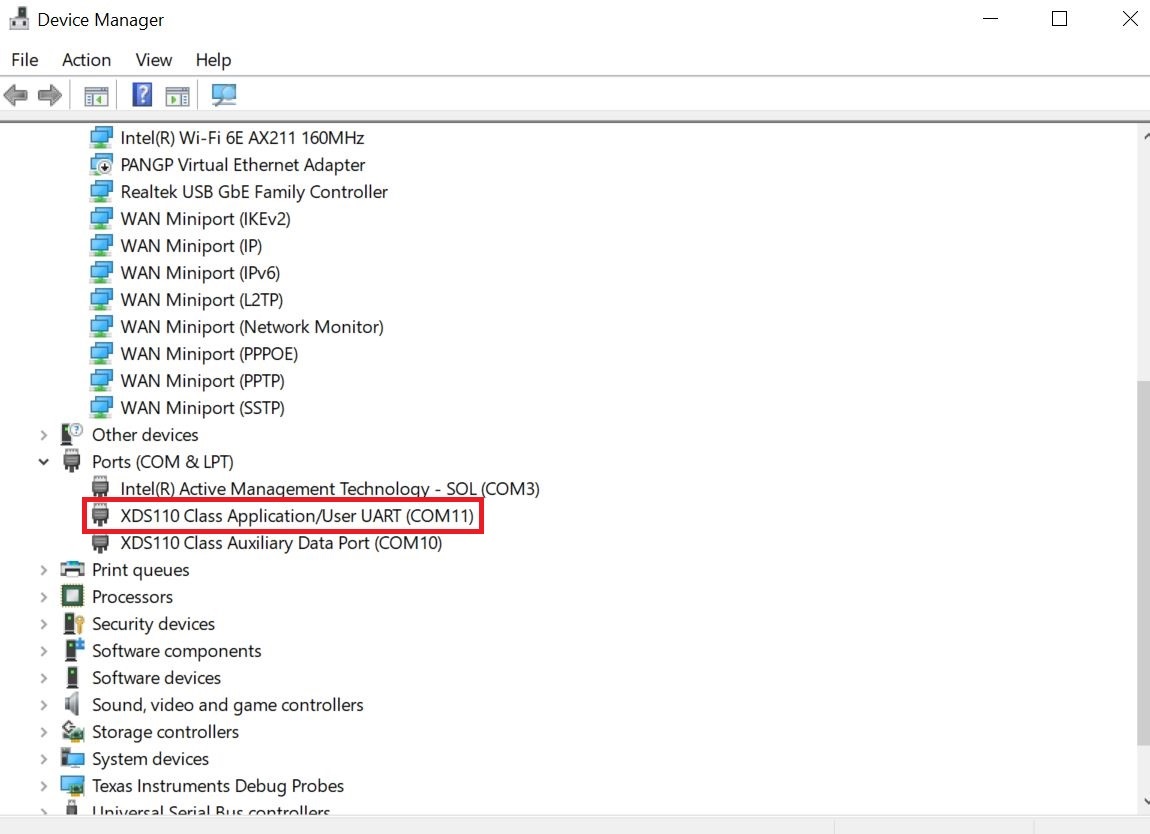
- On Windows: use the "Device
Manager" application to see the detected UART port:
- Expand the "Ports (COM & LPT) tab.
- Locate "XDS110 Class
Application/User UART" and that is the COM port associated with the
device.

Figure 5-2 UART Port on Device Manager
- In CCS, navigate to View > Terminal.
- Open a new UART terminal, as
shown in Figure 5-3.

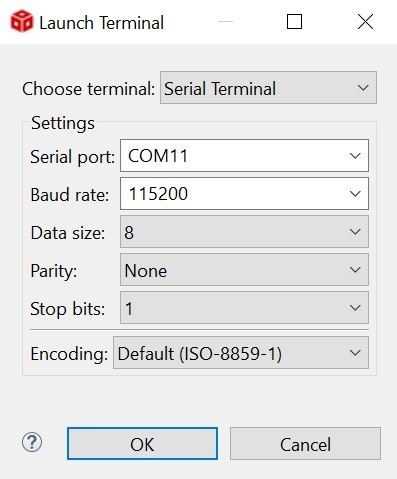
Figure 5-3 UART Terminal in CCS - In the
"Launch Terminal" pop-up, select the associated COM port and leave the other
options default:
- Choose "Serial Terminal".
- Default: 115200 Baud
Rate, 8 data bits, No parity, 1 stop bit.

Figure 5-4 UART Terminal Setup
- Click OK and the UART port is connected.
- Check that "C" is being printed
in the UART terminal to verify the device is connected.

Figure 5-5 UART Terminal Output