SPRUIR8B april 2020 – july 2023
- 1
- CLB Tool
- Trademarks
- 1Introduction
- 2Getting Started
- 3Using the CLB Tool
-
4Examples
- 4.1
Foundational Examples
- 4.1.1 CLB Empty Project
- 4.1.2 Example 3 – PWM Generation
- 4.1.3 Example 7 – State Machine
- 4.1.4 Example 13 – PUSH-PULL Interface
- 4.1.5 Example 14 – Multi-Tile
- 4.1.6 Example 15 – Tile to Tile Delay
- 4.1.7 Example 16 - Glue Logic
- 4.1.8 Exampe 18 - AOC
- 4.1.9 Example 19 - AOC Release Control
- 4.1.10 Example 20 - CLB XBARs
- 4.2
Getting Started Examples
- 4.2.1 Example 1 – Combinatorial Logic
- 4.2.2 Example 2 – GPIO Input Filter
- 4.2.3 Example 4 – PWM Protection
- 4.2.4 Example 5 – Event Window
- 4.2.5 Example 6 – Signal Generation and Check
- 4.2.6 Example 8 – External AND Gate
- 4.2.7 Example 9 – Timer
- 4.2.8 Example 10 – Timer With Two States
- 4.2.9 Example 11 – Interrupt Tag
- 4.2.10 Example 12 – Output Intersect
- 4.2.11 Example 17 – One-Shot PWM Generation
- 4.2.12 Example 21 - Clock Prescaler and NMI
- 4.2.13 Example 22 - Serializer
- 4.2.14 Example 23 - LFSR
- 4.2.15 Example 24 - Lock Output Mask
- 4.2.16 Example 25 - Input Pipeline Mode
- 4.2.17 Example 26 - Clocking Pipeline Mode
- 4.3 Expert Examples
- 4.1
Foundational Examples
- 5Enabling CLB Tool in Existing DriverLib Projects
- 6Frequently Asked Questions (FAQs)
- 7Revision History
5 Enabling CLB Tool in Existing DriverLib Projects
Use the following steps to add CLB support to an existing C2000WARE DriverLib Project:
- Add the "empty.syscfg" file (for F2837xD <C2000WARE_INSTALL>\driverlib\f2837xd\examples\cpu1\clb\empty.syscfg) from the CLB examples folder to the project by copying the file into the project directory.
- CCS asks the user whether or not to
enable SysConfig. Accept and select "Yes".
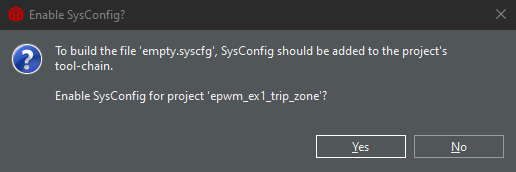 Figure 5-1 Enable
SysConfig
 - Open the "Project Properties" and
open the Resources → Linked Resources. Add the following Variable Paths:
- C2000WARE_ROOT
[PATH_TO_C2000WARE] - CLB_SYSCFG_ROOT [PATH_TO_CLB_TOOL]
- See step 6 for more details
- C2000WARE_ROOT
- In the Project Properties window, select Build → Steps.
- Add the following line to the
Post-build steps as seen in Figure 5-2.
- ${NODE_TOOL} "${C2000WARE_ROOT}/dot_file_libraries/clbDotUtility.js" "${C2000WARE_ROOT}" "${BuildDirectory}/syscfg" "${BuildDirectory}/syscfg/clb.dot"
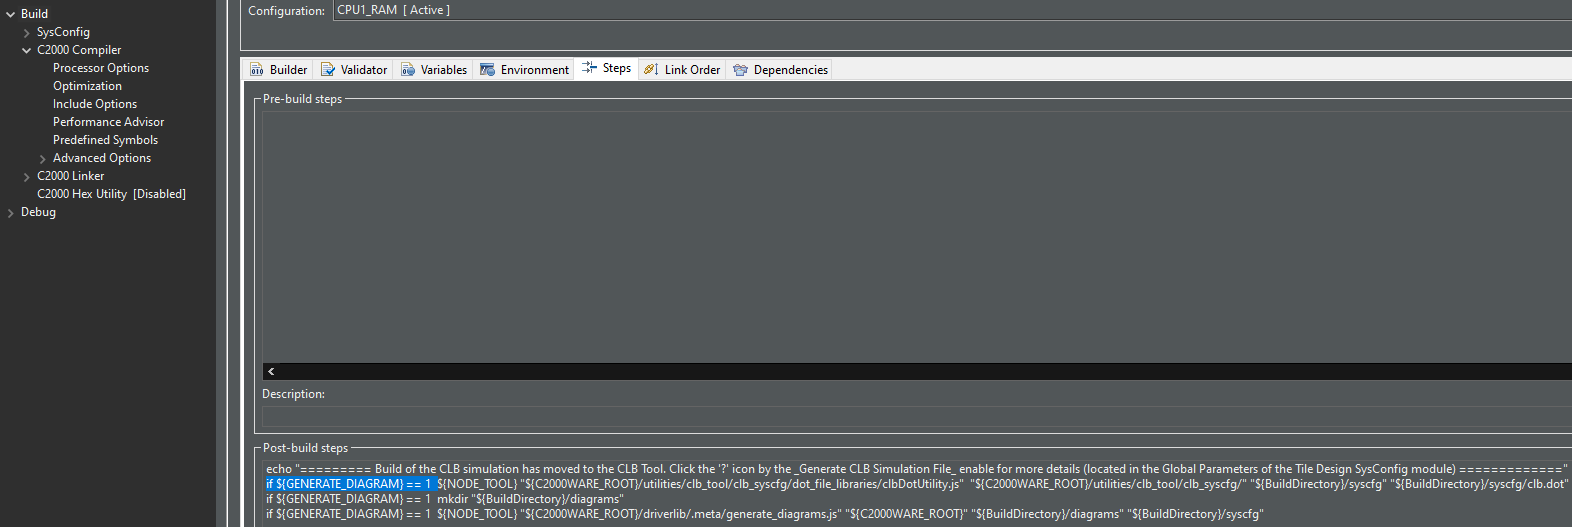 Figure 5-2 Post-Build
Steps
 - Next, open
Resources → Linked Resources to verify the correct path for CLB_SYSCFG_ROOT is
used. Then open Build → SysConfig → Basic Options and add the proper path to the
Root system config meta data list; do this only in the case where the project
does not contain SysConfig:
- Make sure that the Linked
Resources has the correct path for CLB_SYSCFG_ROOT
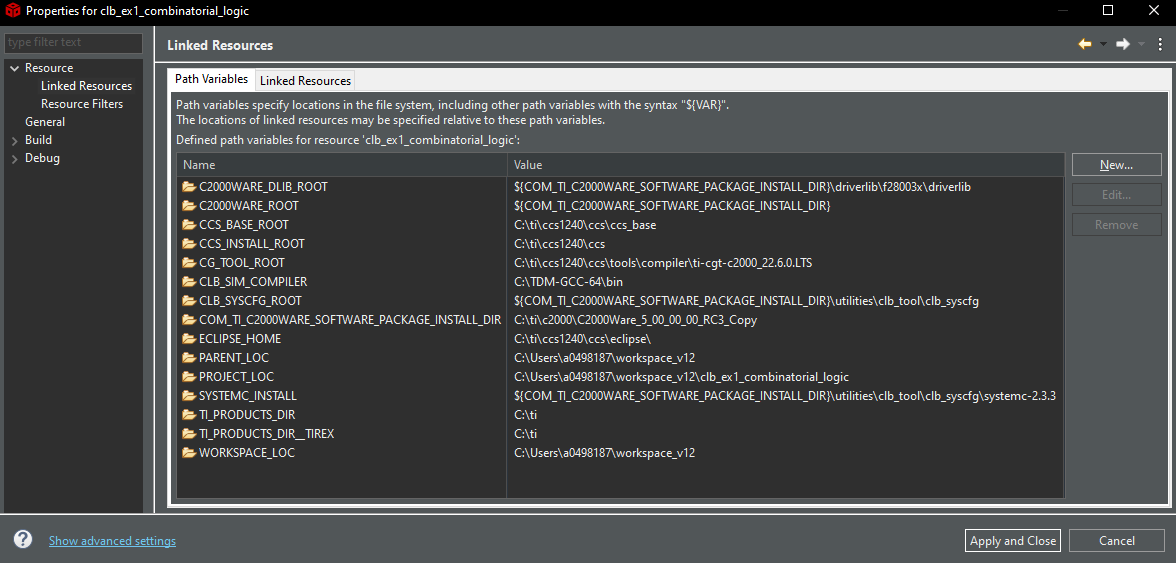 Figure 5-3 Linked
Resources for Enabling CLB Tool
 - ${CLB_SYSCFG_ROOT}/.metadata/product.json
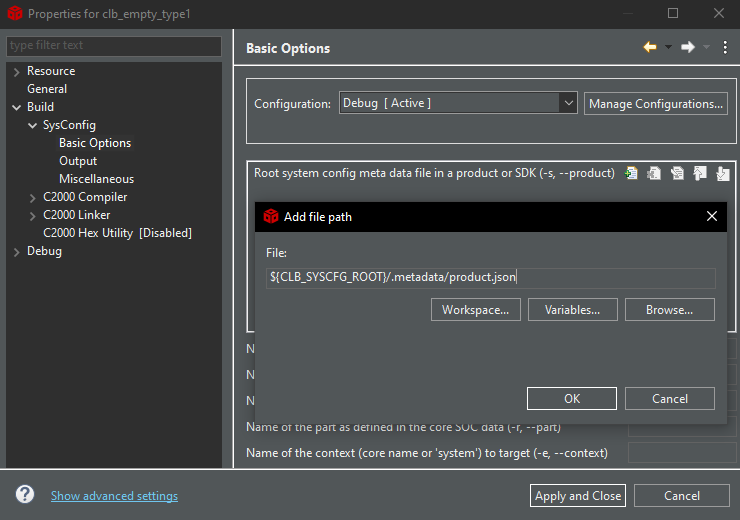 Figure 5-4 SysConfig SDK
Path
- Make sure that the Linked
Resources has the correct path for CLB_SYSCFG_ROOT
- Finally click Apply and Close.
- After
building the project, the content generated by the CLB Tool will be present in
the build configuration directory. Figure 5-5 shows an example of this after adding CLB support to the epwm_ex1_trip_zone
driverlib example.
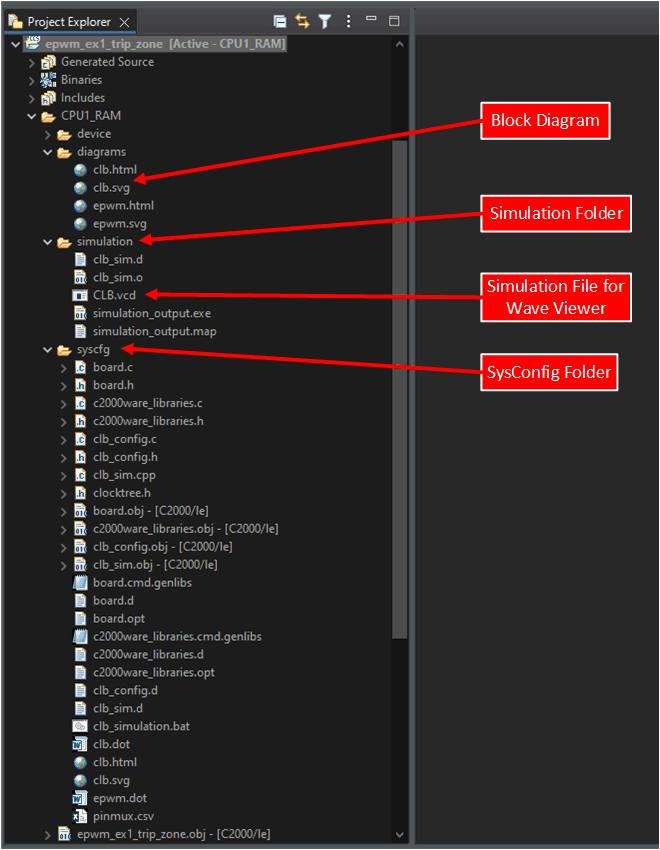 Figure 5-5 epwm_ex1_trip_zone
With CLB Tool Support