SPRUJC1 April 2024
- 1
- Abstract
- Trademarks
- 1Introduction
-
2Steps to Unlock JTAG for HSM Core With
TRACE32
- 2.1 Modifying the SCI Client Default Security Board Configuration
- 2.2 Building the SCI Client Security Board Configuration
- 2.3 Modifying the Secondary Bootloader’s x509 Certificate
- 2.4 Building the Secondary Bootloader
- 2.5 Verifying Secondary Bootloader and TIFS is Executing
- 2.6 Creating a Downloadable x509 Certificate With a Debug Extension
- 2.7 Execution of TRACE32 Unlock Script
- 2.8 Attaching to HSM Core With TRACE32
2.7 Execution of TRACE32 Unlock Script
After the x509 certificate binary has been successfully created and signed with OpenSSL, a TRACE32 script can be used to perform the HSM JTAG unlock procedure. First, please contact your local TI FAE for the custom Jacinto7 TRACE32 script package. After obtaining the TI script package, navigate to the following folder location ~/t32/cmm-ti/cmm-dra/cmm-tda4v_j721s2/x_gel_to_cmm/ and set the following parameters located in the “J721S2_secure_unlock.cmm” script.
 Figure 2-7 TRACE32 – Secure JTAG Unlock
Script
Figure 2-7 TRACE32 – Secure JTAG Unlock
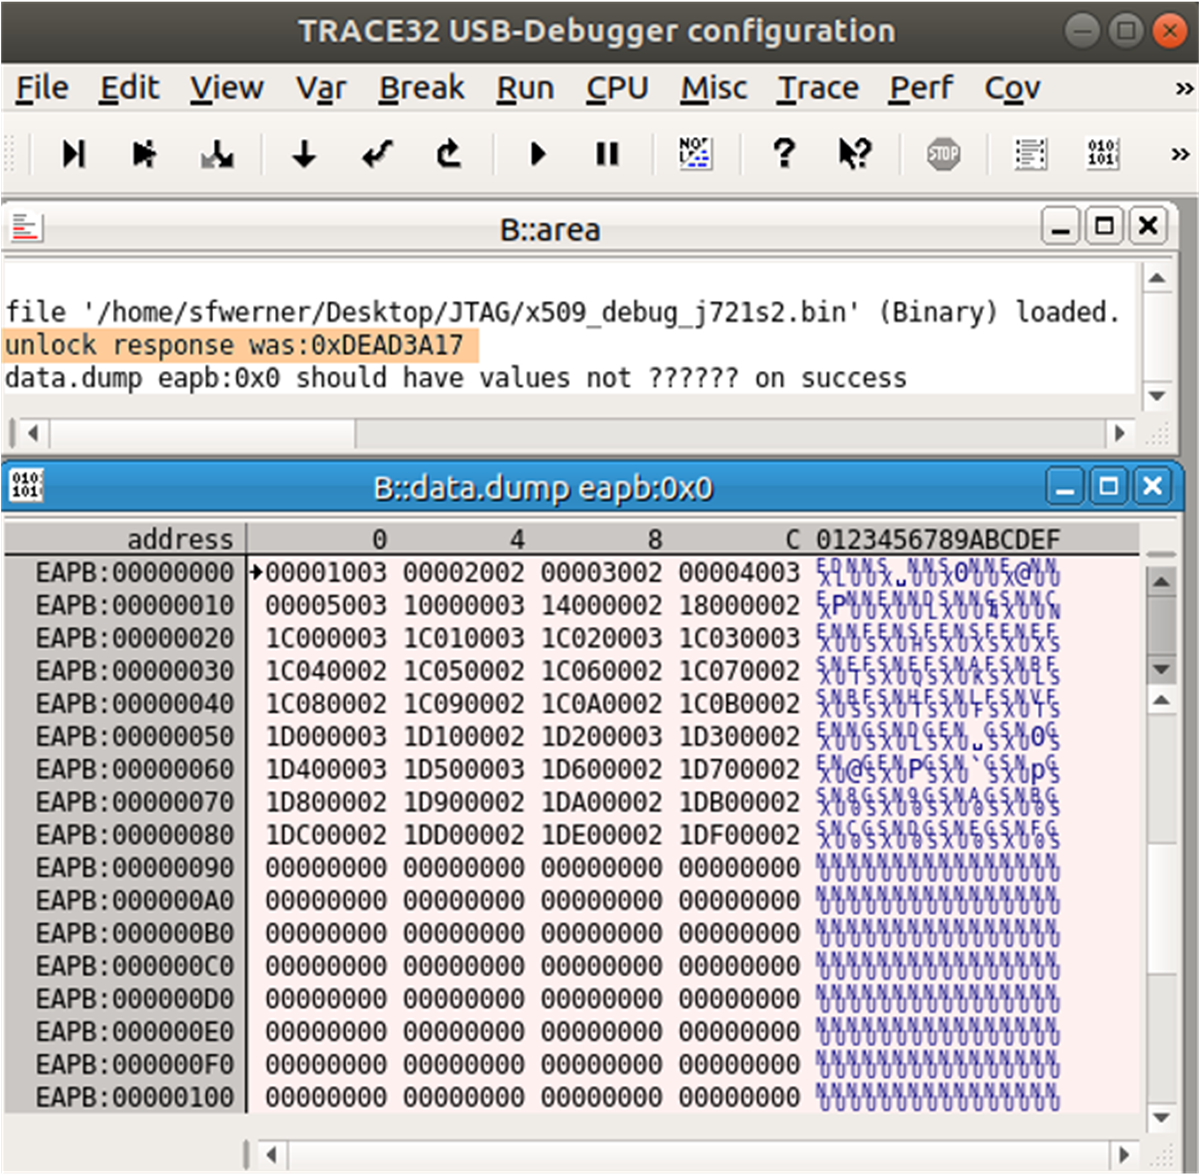
ScriptAfter modifying the “J721S2_secure_unlock.cmm” script, save your changes, power on your Jacinto7 device, and then execute the script with TRACE32 using the “Do” command. After successfully executing the script and JTAG unlock sequence, you should see the following string appear within the TRACE32 area window: “unlock response was : 0xDEAD3A17” (see Figure 2-8).
 Figure 2-8 TRACE32 – Successful Secure
JTAG Unlock Response