SBAU456 September   2024 ADS9212


  1.   1
  2.   Description
  3.   Features
  4.   4
  5. 1Evaluation Module Overview
    1. 1.1 Introduction
    2. 1.2 Kit Contents
    3. 1.3 Specification
    4. 1.4 Device Information
  6. 2Hardware
    1. 2.1 ADS9212EVM Quick Start Guide
    2. 2.2 Power Supplies
      1. 2.2.1 USB Power and When to Power the Board Externally
    3. 2.3 Analog Interface
      1. 2.3.1 ADC Input SMA Connections
      2. 2.3.2 Voltage Reference
    4. 2.4 Digital Interface Connections
    5. 2.5 Digital Interface and Clock Inputs
  7. 3Software
    1. 3.1 ADS9212EVM-GUI Software Installation
    2. 3.2 USB Driver Installation
    3. 3.3 Using the CONFIG Tab
    4. 3.4 Using the Capture Tab
    5. 3.5 Using the INL/DNL Tool
    6. 3.6 Using the Histogram Tab
  8. 4Hardware Design Files
    1. 4.1 Schematics
      1. 4.1.1 ADS9212EVM Schematics
    2. 4.2 Layout
    3. 4.3 Bill of Materials (BOM)
  9. 5Additional Information
    1. 5.1 Trademarks
  10. 6Related Documentation

USB Driver Installation

This section describes the steps for installing the USB driver.

  1. For the TSWDC155EVM, connect J8 to the workstation using a USB-C to USB-A cable.
  2. Bypass any USB hub and connect directly to the computer.
  3. Open the Windows® Device Manager, right-click on the WestBridge folder in the Device Manager window, and select the Update Driver button as shown in Figure 3-3. See Figure 3-4.
  4. In the next window that appears, select Browse my computer for driver software.
  5. Then select Let me pick from a list of available drivers on my computer in the next pop-up window.
  6. Click on Have Disk in the pop-up window and navigate to:
    1. For ADS9212EVM: C:\Program Files\Texas Instruments\ADS9212_EVM_GUI\bin\proj_lib\Sparrow\Bootloader
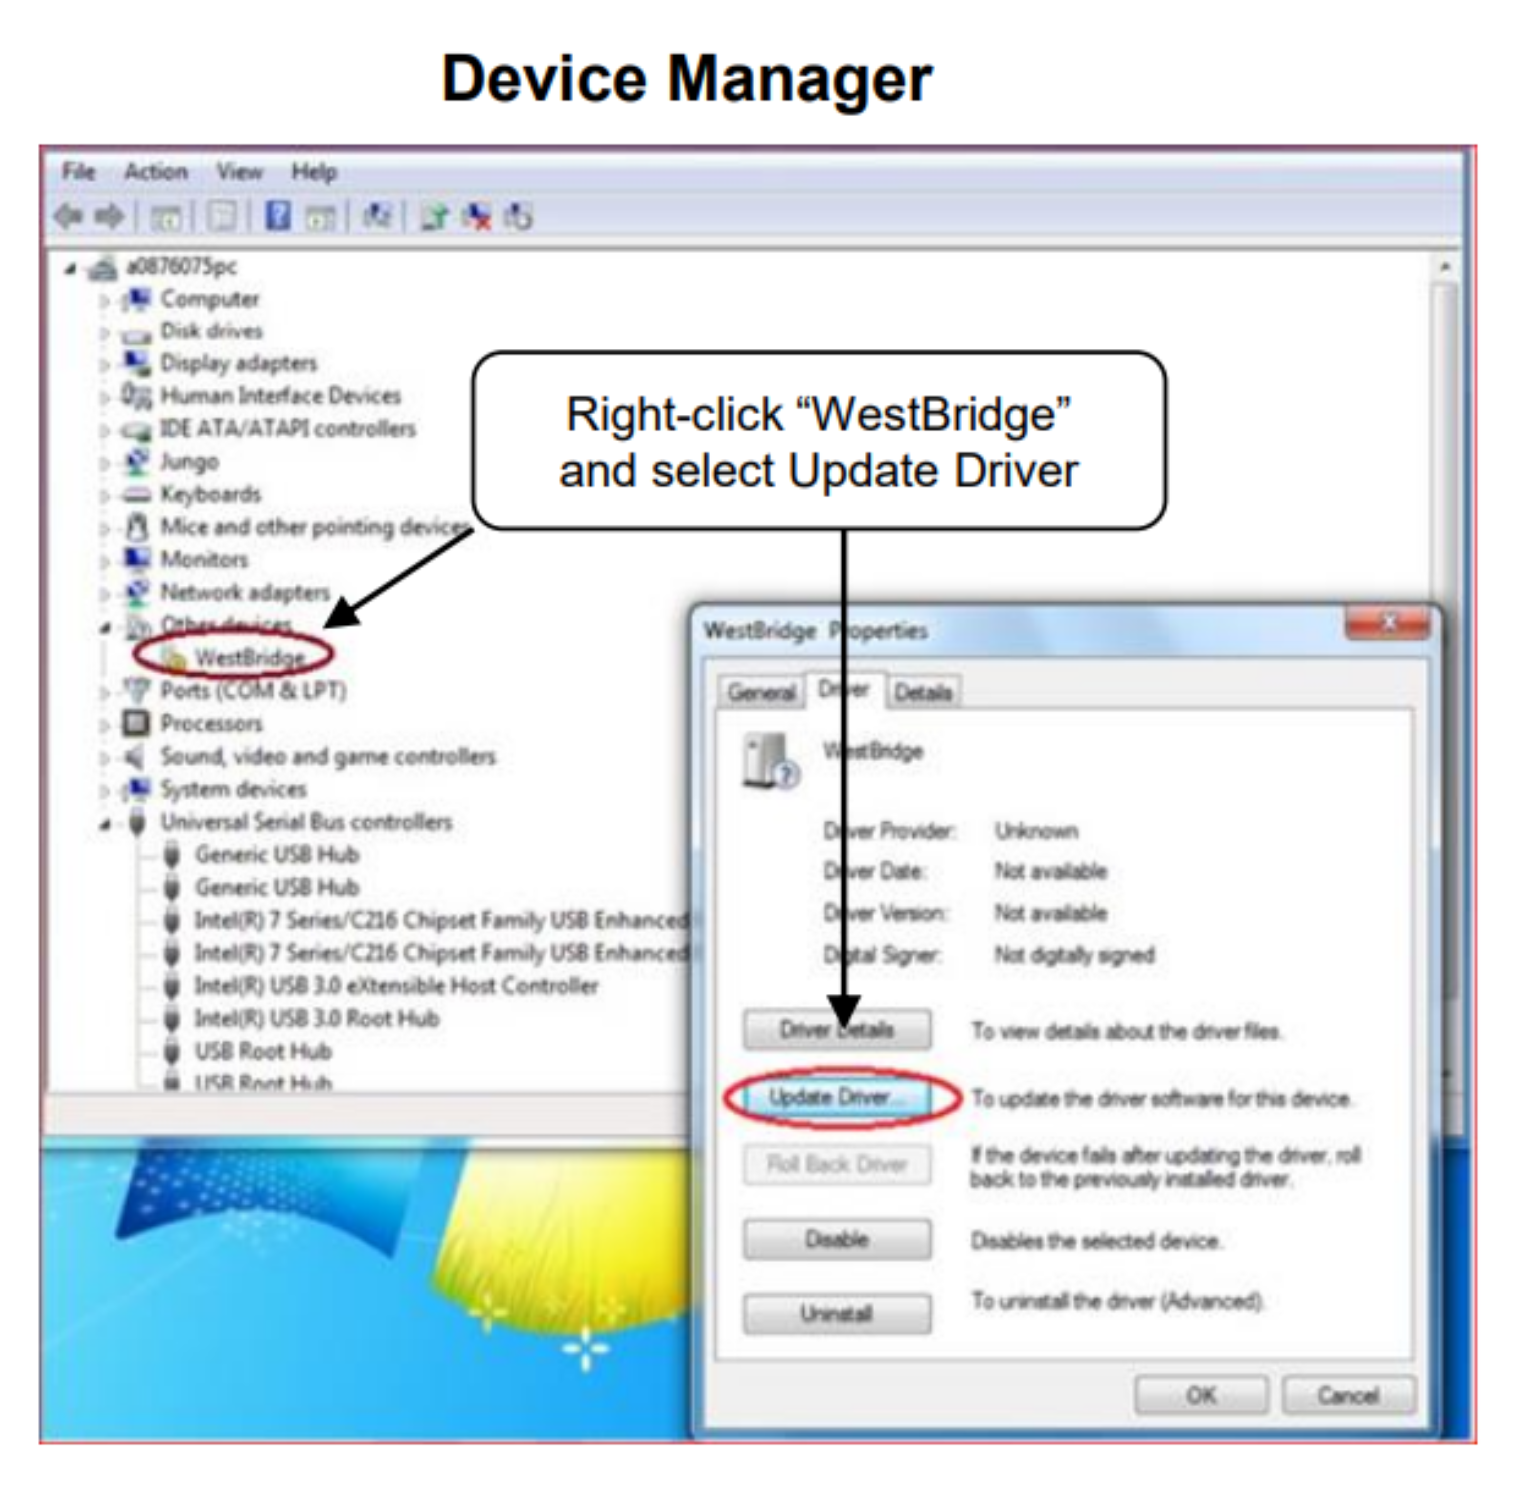
ADS9212EVM Open Device ManagerFigure 3-3 Open Device Manager
ADS9212EVM Update Driver With Device ManagerFigure 3-4 Update Driver With Device Manager