SCEU027B November 2023 – October 2024 TPLD1201
PRODUCTION DATA
3.2.4 Temporarily Configuring a TPLD Device
This section covers using InterConnect Studio to configure a TPLD1201 using a pre-built demo circuit.
When the TPLD is temporarily configured, removing power from the device causes the TPLD to reset and the configured circuit to be erased. The TPLD can be reconfigured multiple times without needing to be reset between configurations.
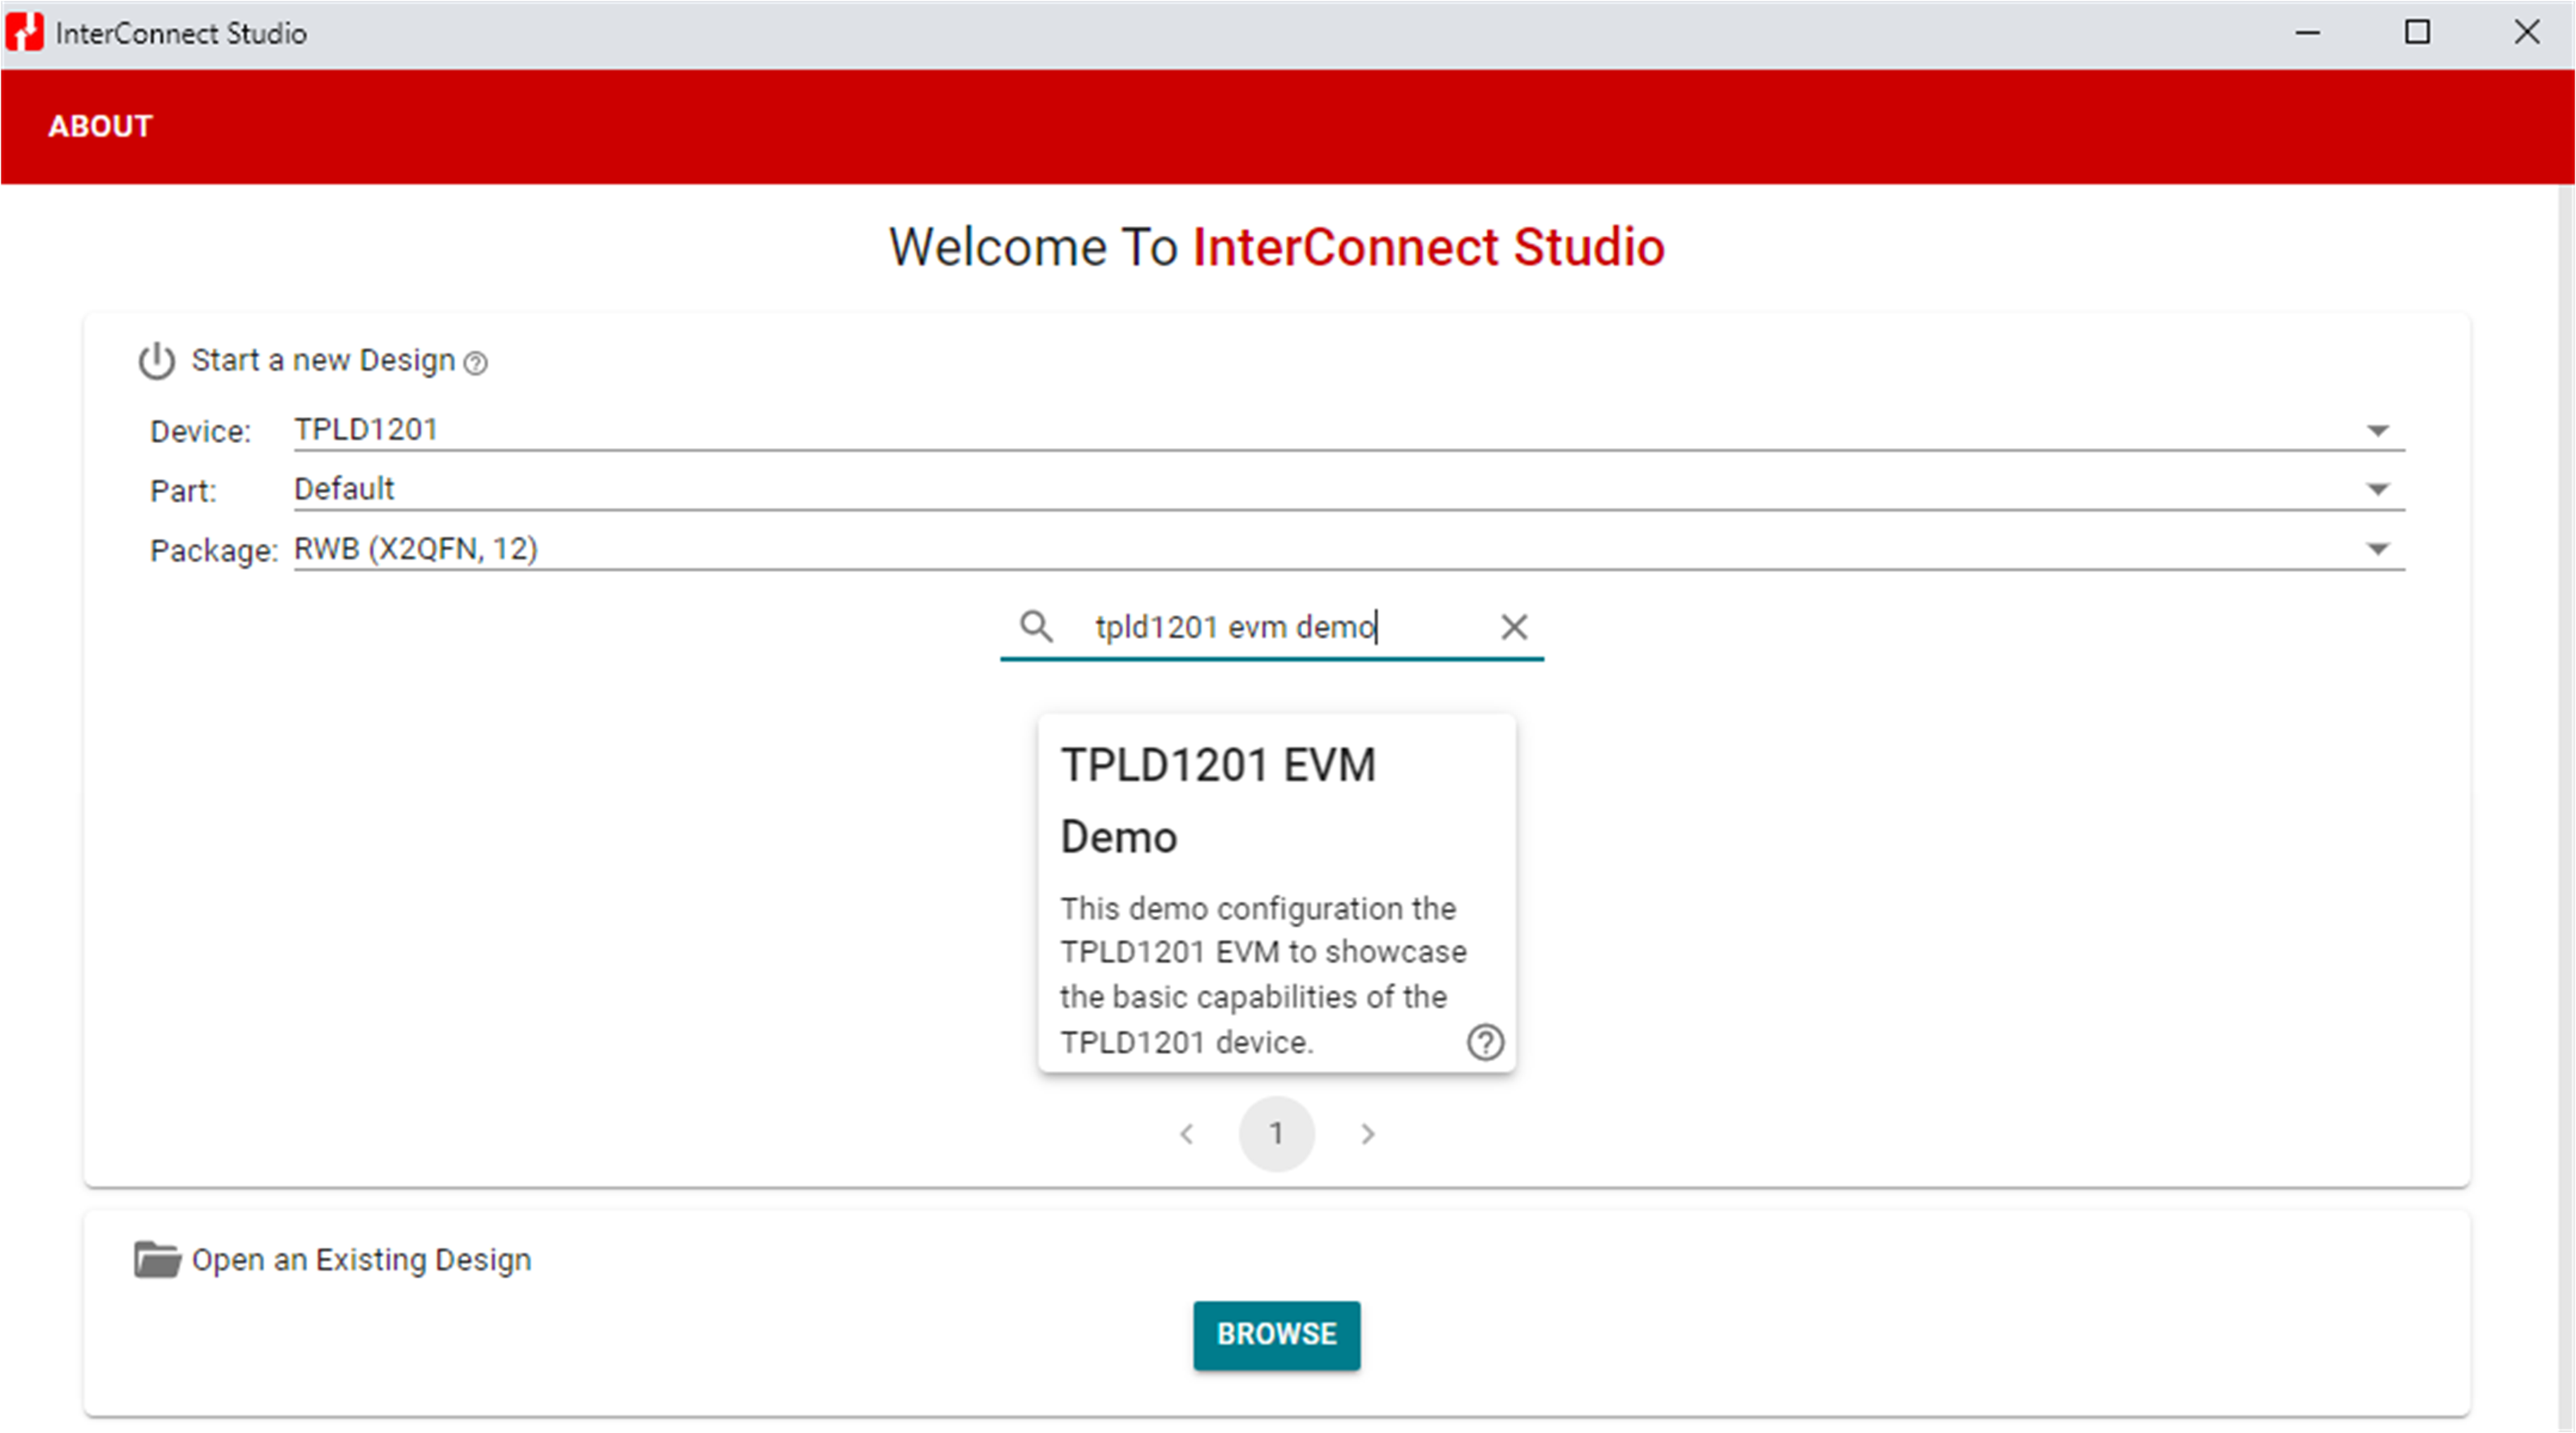
- Open InterConnect Studio on the computer to which the TPLD-PROGRAM is connected. Under Design, select TPLD1201. Under Part:, select Default. Under Package:, select RWB (X2QFN, 12).
- Search for TPLD1201 EVM
Demo and select the demo from the list of pre-designed circuits, or
select Empty Design to build a custom circuit.
 Figure 3-5 Selecting the Demo in
ICS
Figure 3-5 Selecting the Demo in
ICSSee Section 3.3 for more details about the demo.
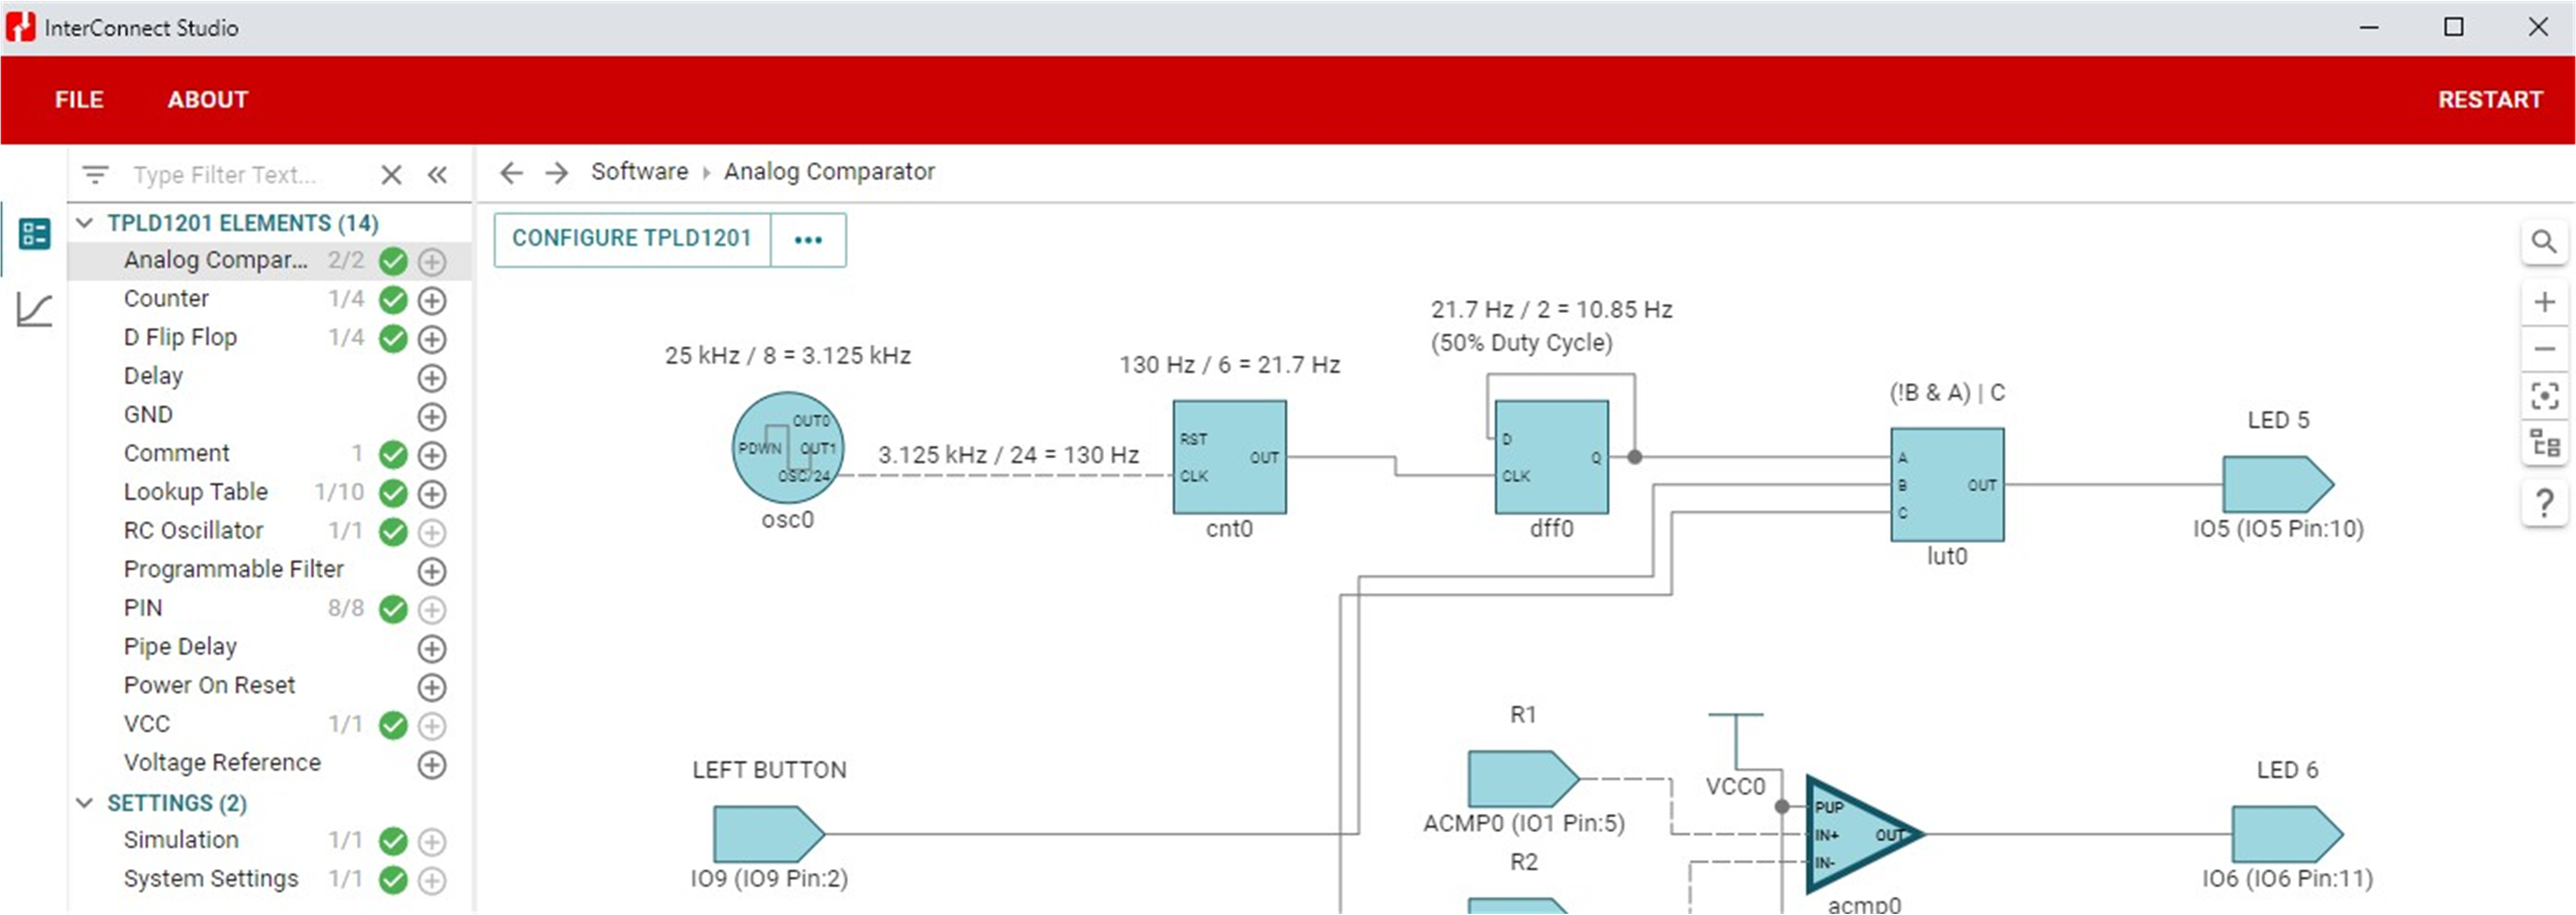
- InterConnect Studio opens the chosen circuit.
- Select CONFIGURE TPLD1201
in the top left corner of InterConnect Studio to configure the TPLD in the
socket of the EVM with the circuit shown by InterConnect Studio. Select the
serial port connected to the TPLD-PROGRAM, then select OK.
 Figure 3-6 Temporarily
Configuring in ICS
Figure 3-6 Temporarily
Configuring in ICS- Some LEDs on the TPLD1201-RWB-EVM flash during the programming sequence, which is normal.
- If the configuration fails, check the connections between the EVM and the computer, make sure SW3 is ON, check the connection between the TPLD device and the socket contacts, and retry.
Once the programming sequence is completed, the TPLD device on the board is temporarily configured with the circuit built in InterConnect Studio. The configured circuit can be tested using the buttons, potentiometers and LEDs provided on the EVM.