SLAA721E October 2016 – March 2020 MSP430FR5969 , MSP430FR5969-SP , MSP430FR5994 , MSP430FR6989
- Trademarks
- 1Introduction
- 2Implementation
- 3Customization of MSP430FRBoot
- 4Building MSPBoot
- 5Demo Using FRAM LaunchPad Development Kit as Host
- 6Porting the target side example projects to other MSP430FR devices
- 7References
- 8Revision History
4.3.1 Building the Target Software
- Select a target processor: MSP430FR5969, MSP430FR5994, or MSP430FR2433.
- Open CCS and select or create a workspace.
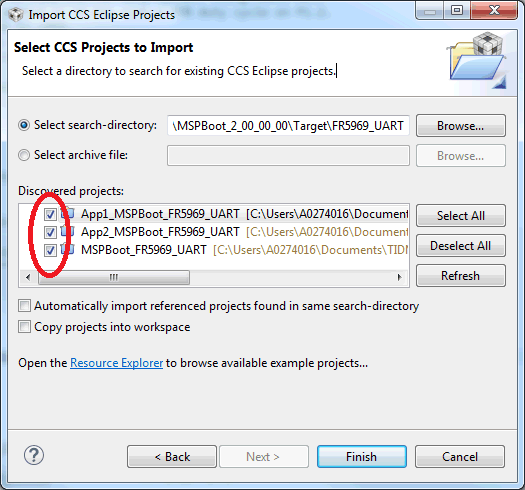
- Import the MSPBoot CCS projects into the
workspace. The projects are located in
MSP430FRBoot_<version>\Target_CCS\<target>\CCS\
 Figure 4-3 Import
MSPBoot CCS Projects
 - Build the bootloader.
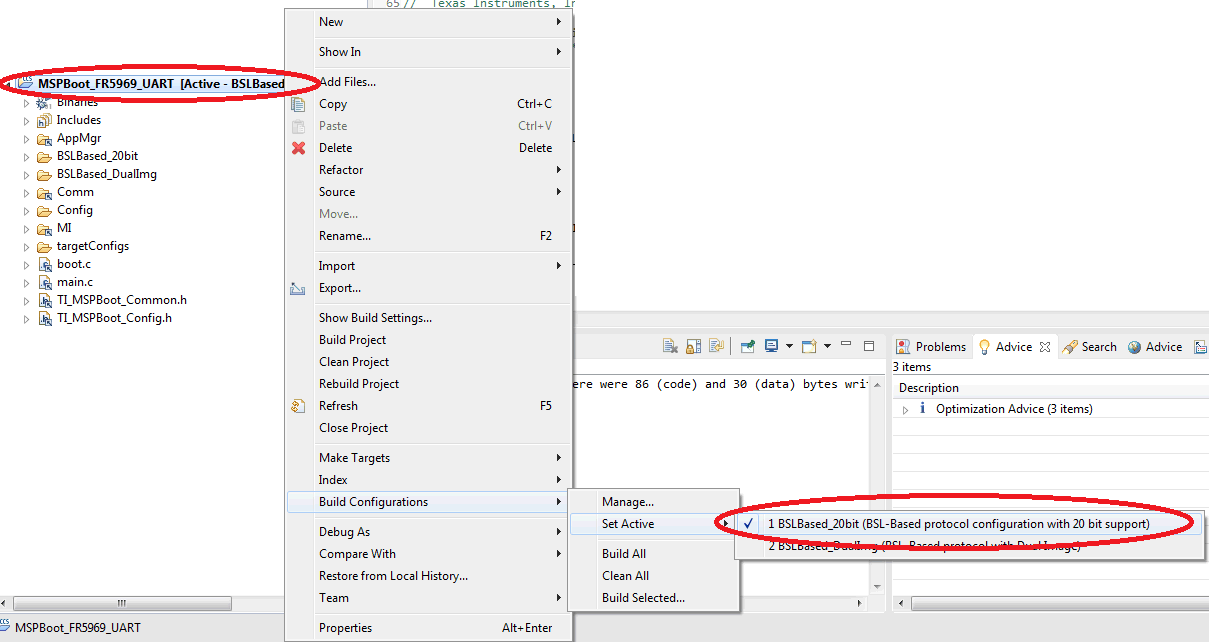
- Select the MSPBoot project.
- Select the proper target configuration based on Section 3.1.
 Figure 4-4 Select Target Configuration
 - Build
 and Download
  . Only the target LaunchPad development kit should be connected to the PC.
- Build both applications.
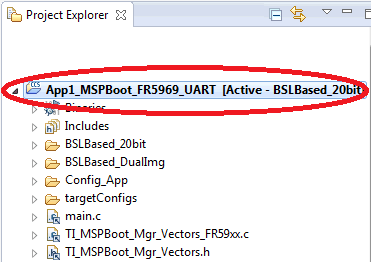
- Select the App1_MSPBoot project and select the same configuration as the bootloader:
 Figure 4-5 Select App1_MSPBoot Project
 - Click the Build
 project. The output is generated after this step, but the output will be converted and downloaded through the Host processor. Section 4.3.2 explains how to convert the image, and Section 5 explains how to download it using a host demo.
 - Repeat Step 5 for App2_MSPBoot.
- Select the App1_MSPBoot project and select the same configuration as the bootloader: