SLLU374 November   2024 MCF8329A


  1.   1
  2.   Abstract
  3.   Trademarks
  4. 1Introduction
  5. 2Hardware Design and Setup
    1. 2.1 Board Design
      1. 2.1.1 External MOSFET Selection
      2. 2.1.2 Gate Resistor Selection
      3. 2.1.3 Bootstrap and GVDD Capacitor Selection
      4. 2.1.4 Current Shunt Resistor Selection
      5. 2.1.5 VREG MOSFET Selection
      6. 2.1.6 Additional External Power Stage Components
  6. 3Connecting to the GUI
  7. 4Spinning Into Closed Loop
    1. 4.1 Essential Configuration
      1. 4.1.1 Loading Recommended Default Values
      2. 4.1.2 Setting Base Current
      3. 4.1.3 Setting Current Limits
      4. 4.1.4 Setting Voltage Limits
      5. 4.1.5 Input the Motor's Phase Resistance and Inductance
      6. 4.1.6 Maximum Electrical Speed (Hz)
      7. 4.1.7 Run MPET to Identify Motor Parameters
        1. 4.1.7.1 Skipping MPET Measurements
    2. 4.2 Testing for Successful Startup Into Closed Loop
  8. 5Basic Controls
    1. 5.1 Speed Input Mode
    2. 5.2 Preventing Back Spin of Rotor During Startup
    3. 5.3 Faster Startup Timing
    4. 5.4 Improving Speed Regulation
    5. 5.5 Limiting and Regulating Supply Power
    6. 5.6 MTPA Tuning
    7. 5.7 Motor Studio Optimization Wizards
  9. 6Fault Handling
    1. 6.1 MPET BEMF FAULT [MPET_BEMF_FAULT]
    2. 6.2 Abnormal BEMF Fault [ABN_BEMF]
    3. 6.3 Lock Current Limit [LOCK_LIMIT]
    4. 6.4 Hardware Lock Current Limit [HW_LOCK_LIMIT]
    5. 6.5 No Motor Fault [NO_MTR]
    6. 6.6 Abnormal Speed [ABN_SPEED]

Maximum Electrical Speed (Hz)

Go to the Motor Information Section of the GUI on the Quick Spin tab and use the following steps to set the motor's max speed:

  1. Select Speed in RPM or Speed in Hz depending on the unit of speed provided by the motor's data sheet.
  2. Input the speed in the Max Speed box. If inputting a speed in RPM, also input the number of pole pairs the motor has using the Pole Pairs box.
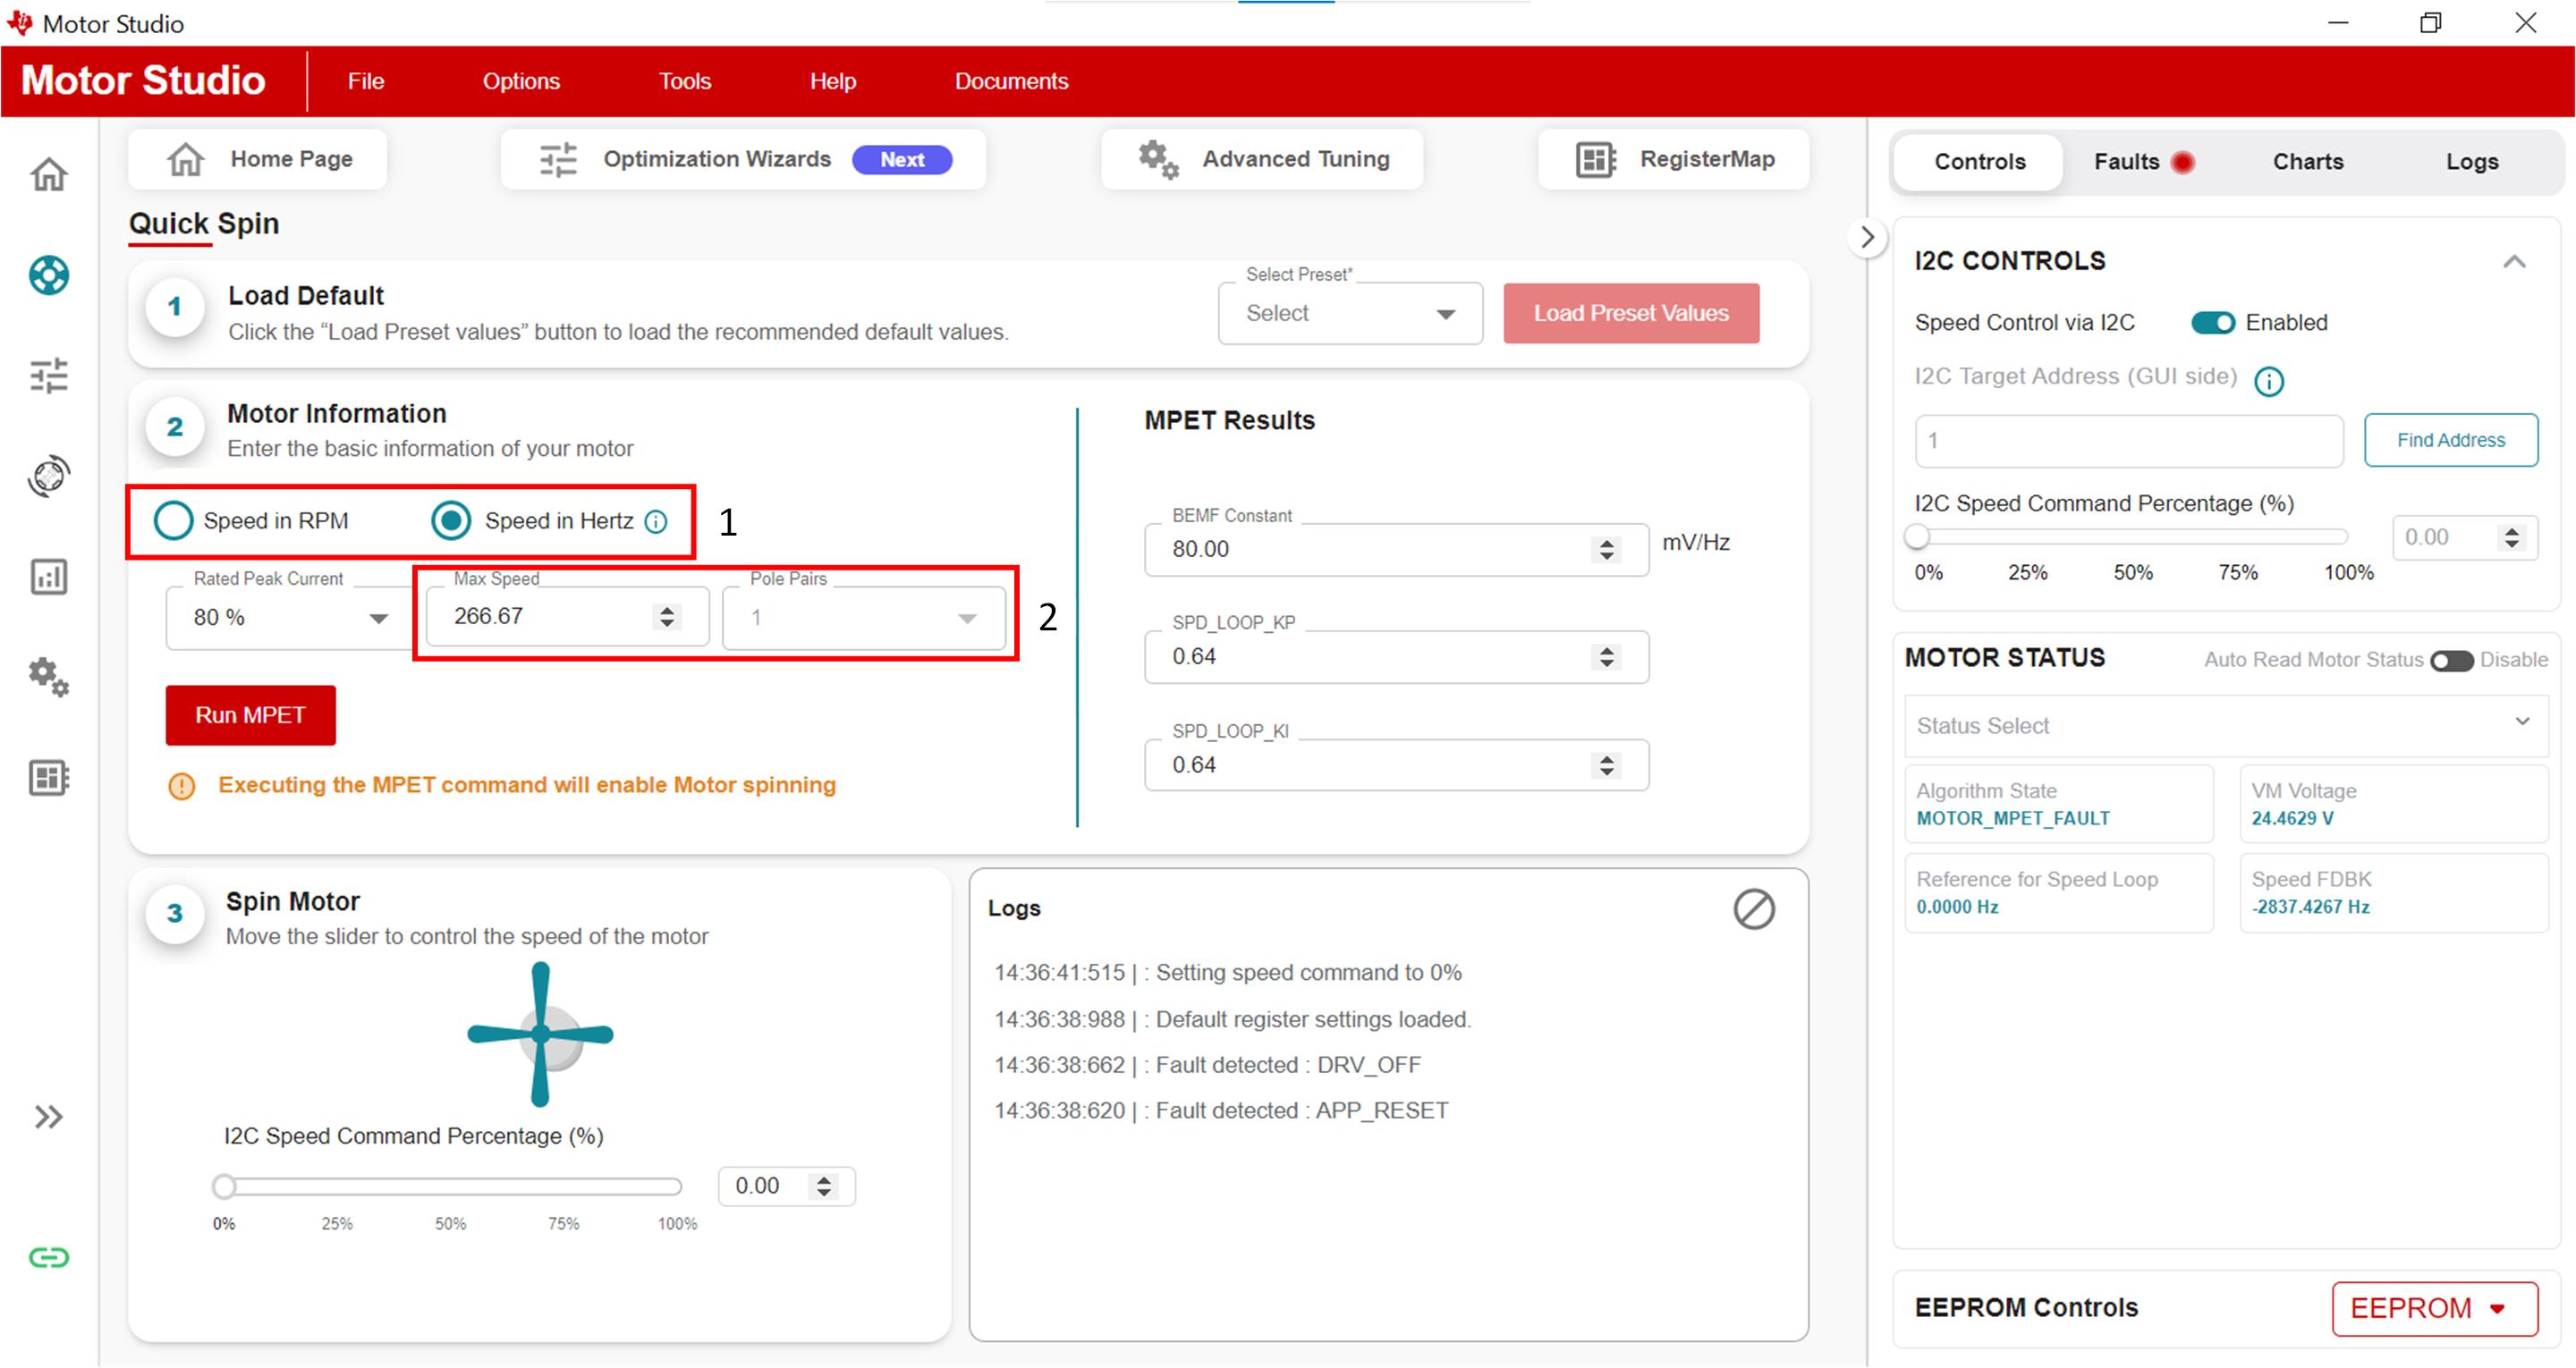
 Motor Max Speed Figure 4-9 Motor Max Speed
Note: Determining number of motor poles without a motor data sheet:
  1. Use a lab power supply and make sure it's current limit is set to less than the motor rated current. Do not turn on the supply.
  2. Connect V+ of the supply to phase A and V- of the supply to phase B of the motor. Any 2 of the 3 phases can be chosen at random if they are not labeled.
  3. Turn on supply. The rotor should have settled at one position with the injecting current.
  4. Manually rotate the rotor until rotor snaps to another settle position. It will have several settle-down positions around one mechanical cycle.
  5. Count the number of settle-down positions for one fully mechanical cycle, which is the number of pole pairs. Multiplying by two calculates the number of poles.

Be careful of gearing systems within a motor. The gear ratio determines how many rotor revolutions correlate to the shaft’s mechanical revolution.