SLLU383 October 2024
3.3 Downloading Code Composer Studio and Importing GUI Firmware
- Download and extract the Motor Studio firmware to a location on your computer.
- Download the latest version of Code Composer Studio to set up a folder in the directory C:\ti.
- Accept all agreements, default install instructions, and select Next to proceed through the menus.
- In the Selected Components window, make sure to check MSP430 Low-Power MCUs to install the required packages for the MSP430 Launchpad Evaluation Kits.
- After installing, run CCS and select a folder or the default to use as the workspace to store any new projects. The location and naming convention can be changed based on the user's preference. Click the OK button to accept.
- In CCS, click on the Project tab and select Import CCS Projects. Click on Browse.
- Select the folder created in step 1 by extracting the Motor Studio firmware.
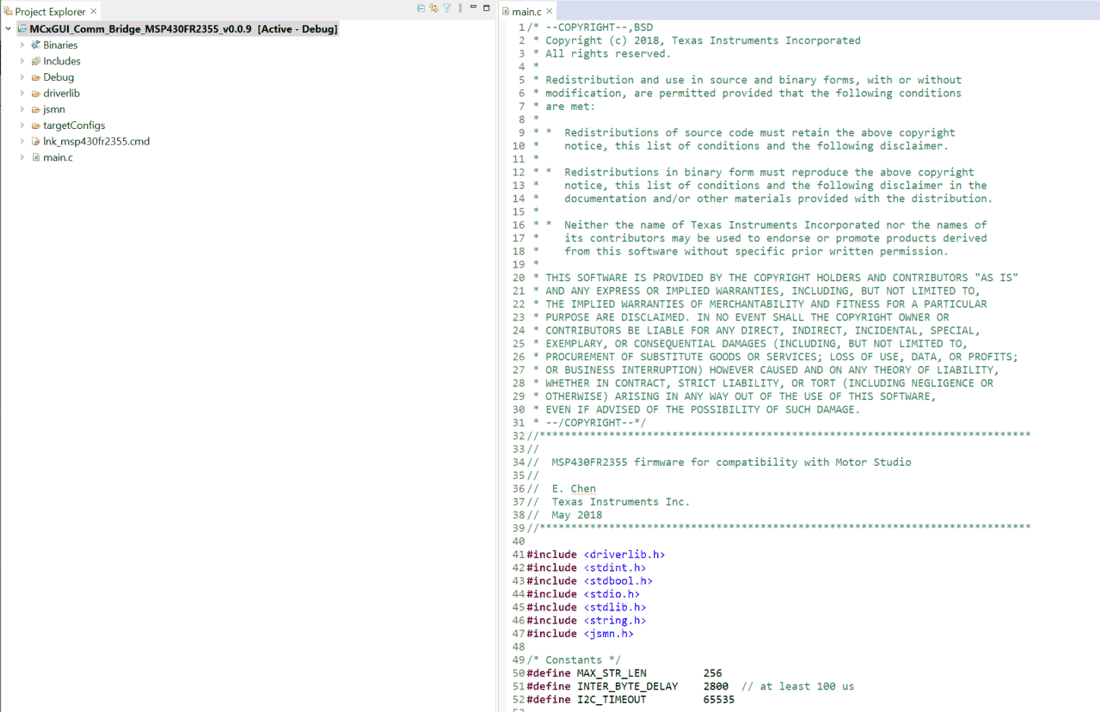
- Import the project into your workspace as shown in Figure 3-2
 Figure 3-2 MSP430FR2355 Interface Firmware Code in Code Composer Studio