SLUAAL7 September 2022 BQ35100
3.1 Steps for Enabling EOS Mode
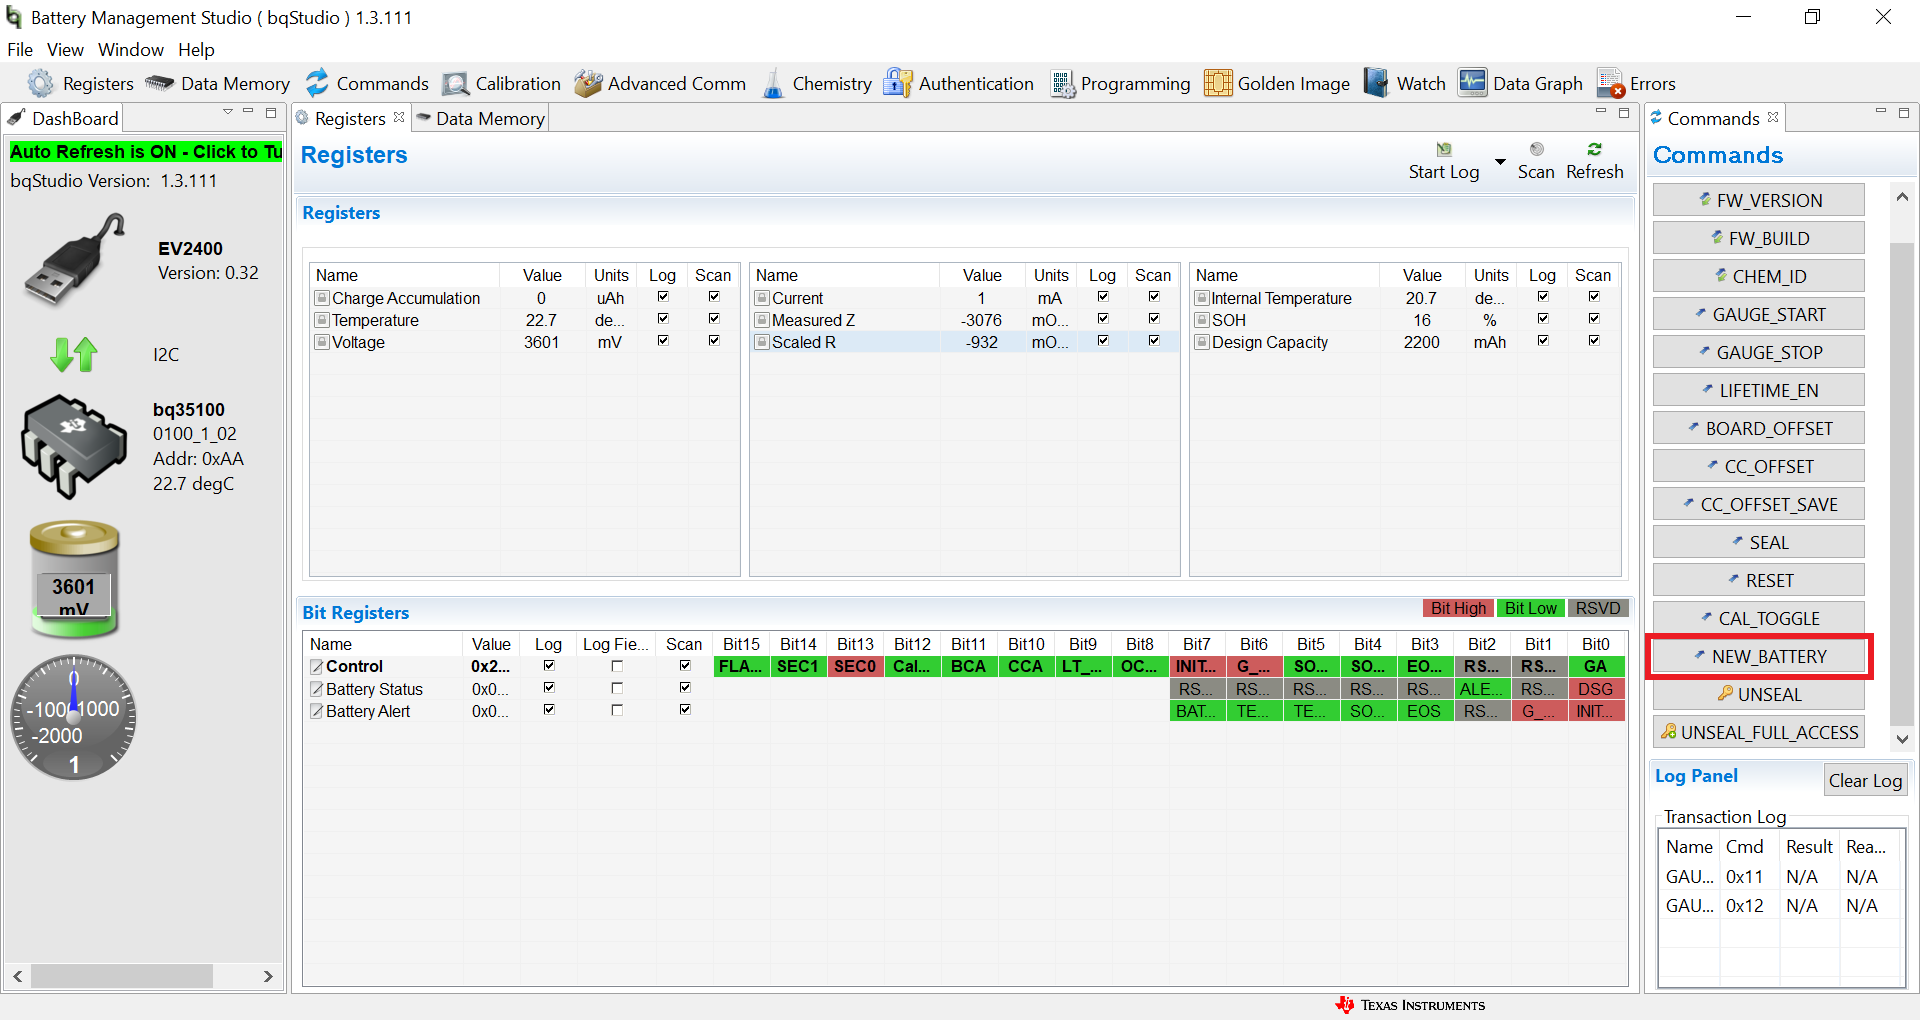
First, set the gauge to unsealed mode if it was previously sealed by pressing UNSEAL in the Commands tab. Verify the gauge is unsealed by checking the [SEC1,0] bits of ControlStatus(). The gauge is unsealed when SEC1 is set high and SEC0 is set low. If the gauge was previously sealed, re-uploading the default .SREC file which was never sealed will stop the gauge from booting up in a sealed state.
![UNSEAL and [SEC1,0] in
bqStudio GUID-6699651B-B08A-4450-8793-C758065E28CB-low.png](/ods/images/SLUAAL7/GUID-6699651B-B08A-4450-8793-C758065E28CB-low.png) Figure 3-1 UNSEAL and [SEC1,0] in
bqStudio
Figure 3-1 UNSEAL and [SEC1,0] in
bqStudioNext, press NEW_BATTERY in the Commands tab. This resets any previous data stored for resistance and scale factors and needs to always be sent before a new battery is inserted. Never insert a partially drained primary battery for testing.
 Figure 3-2 NEW_BATTERY in
BQStudio
Figure 3-2 NEW_BATTERY in
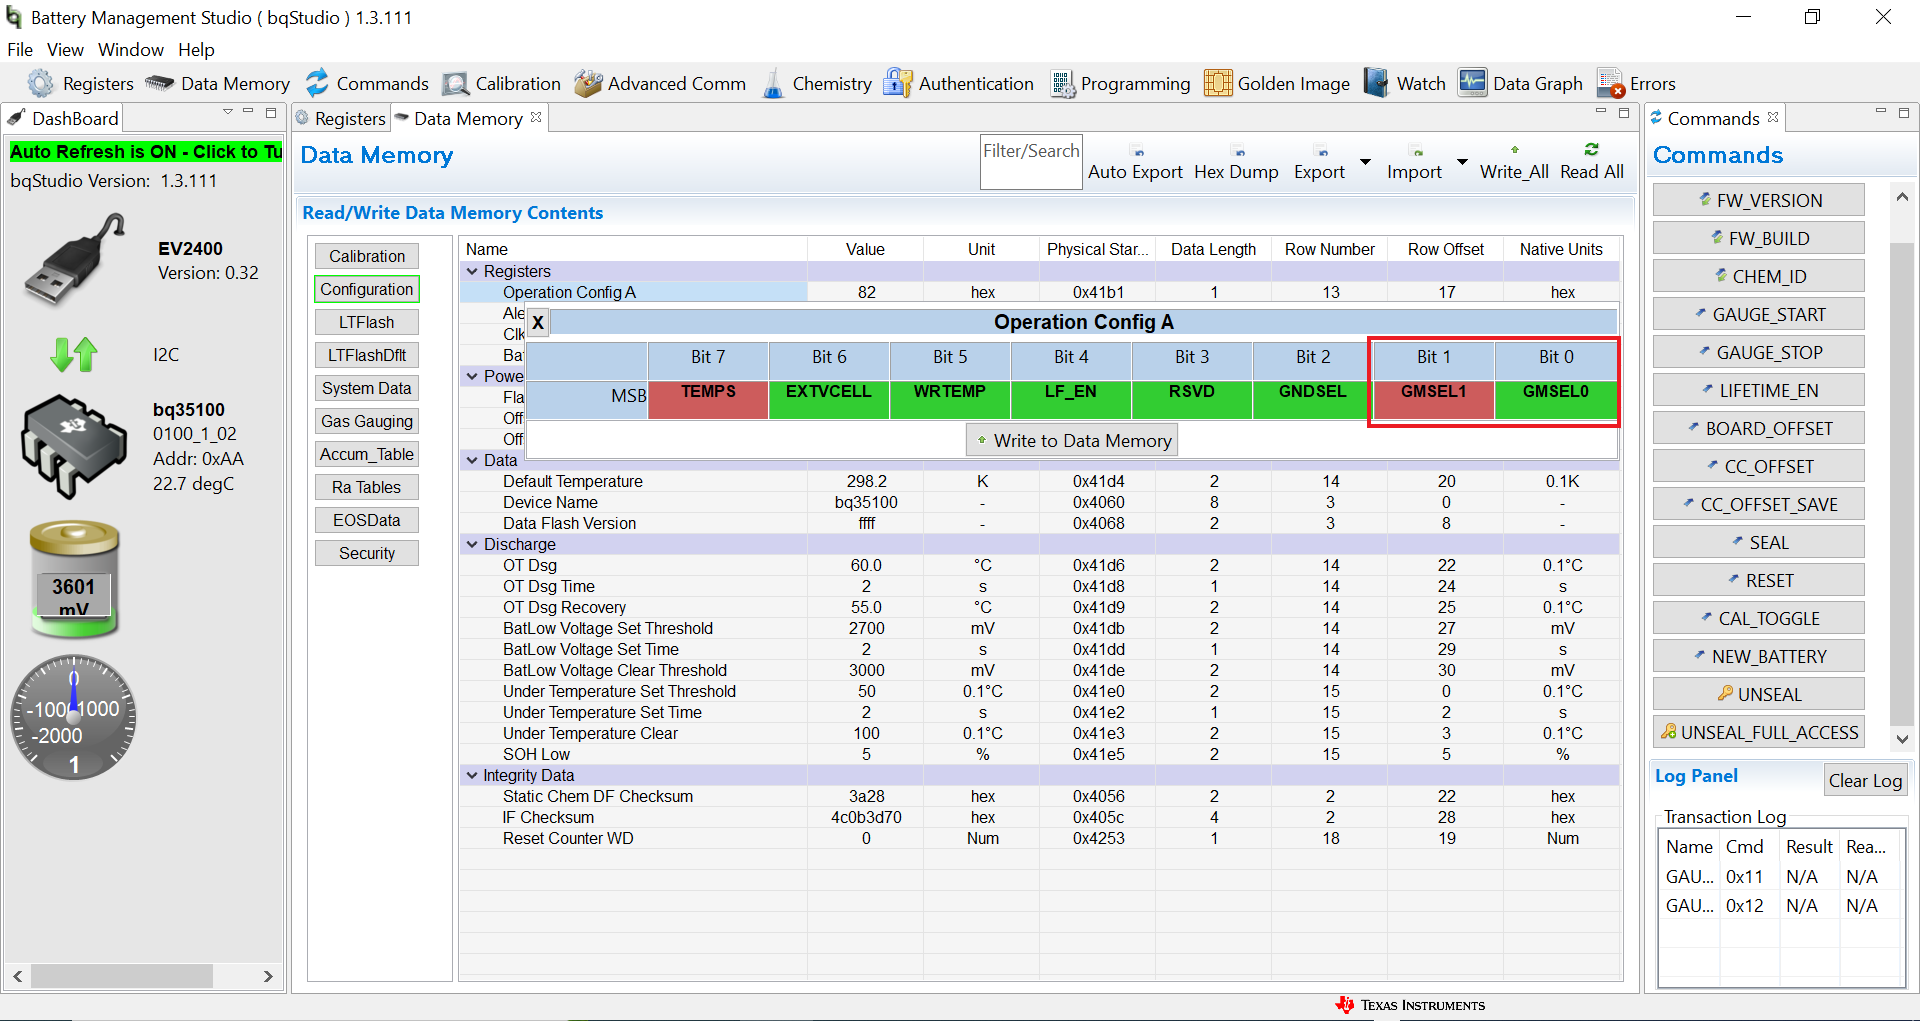
BQStudioFinally, in the Data Memory Tab, press the Configuration button. In Operation Config A, set bit GMSEL1 to high and set bit GMSEL0 to low. This configures the gauge for EOS mode. It can also be configured for accumulation and SOH mode for different applications.
 Figure 3-3 Operation Config A in
BQStudio