SLUUCR5A december 2022 – june 2023 LM74900-Q1
5 Test Setup and Procedures
Make sure the evaluation board has default jumper settings as shown in Table 5-1.
Table 5-1 Default Jumper Setting for
LM74900Q1EVM Evaluation Board
| Jumper | Default Setting | Functionality |
|---|---|---|
| J5 | 1-2 | EN connected to C. EN pulled High. |
| J6 | 1-2 | SLEEP/ connected to C. SLEEP mode disabled. |
| J7 | 1-2 | D5 LED indication when output High. |
| J8 | 2-3 | SLEEP_OV connected to C. Overvoltage cut-off functionality in SLEEP mode. |
| J10 | 1-2 | TIMER set to 1 ms. |
| J11 | 3-4 | Overcurrent protection threshold set to 5 A. |
| J12 | 1-2 | IMON voltage set to 0.54 V/A. |
| J13 | 2-3 | FLT/ pulled up to C. |
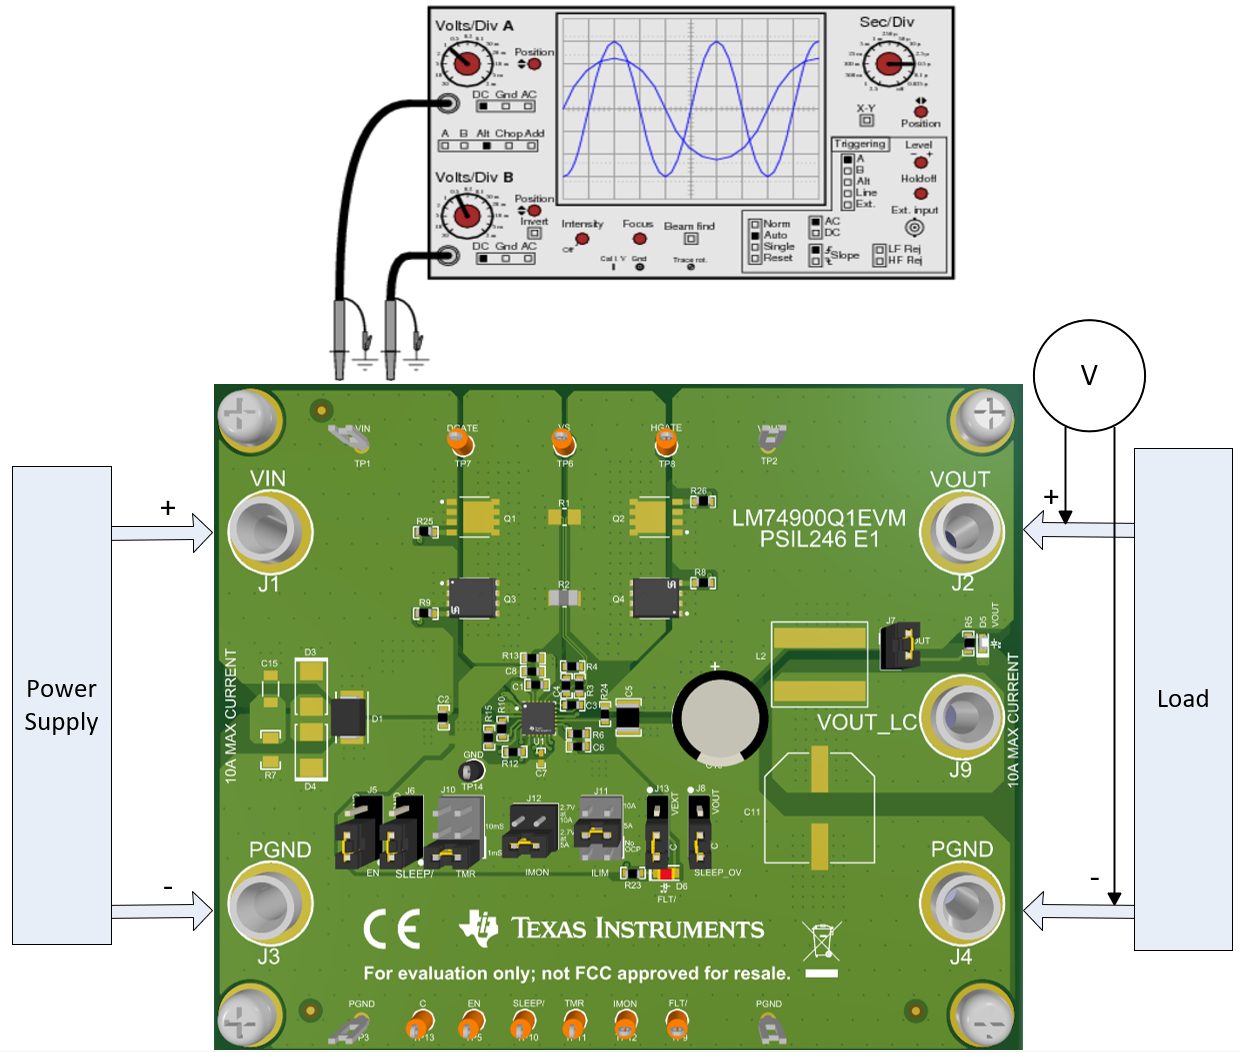
 Figure 5-1 LM74900Q1EVM Setup
With
Test Equipment
Figure 5-1 LM74900Q1EVM Setup
With
Test EquipmentUse the following instructions before starting any test and repeat again before moving to next test.
- Set the power supply output VIN to 0 V.
- Turn ON the power supply and set the power supply output VIN to 12 V and current limit of 10 A.
- Turn OFF the power supply.
- Set the jumper setting on EVM to default position as shown in Table 5-1.