SLUUCW7 july 2023 TPS25983
2.3.1 Hot-Plug Test
Use the following instructions to measure the inrush current during Hot-Plug event.
- For checking inrush current control capability, insert additional capacitance of 1800 uF at C16 terminals. Total output capacitance = 1800 uF + 220 uF approx. 2 mF.
- Set Jumper J12 in 3-4 position to set Cdvdt at 10 nF for o/p slew rate of 0.5 V/ms.
- Set the input supply voltage VIN to 12 V and current limit of 5 A. Enable the power supply.
- Hot-plug the supply between input connectors J1 and J3.
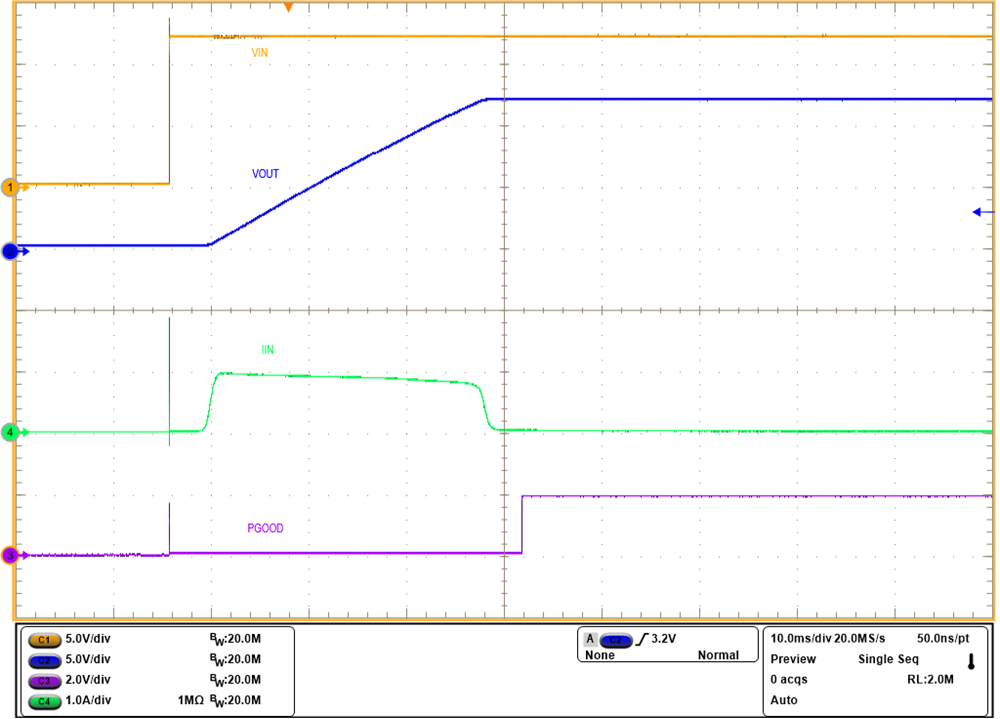
- Observe the waveform at VOUT (TP2) with an oscilloscope to measure the slew rate and rise time of the eFuse with a given input voltage of 12 V.
Figure 3-2 shows an example of inrush current captured on the TPS25983EVM eFuse Evaluation Board.
 Figure 2-2 TPS25983 Output Rise Profile
(VIN = 12 V, CdVdT = 10 nF, COUT = 2 mF, No-load)