SLVUC16 October 2020 TLC6C5748-Q1
2.3 Software Setup
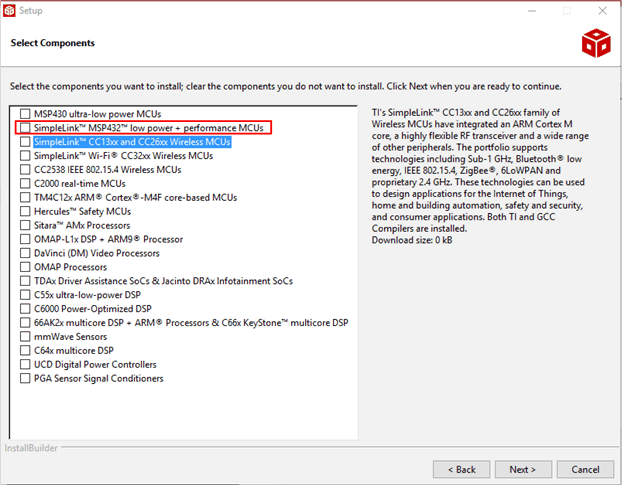
Step 1: Download the CCS IDE and follow the installation instructions. Choose "SimpleLink MSP432 low power + performance MCUs components" when choosing support device if custom installation is selected, as shown in Figure 2-3.
 Figure 2-3 Select components when
install CCS IDE
Figure 2-3 Select components when
install CCS IDEStep 2: Download and install the MSP432 SDK.
Step 3: Download the sample code from the TLC6C5748EVM tools folder and import the sample code according to the Importing a CCS Project steps.
Step 4: If the project can’t be imported, please try to install the latest version of ti-cgt.
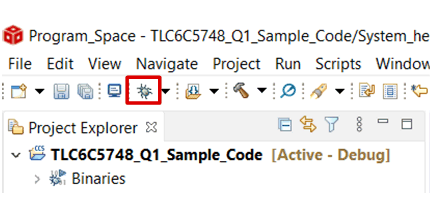
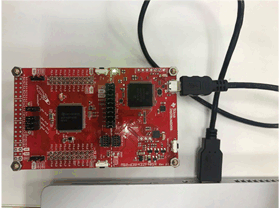
Step 5: Power on the MSP-EXP432P401 Launchpad. The Launchpad should be connected to the PC as shown in Figure 2-5 using the Micro USB cable provided in the Launchpad kit. Debug the project and download the sample code to MSP-EXP432P401 Launchpad according to the Building and Running Your Project steps. Pressing the button shown in Figure 2-4 can also compile and debug the sample code. There will be no errors if all the previous steps are correct.
 Figure 2-4 Compile and Debug Project
in CCS IDE
 Figure 2-5 Download the Sample Code
to MCU
Figure 2-5 Download the Sample Code
to MCUStep 6: Terminate the project and then power down the MCU.