SLVUC34 March 2021 TPS2521
5.1 Start up the eFuse
Use the following instructions to measure the inrush current during Hot-Plug event:
- Set Jumper J3 position to desired slew rate as mentioned in Table 4-3.
- Set the input supply voltage VIN to 5 V and current limit of 10 A.
- Connect the supply between VIN and PGND points of connector J1. Enable the power supply.
- Observe the waveform at VOUT (TP2) and input current with an oscilloscope to measure the slew rate and rise time of the eFuse with a given input voltage of 5 V.
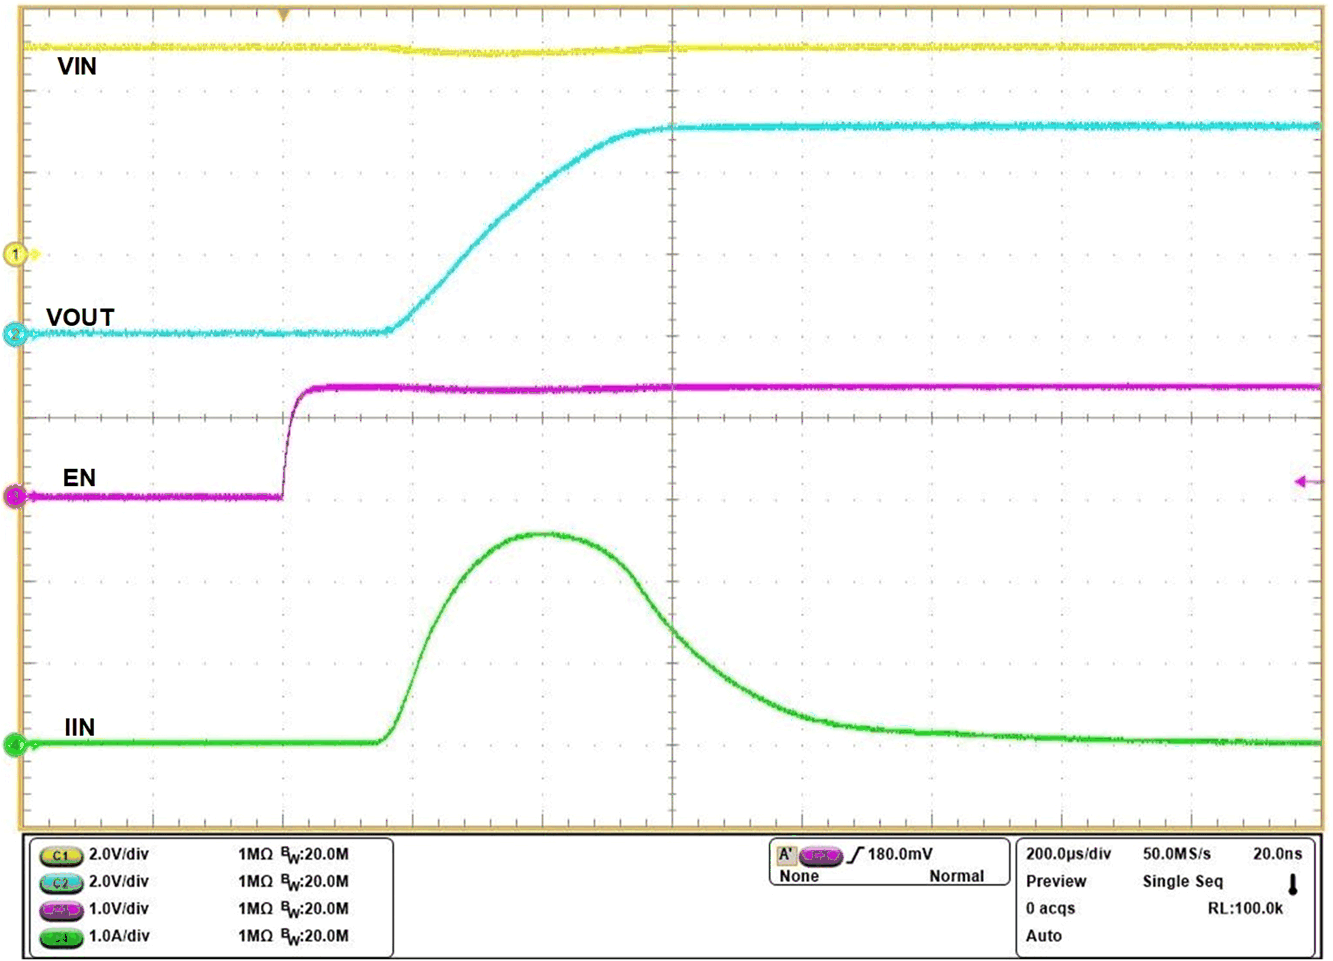
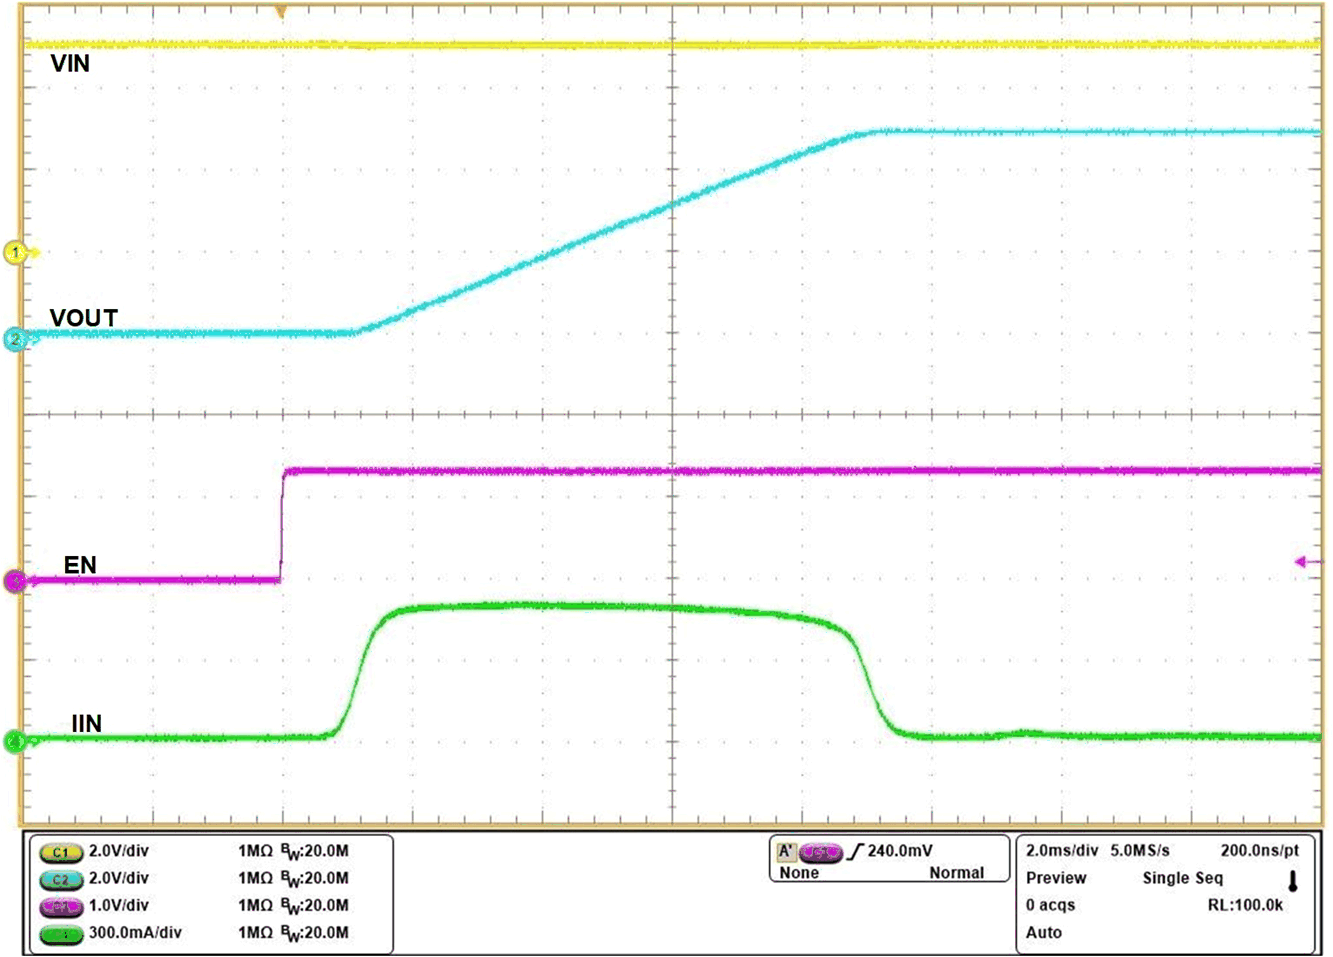
Figure 5-2 and Figure 5-3 shows example of inrush current captured on the TPS25210EVM eFuse Evaluation Board.
 Figure 5-2 TPS25210x Start Up with Enable at VIN = 5 V,
Cout = 220 uF, CdVdT = OPEN
 Figure 5-3 TPS25210x Inrush Current with Capacitive Load
at VIN = 5 V, Cout = 690 uF, CdVdT = 3300 pF