SLVUCJ0 December 2022
3.4.5 Registers Page
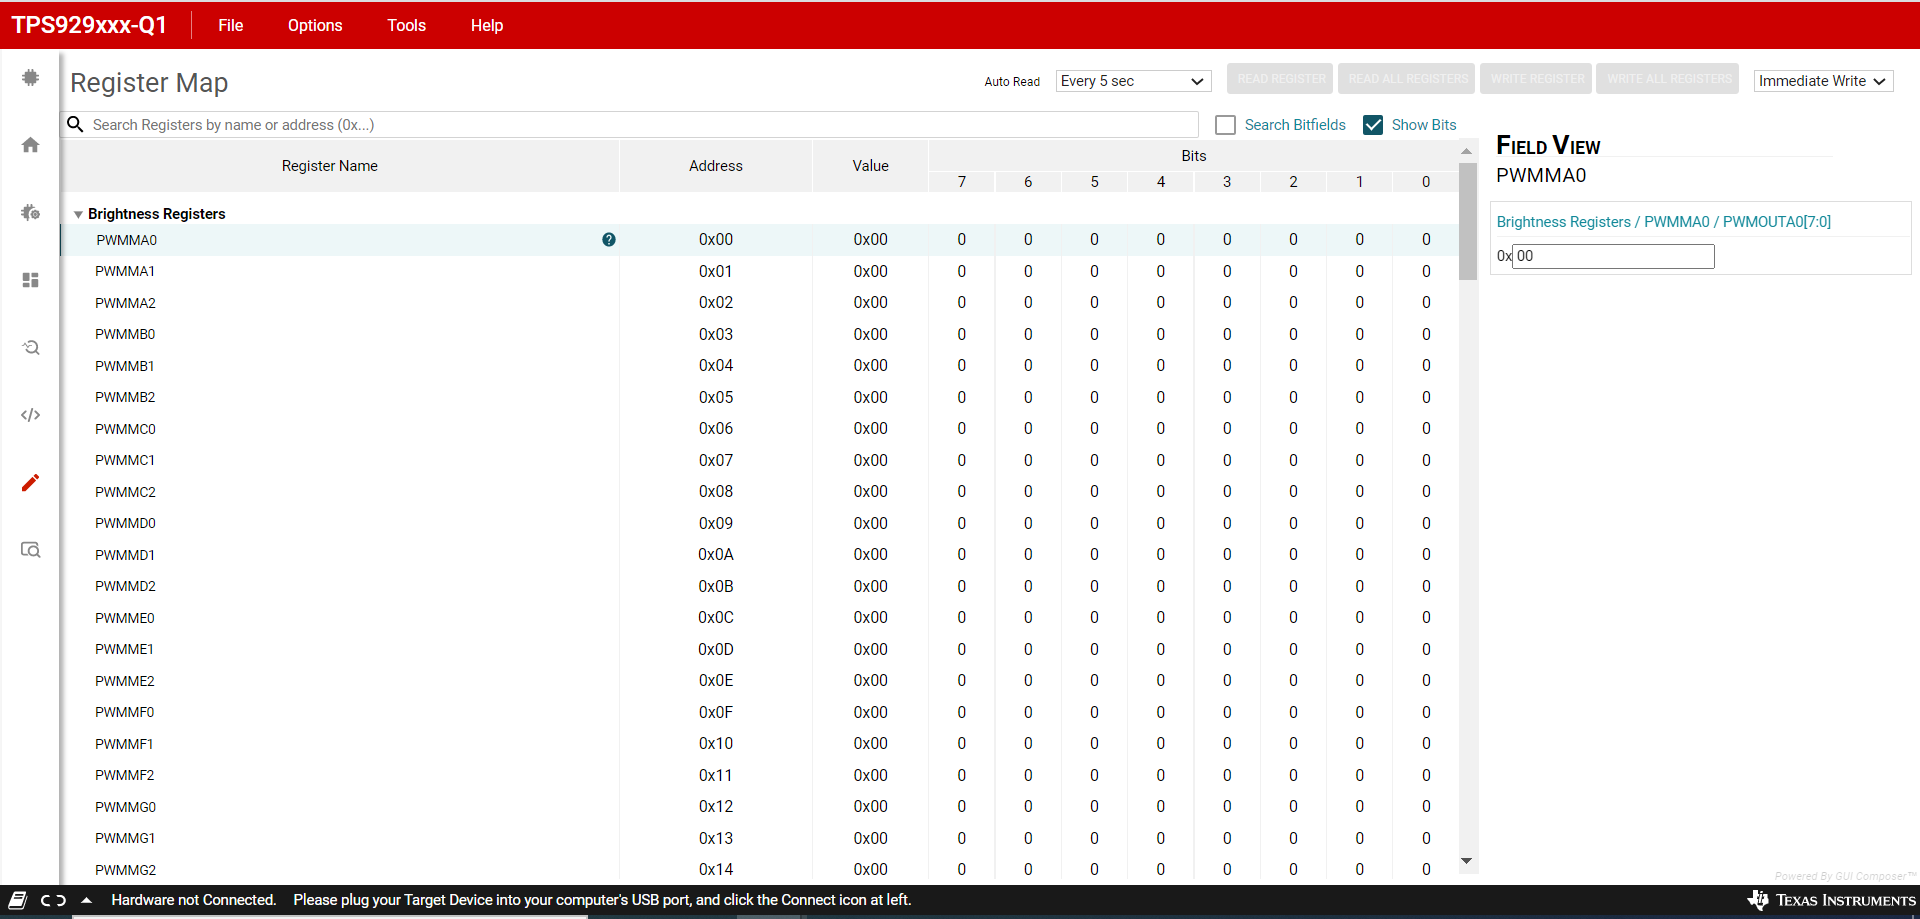
Figure 3-15 shows the registers page. All the configuration and EEPROM registers are available on this page. Clicking on the row of the register automatically updates the corresponding field view on the right side of the page. The register value can be modified through clicking the "Value" column or double clicking the "Bits" column. The modified value is effective immediately if "Immediate" function is selected on the top right corner. The modified value does not take effect until you click "WRITE REGISTER" button with "Deferred" function selected. Click "READ REGISTER" button only reads the selected register. All registers' value can be read back or set one time through clicking "READ ALL REGISTERS" or "WRITE ALL REGISTERS".
Modifying the EEPROM registers' value on the register map page does not overwrite the real EEPROM registers' value. Real EEPROM registers' value can be modified only through EEPROM programming page.
 Figure 3-15 TPS929160EVM GUI Register
Page