SLVUCL3 December 2022
- Abstract
- Trademarks
- 1Cautions and Warnings
- 2Introduction
- 3Quick Start Guide
- 4Hardware and Software Overview
- 5Hardware Setup
- 6Firmware and GUI Application
- 7Schematics
- 8Revision History
6.1 C2000 InstaSPIN Universal GUI
Follow the instructions in Section 5 and ensure the LAUNCHXL-F280049C is connected to the PC and the power supply is turned on to the DRV8317HEVM PCB.
Search for the GUI Composer Galllery through https://dev.ti.com/gallery/search/DRV8317xevm. You will need to login with a myTI account in order to access the GUI.
Accept the readme if the readme message pops up.
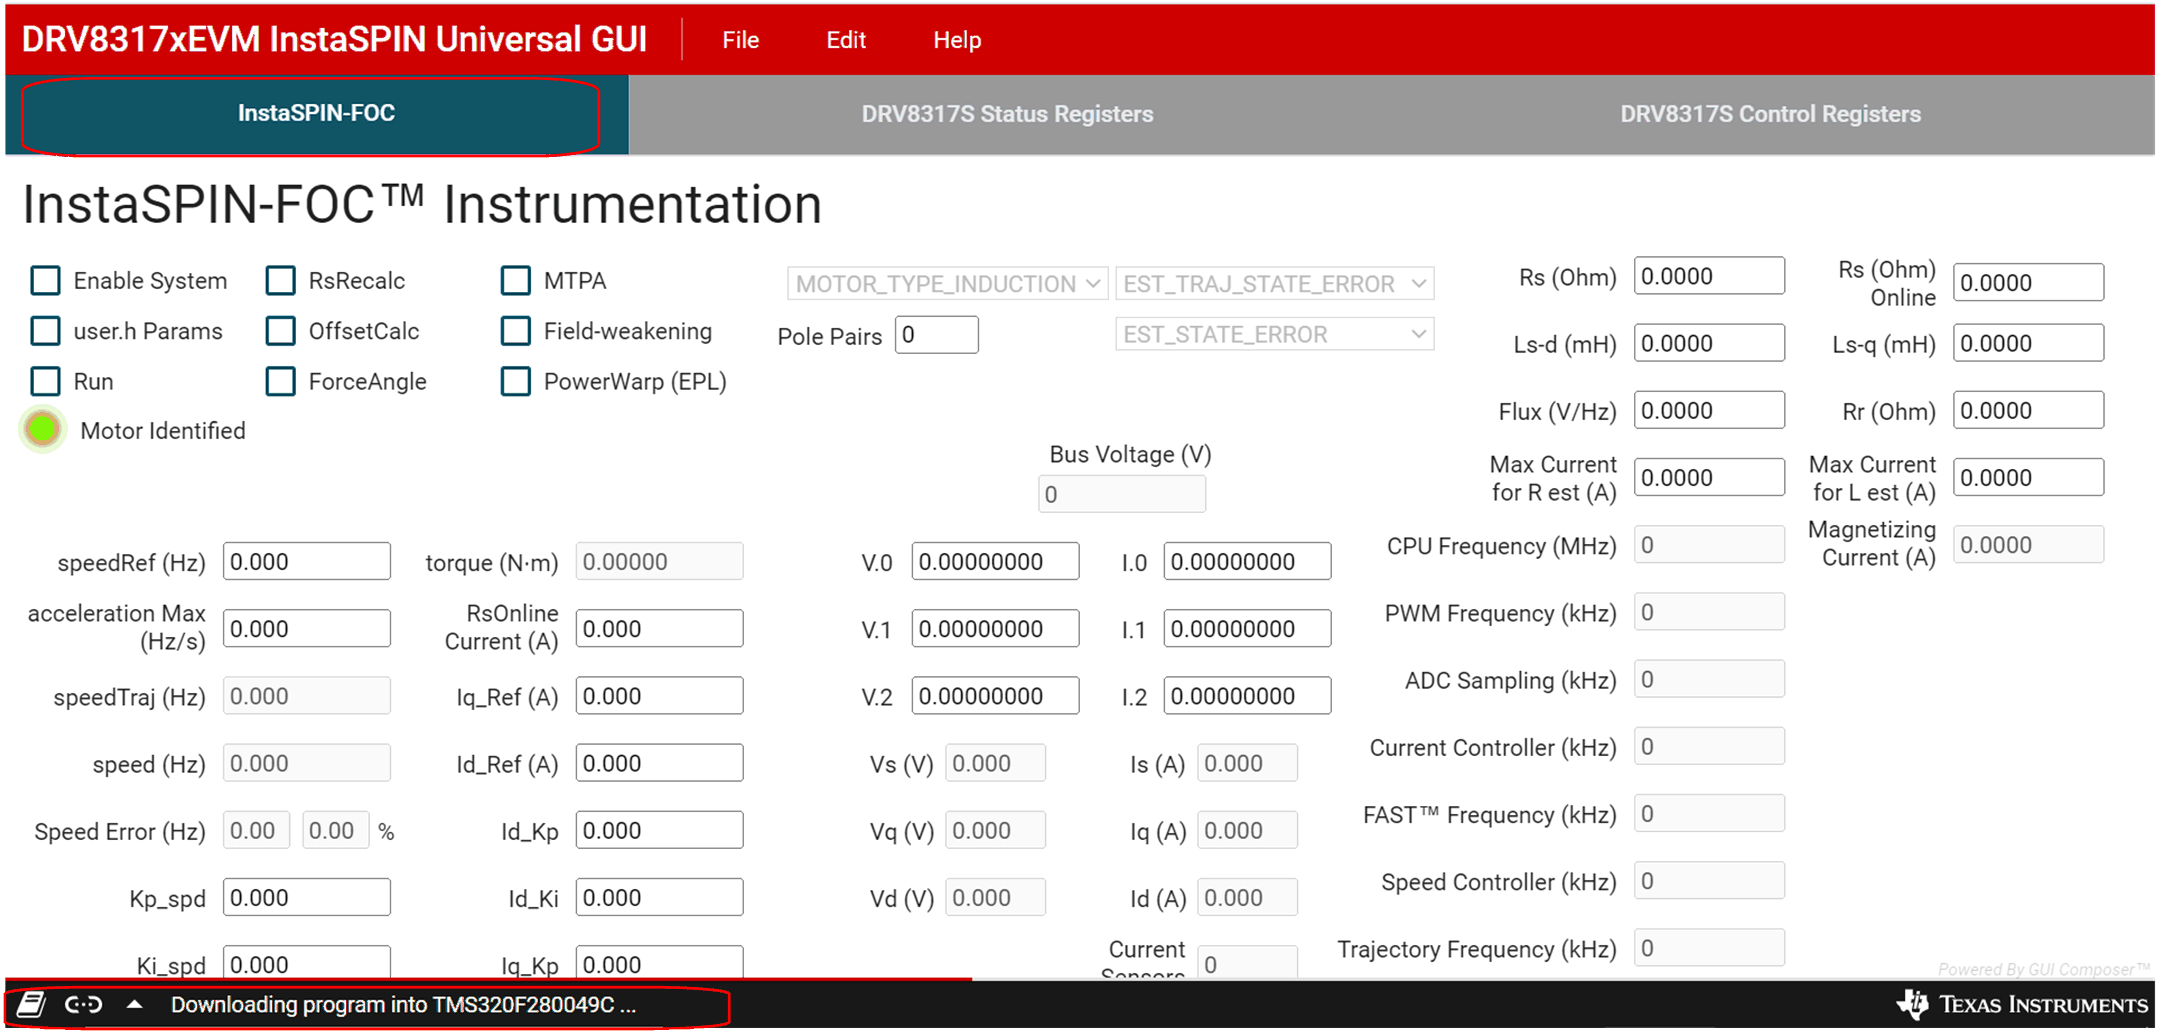
Select the "InstaSPOIN-FOC" tab at the top right hand corner to go to the main page of the GUI. Check the bottom left corner of the GUI to see if the GUI flashes the algorithm to the MCU as shown in Figure 6-1. Once the device has completed flashing the algorithm, it should show “Hardware Connected” in the bottom left corner.
 Figure 6-1 C2000 InstaSPIN Universal GUI Downloading Program