SLYA078 February 2024 TMAG5170D-Q1
6 Error Sources
There are several possible sources of error, many of which correspond to fabrication and assembly. In the process of evaluating on the bench, such error sources are easier to identify, thereby making bench testing a good and necessary practice to embrace before proceeding to mass production. The following list shows all possible error sources identified for this particular design including the ones accounted for in the preliminary design:
- Magnet Offset from the axis of rotation (eccentricity)
- Magnet Tilt
- Sensor Offset
- Sensor Tilt
- Magnet Variation
- Device Variation
- External fields
- Nearby Material Influence
- Bench Setup Error
- Post Processing Error
For a in depth review on how magnet offset and sensor offset impact design, see the Comparison Between Stacked Die and Side-by-side Die Implementations in Dual-die Magnetic Position Sensors application note.
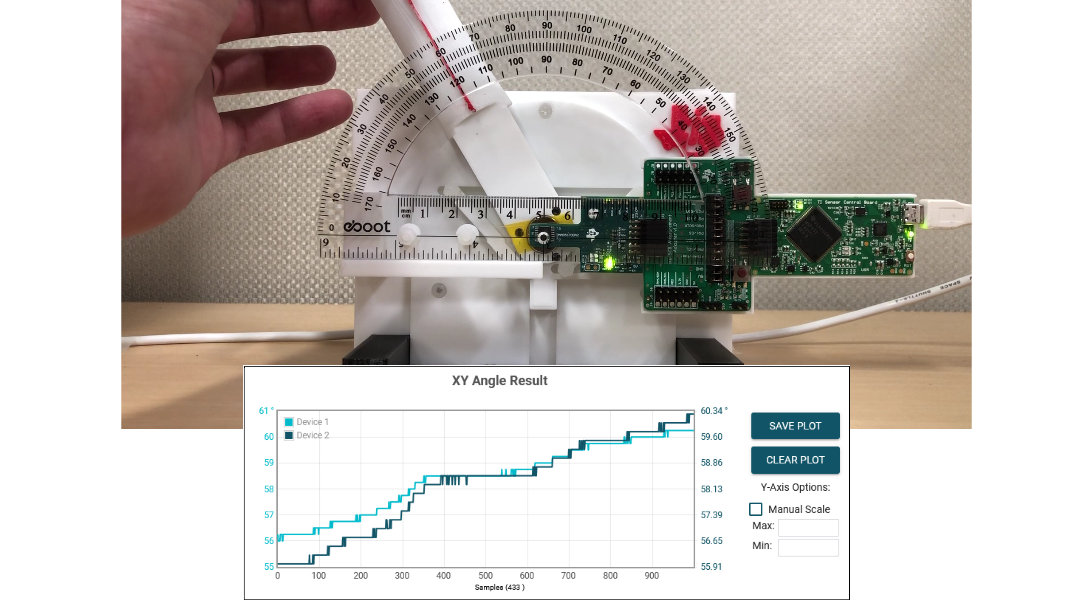
Bench setup error corresponds to how accurate the reference angle source presumed to be perfect is as well as how precise the device under test (DUT) signal can be measured at the position of interest. For an example of bench setup errors, Figure 6-1 shows how data was initially collected for assessing the design presented in this application note. The measurement errors introduced by the preliminary setup were from the limits of human optical resolution, ability to maintain precise position, and time syncing averaged data. The setup shown in Figure 5-1, removed these sources of error.
 Figure 6-1 preliminary test setup
Post processing errors can stem from how data is averaged, how data is converted from one scale to another, and how calibration algorithms are executed. An example of a post-processing error is shown in Figure 6-2. In this particular case, multiple measurements were made at each discrete step taken during the bench test to account for noise. These measured values which are in twos complement format were then erroneously averaged like non-two-complement numbers. As a negative number near 0 in twos complement has the same binary format as a large non-two-complement number, when averaged like a non-two-complement number, the averaged value becomes very large for a value that is supposed to be near 0 in standard non-two-complement form.
 Figure 6-2 Error from User Incorrectly
Post Processing