SNAU210B March 2020 – July 2021
- Trademarks
- 1Evaluation Board Setup
- 2EVM Description
- 3Bringing LMX2594 to a Lock State
- 4Loop Filter Configuration
- 5Key Results to Expect
- A Schematic
- B Bill of Materials
- C Board Layers Stack-Up
- D Changing Reference Oscillator and Setup
- E Connecting Reference Pro
- F Ramping Feature
- G SYSREF Feature
- H Enabling Onboard DC-DC Buck Converter (TPS62150)
- Revision History
2.1 Installing the Software
- Download TICS Pro from the TI Website at www.ti.com/tool/TICSPRO-SW.
- Install the software by following the wizard.
- Search for the LMX2594. In the menu bar, search Select Device → PLL + VCO → LMX2594
 Figure 2-2 Search for LMX2594 on TICS Pro
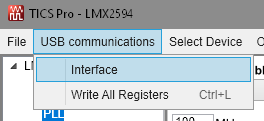
 - You are now ready to use this software. Verify that you can communicate with Reference Pro. Select Interface under USB communications.
 Figure 2-3 USB Communications on TICS Pro
 - Click on Identify and you will see the LED (MSP430 Supplied) blinks on Reference Pro.
 Figure 2-4 USB Communication Between TICS Pro and Reference Pro