SNAU282 September 2022
- Abstract
- Trademarks
- 1Evaluation Board Kit Contents
- 2Quick Start
- 3PLL Loop Filters and Loop Parameters
- 4Default TICS Pro Mode
- 5Using TICS Pro to Program the LMK04832-SEP
- 6Evaluation Board Inputs and Outputs
- 7Recommended Test Equipment
- 8Schematics
- 9Bill of Materials
- A USB2ANY Firmware Upgrade
- B TICS Pro Usage
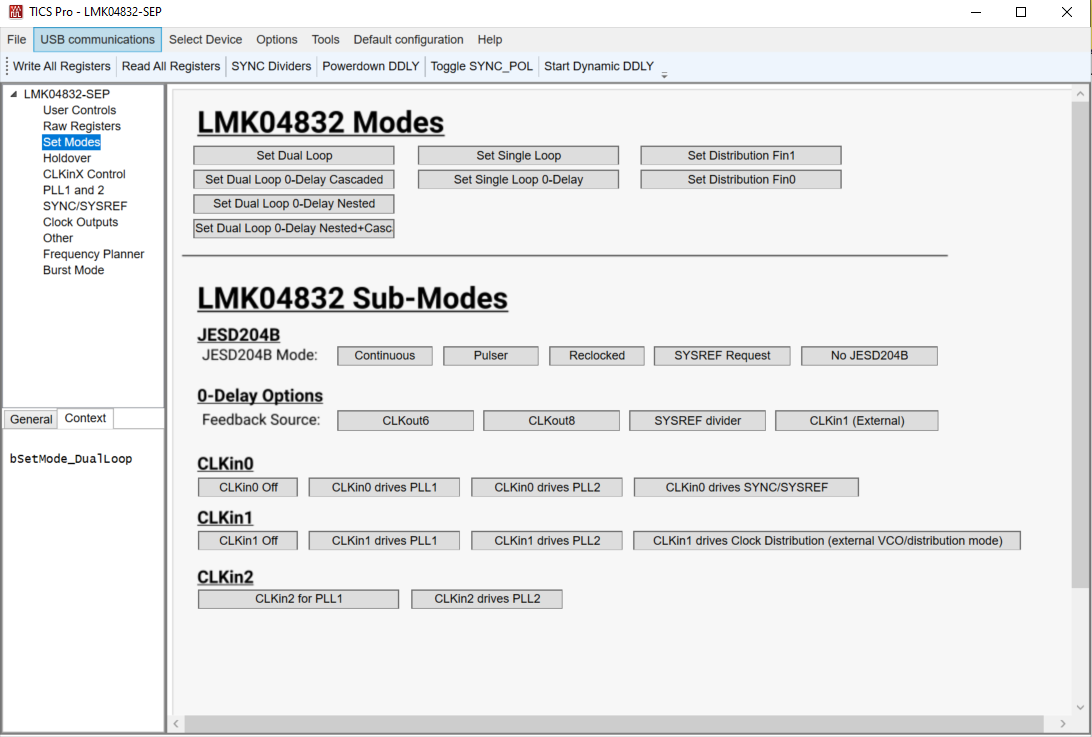
11.4 Set Modes Page
The Set Modes page allows the user to quickly configure the LMK04832 into a desired mode. If the LMK04832 is already in the desired mode, or several registers are already programmed as needed, the log will not display any or many register writes.
The top LMK04832 modes section allows the user to set high level usage profiles to allow the device to operate in dual loop, single loop, or distribution mode.
The bottom LMK04832 sub-modes section allows further JESD204B configuration, 0-delay configuration, or clock input configuration which may apply for many of the LMK04832 modes of operation.
 Figure 11-4 TICS Pro - Set Modes Page