SPRUJ22C November 2021 – September 2024 AWR2944 , AWR2944P
- 1
- Description
- Features
- 4
- 1Evaluation Module Overview
-
2Hardware
- 2.1 Block Diagram
- 2.2 PCB Handling Recommendations
- 2.3 Power Connections
- 2.4
Connectors
- 2.4.1 MIPI 60-Pin Connector (J19)
- 2.4.2 Debug Connector-60 pin (J7)
- 2.4.3 CAN-A Interface Connector (J3)
- 2.4.4 CAN-B Interface Connector (J2)
- 2.4.5 Ethernet Ports (J4 and J9)
- 2.4.6 USB Connectors (J8, J10)
- 2.4.7 OSC_CLKOUT Connector (J14)
- 2.4.8 PMIC SPI Connector (J16) (DNP)
- 2.4.9 Voltage Rails Ripple Measurement Connectors (J1, J5) (DNP)
- 2.5 Antenna
- 2.6 PMIC
- 2.7 On-Board Sensors
- 2.8 PC Connection
- 2.9 Connecting the AWR2944EVM/AWR2944PEVM to the DCA1000 EVM
- 2.10 Jumpers, Switches, and LEDs
- 3Software
- 4Hardware Design Files
- 5Compliance Information
- 6Additional Information
- 7Revision History
2.4.6 USB Connectors (J8, J10)
The EVM must be powered on before the USB cables are connected. Plugging in the USB cables before powering on the board can cause the board to get stuck in a permanent reset state. In the event that this occurs, just unplug the USB cables, power cycle the EVM, and plug in the USB cables to resolve the issue.
The AWR2944EVM/AWR2944PEVM has two standard micro USB connectors.
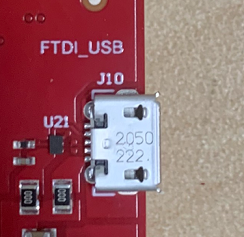
Micro USB Connector J10 provides access to the AWR2944 UART, SPI, I2C, RS232, and SOP interfaces through the FTDI chip.
| Pin Number | Description | Pin Number | Description |
|---|---|---|---|
| 1 | FTDI_VBUS | 2 | FTDI_USBD_N |
| 3 | FTDI_USBD_P | 4 | FTDI_USBID |
| 5 | GND | 6 | GND |
| 7 | GND | 8 | GND |
| 9 | GND | 10 | GND |
| 11 | GND |
 Figure 2-14 FTDI USB Port
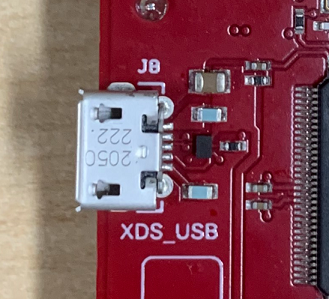
Micro USB connector J8 provides access to the JTAG, MSS_UARTA, and MSS_UARTB interfaces of the AWR2944 via the XDS110 emulator.
This is the UART interface used to flash the binary to the onboard serial flash and for Out-of-box (OOB) demo.
| Pin Number | Description | Pin Number | Description |
|---|---|---|---|
| 1 | XDSET_VBUS | 2 | XDSET_D_N |
| 3 | XDSET_D_P | 4 | XDSET_ID |
| 5 | GND | 6 | GND |
| 7 | NC | 8 | NC |
| 9 | GND | 10 | GND |
| 11 | GND |
 Figure 2-15 XDS USB Port