TIDUEZ4 May 2021
- Description
- Resources
- Features
- Applications
- 5
- 1System Description
-
2System Overview
- 2.1 Block Diagram
- 2.2 Highlighted Products
- 2.3 Design Considerations
- 3Hardware, Software, Testing Requirements, and Test Results
- 4Design and Documentation Support
- 5About the Author
3.3.1 Configuration Steps for Video over Wi-Fi
- Flash OA7000 with Single.bin provided in the software package (optional, since the camera module is already flashed with the latest .bin file). In case there is a need to overwrite or update this file, see the Flash OA7000 with latest firmware section.
- Connect the necessary signals between the LaunchPad and the camera module (mentioned in the Setup section) and power the camera module using USB or battery.
- Build the Software:
- Install the latest CCS,
and SimpleLink SDK.Note: Open the
<SimpleLink_SDK_Install_Dir>/docs/Documentation_Overview.htmldocument in the CC32xx SDK and navigate to Quick Start Guide for instructions to setup CCS to correctly use the FreeRTOS installation. - Import and build the project in the workspace. Import both: OV7000 project and the FreeRTOS build. After successful compilation, this should create a .bin in Debug output folder.
- Additional configuration:
- In Provisioning.c Line 1500 – change the code to configure to a known AP.
- Provision the device to an AP using the SimpleLink Starter App which can be installed on the iOS or Android Smartphone.
- Optional: To see the MCU
(CC3235MODS and CC1352R) log over UART available on CC1352R LaunchPad pins 3 and
4, note the following settings:
- Bits per second: 115200
- Data bits: 8
- Parity: None
- Stop bits: 1
- Flow control: None
- Install the latest CCS,
and SimpleLink SDK.
- Flashing the camera module:
- Review SimpleLink academy for how the C32xx devices get programmed.
- Use this as your guide to create a new project with Device Type: CC3235SF, Device Mode: Develop, Start Role: Station.
- To add an MCU image to the
project, press the Browse button and navigate to
video_streaming_ov7000_CC3235SF_LAUNCHXL_freertos_ccs\video_streaming_ov7000_CC3235SF_LAUNCHXL_freertos_ccs\Debug\video_streaming_ov7000_CC3235SF_LAUNCHXL_freertos_ccs.bin.Select the BIN file.
- To add a service pack to the
project, click the Browse button and navigate to
simplelink_cc32xx_sdk_x_xx_xx_xx/tools/cc32xx_tools/servicepack-cc3xxx/sp_xxxx_xxxx_xxxx.bin.Select the BIN file.
- Click the Connect button followed by pressing the Burn button. This takes you to the Generate Image page where you can program your module by selecting Program Image.
- Power-cycle the camera module. You can observe the success message and the IP address from the log on UART serial port.
- Demo
- After provisioning or connection to the AP is successful, connect another device to the same local AP and launch the VLC player.
- VLC for Windows:
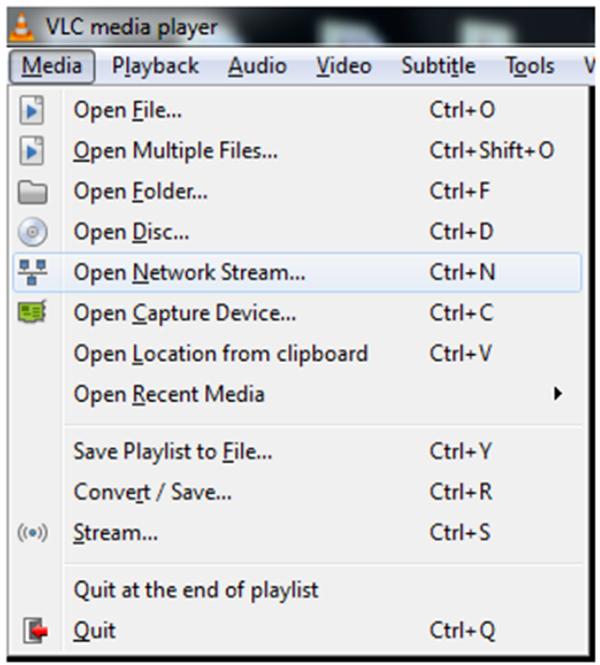
- Launch VLC, connect to the
stream by choosing Open Network Stream from the Media menu, as
shown in Figure 3-6.
 Figure 3-6 Connect to the Stream by
Choosing Open Network Stream from the Media Menu
 - For the network URL, enter the
following command
rtsp://[IPADDRESS]:554and press Play. An example isrtsp://192.168.2.24:554 - Obtain the IP address of the camera module from the applications logs or from the provisioning app.
- Launch VLC, connect to the
stream by choosing Open Network Stream from the Media menu, as
shown in Figure 3-6.
- VLC for Android:
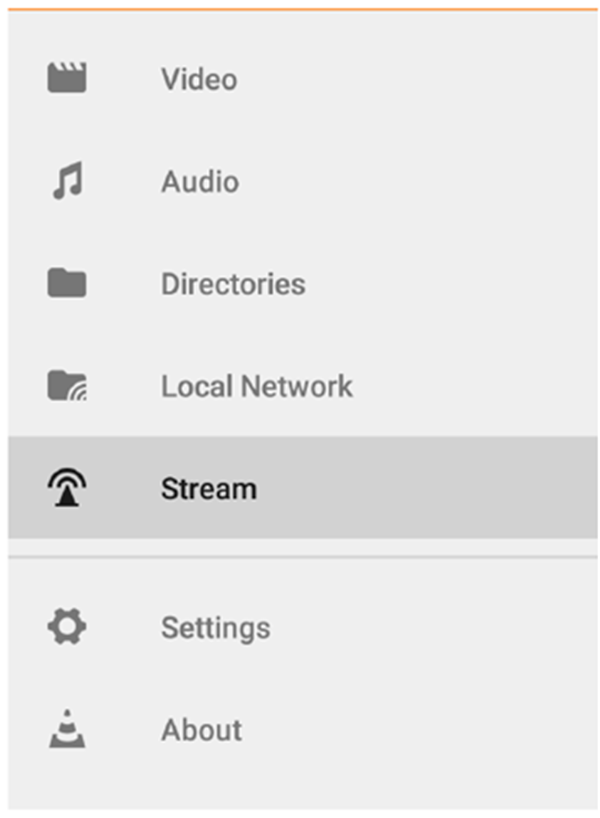
- Launch VLC, choose Stream,
as shown in Figure 3-7.
 Figure 3-7 Choose Stream for
Android
 - For the network URL, enter the
following command
rtsp://[IPADDRESS]:554and press the yellow arrow, as shown in Figure 3-8. An example isrtsp://192.168.2.24:554 Figure 3-8 Enter Network Address
Here
 - The IP address of the camera module can be obtained from the applications logs or from the provisioning app.
- Launch VLC, choose Stream,
as shown in Figure 3-7.
- VLC for iOS:
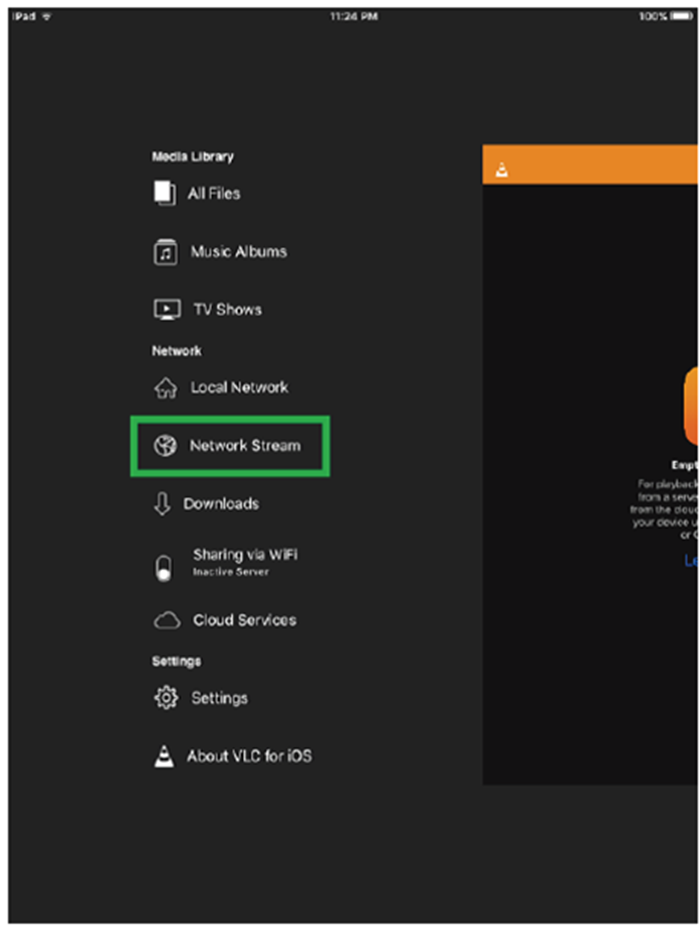
- Launch VLC, choose Open
Network Stream, as shown in Figure 3-9.
 Figure 3-9 Choose Open Network Stream
for iOS
 - For the network URL, enter the
following command
rtsp://[IPADDRESS]:554and press Open Network Stream. An example isrtsp://192.168.2.24:554 - The IP address of the camera module can be obtained from the applications logs or from the provisioning app.
- Launch VLC, choose Open
Network Stream, as shown in Figure 3-9.