TIDUEZ9B July 2022 – April 2023
- Description
- Resources
- Features
- Applications
- 5
- 1System Description
- 2System Overview
- 3Hardware, Software, Testing Requirements, and Test Results
- 4Design and Documentation Support
- 5About the Author
- 6Revision History
3.3.1 Test Results of Hardware and Software Validation
Figure 3-1 shows the setup used for this test. There are sinusoidal input signals with different frequencies applied to the CH1 input and the sampled signal. The computed arc noise is observed within Code Composer Studio. Figure 3-3 and Figure 3-4 show the Expressions window for the external ADC version and for the internal ADC version after loading the software to the controlCARD, but before starting the code.
 Figure 3-3 Expressions Window for
External ADC
 Figure 3-4 Expressions Window for
Internal ADC
Figure 3-4 Expressions Window for
Internal ADC- CH1Data: Array to store 1024 samples of the input signal.
- AD_result: Array in which the computed arc noise is stored. Each element represents the outcome of the analysis of 1024 samples.
- BufferFillFLagCH1 (only for external ADC): Flag to start the arc detection in case of the external ADC solution. Internal ADC project starts directly after boot up.
- ArcTunningParams: See Table 3-5. In this case the frequency band for arc detection is set to 30 kHz to 60 kHz.
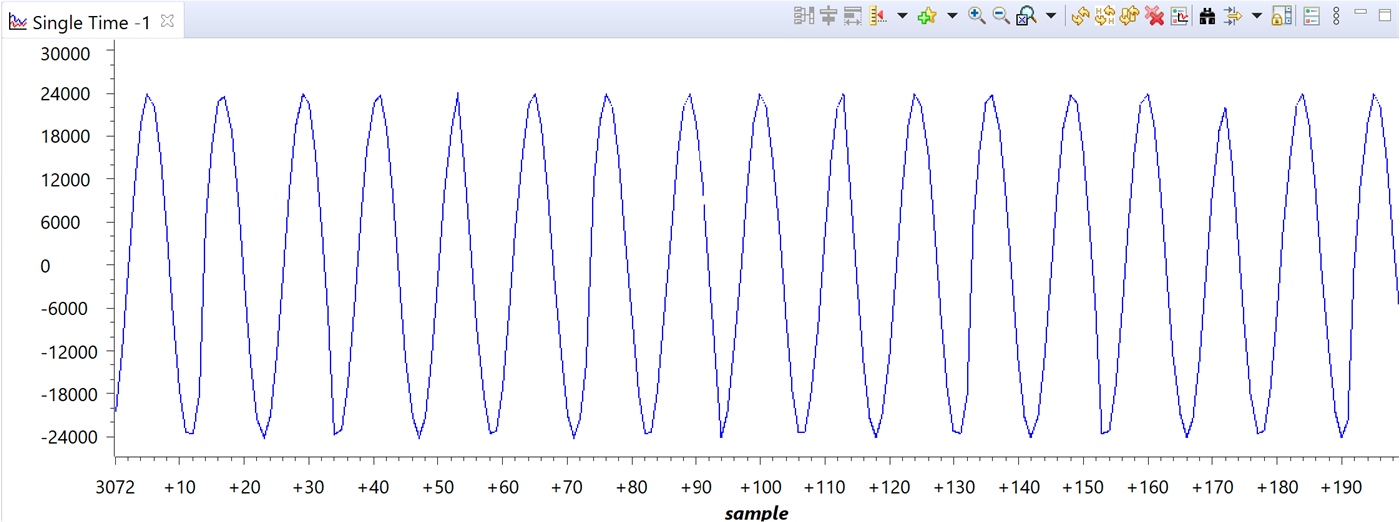
After starting the software and enabling the continuous refresh option in the expressions window, the displayed values change, as shown in Figure 3-5. The input signal as well as the AD_result variable can be observed in the graphing tool. Figure 3-6 shows the sampled input signal for a 20-kHz sinusoidal input current.
 Figure 3-5 Expressions Window for 20 kHz
Sinusoidal Input Current
 Figure 3-6 Graph of CH1Data at 20-kHz
Sinusoidal Input Current
Figure 3-6 Graph of CH1Data at 20-kHz
Sinusoidal Input Current| FREQUENCY IN Hz | AD RESULT WITH EXTERNAL ADC | AD_result WITH INTERNAL ADC |
|---|---|---|
| 10000 | 46 | 23 |
| 20000 | 43 | 28 |
| 30000 | 89 | 47 |
| 40000 | 98 | 67 |
| 50000 | 80 | 49 |
| 60000 | 77 | 46 |
| 70000 | 35 | 33 |
| 80000 | 12 | 30 |
| 90000 | 16 | 29 |
| 100000 | 19 | 25 |