TIDUF31B May 2023 – September 2024
- 1
- Description
- Resources
- Features
- Applications
- 6
- 1System Description
- 2System Overview
-
3System Design Theory
- 3.1 High-Voltage Buck Auxiliary Power Supply
- 3.2 DC Bus Voltage Sensing
- 3.3 Motor Drive Stage
- 3.4 Bypass Capacitors
- 3.5 Phase Current Sensing With Two or Three Shunt Resistors
- 3.6 Phase Current Sensing With a Single Shunt Resistor
- 3.7 Hall-Effect Sensor or QEI Interface for Sensored Motor Control
- 3.8 DAC for Software Debug
- 3.9 Overcurrent Protection
- 3.10 Overtemperature Protection
- 3.11 Isolated UART port
- 3.12 Inverter Peak Power Capability
- 4Hardware, Software, Testing Requirements, and Test Results
- 5Design and Documentation Support
- 6About the Author
- 7Revision History
4.3.6 Load Test
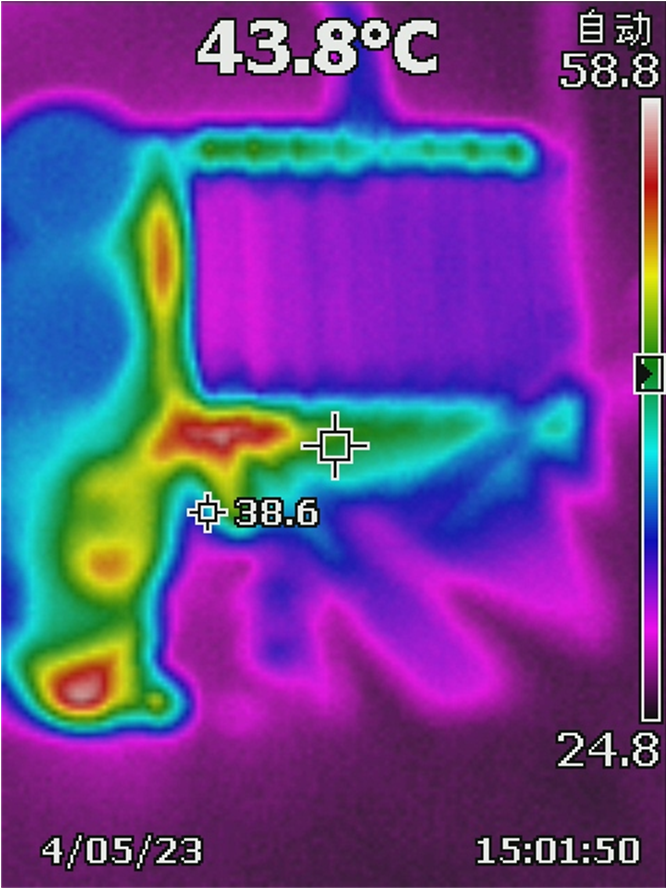
A load test was conducted to verify the overall thermal design. Figure 4-16 shows the board temperature rising with a 460W load. The heat sink temperature is only 32°C. Fuse and diode bridge are the hottest locations, but there is still enough margin, and the fuse cover can be removed to provide cooling.
 Figure 4-16 Board Temperature
Rising
Figure 4-16 Board Temperature
RisingWith 460W Load
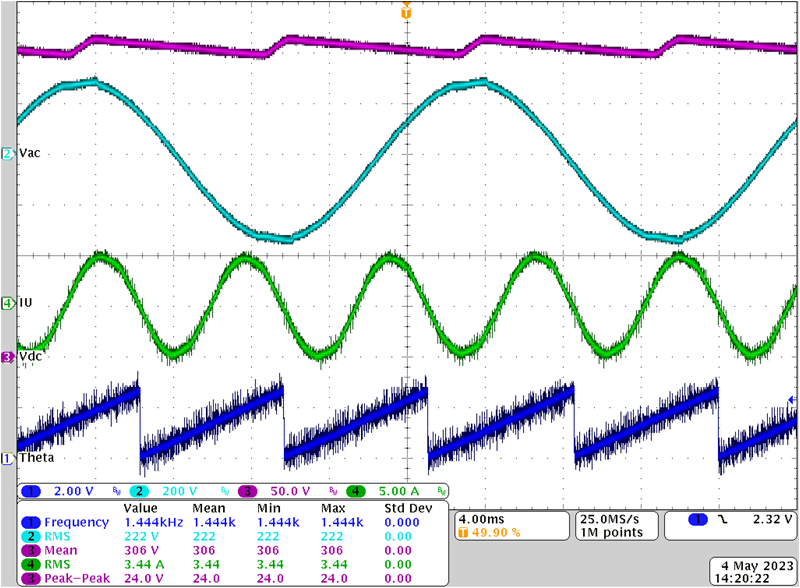
 Figure 4-17 Test Waveform With 460W
Load
Figure 4-17 Test Waveform With 460W
LoadFigure 4-17 shows the test waveform with a 460W load and the following channel assignments:
- CH1(Blue): Observed rotor angle
- CH2 (Cyan): AC input voltage
- CH3 (Purple): DC bus voltage
- CH4 (Green): Current of phase U
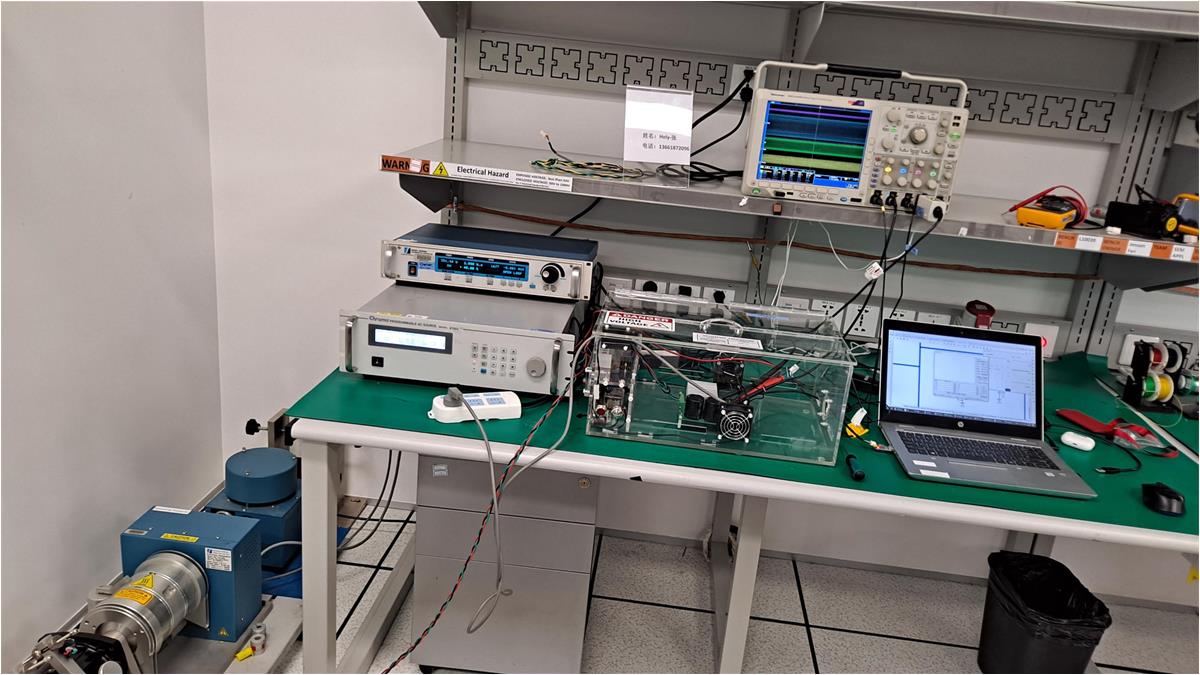
Figure 4-18 shows load test setup with a dynamometer.
 Figure 4-18 Load Test Setup