TIDUFB1 December 2024
- 1
- Description
- Resources
- Features
- Applications
- 6
- 1System Description
-
2System Overview
- 2.1 Block Diagram
- 2.2 Design Considerations
- 2.3 Highlighted Products
- 2.4
Hardware Design
- 2.4.1 Inductor Design
- 2.4.2 Bus Capacitor Selection
- 2.4.3 Input AC Voltage Sensing
- 2.4.4 Output DCBUS Voltage Sensing
- 2.4.5 Auxiliary Power Supply
- 2.4.6 Isolated Power Supply
- 2.4.7 Inductor Current Sensing
- 2.4.8 Gate Driver
- 2.4.9 Isolated Temperature Sensing
- 2.4.10 Overcurrent, Overvoltage Protection (CMPSS)
-
3Hardware, Software, Testing Requirements, and Test Results
- 3.1 Hardware Requirements
- 3.2
Software Requirements
- 3.2.1 Getting Started GUI
- 3.2.2
Getting Started Firmware
- 3.2.2.1 Opening the Project Inside Code Composer Studio™
- 3.2.2.2 Project Structure
- 3.2.2.3 Test Setup
- 3.2.2.4 Running Project
- 3.3
Test Results
- 3.3.1 IGBT Gate Rising and Falling Time
- 3.3.2 Power On Sequence
- 3.3.3 PFC Started by GUI
- 3.3.4 Zero Crossing Under 380VAC, 9kW
- 3.3.5 Current Ripple Under 380VAC,10kW
- 3.3.6 10kW Load Test With Grid Power
- 3.3.7 9kW Load Test With AC Power Source
- 3.3.8 Power Analyzer Results
- 3.3.9 Thermal Performance
- 3.3.10 Voltage Short Interrupt Test
- 3.3.11 Efficiency, iTHD, and Power Factor Results
- 4Design and Documentation Support
- 5About the Author
3.2.2.4.4.2 Running Code (Build 4)
- Run project by clicking the
 button.
 - Raise the AC input to 120VRMS VL-L and
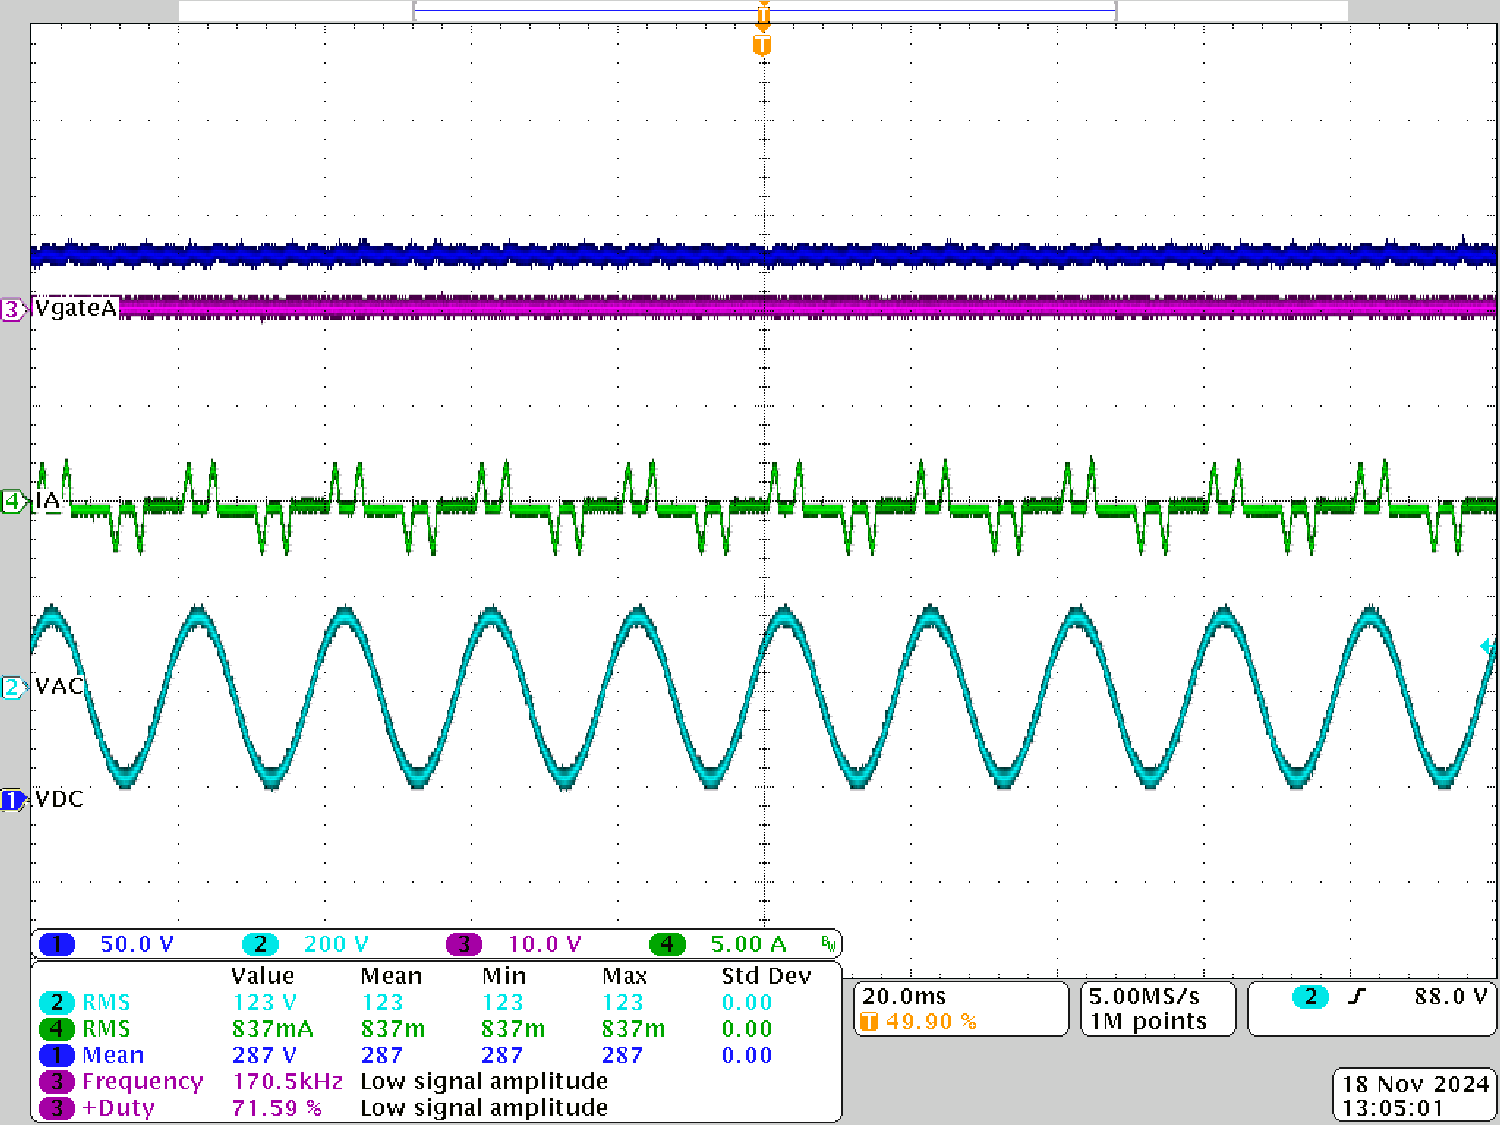
208VRMS VL-L, 50/60Hz. Figure 3-30 shows a rectified current that is going to be drawn from the input.
 Figure 3-30 Build Level 4: Scope Capture Ia and Va (120VRMS L-N) With PWM Tripped
- CH1 (Blue): DCBUS output voltage
- CH2 (Light blue): AC input phase A voltage
- CH3 (Pink): IGBT gate voltage
- CH4 (Green): AC Input phase A current
- Bus voltage is set by the
vBusRefvariable, and is about 1.55V already, which corresponds to 650V for this design. - Start the PFC action by writing a 1 to the
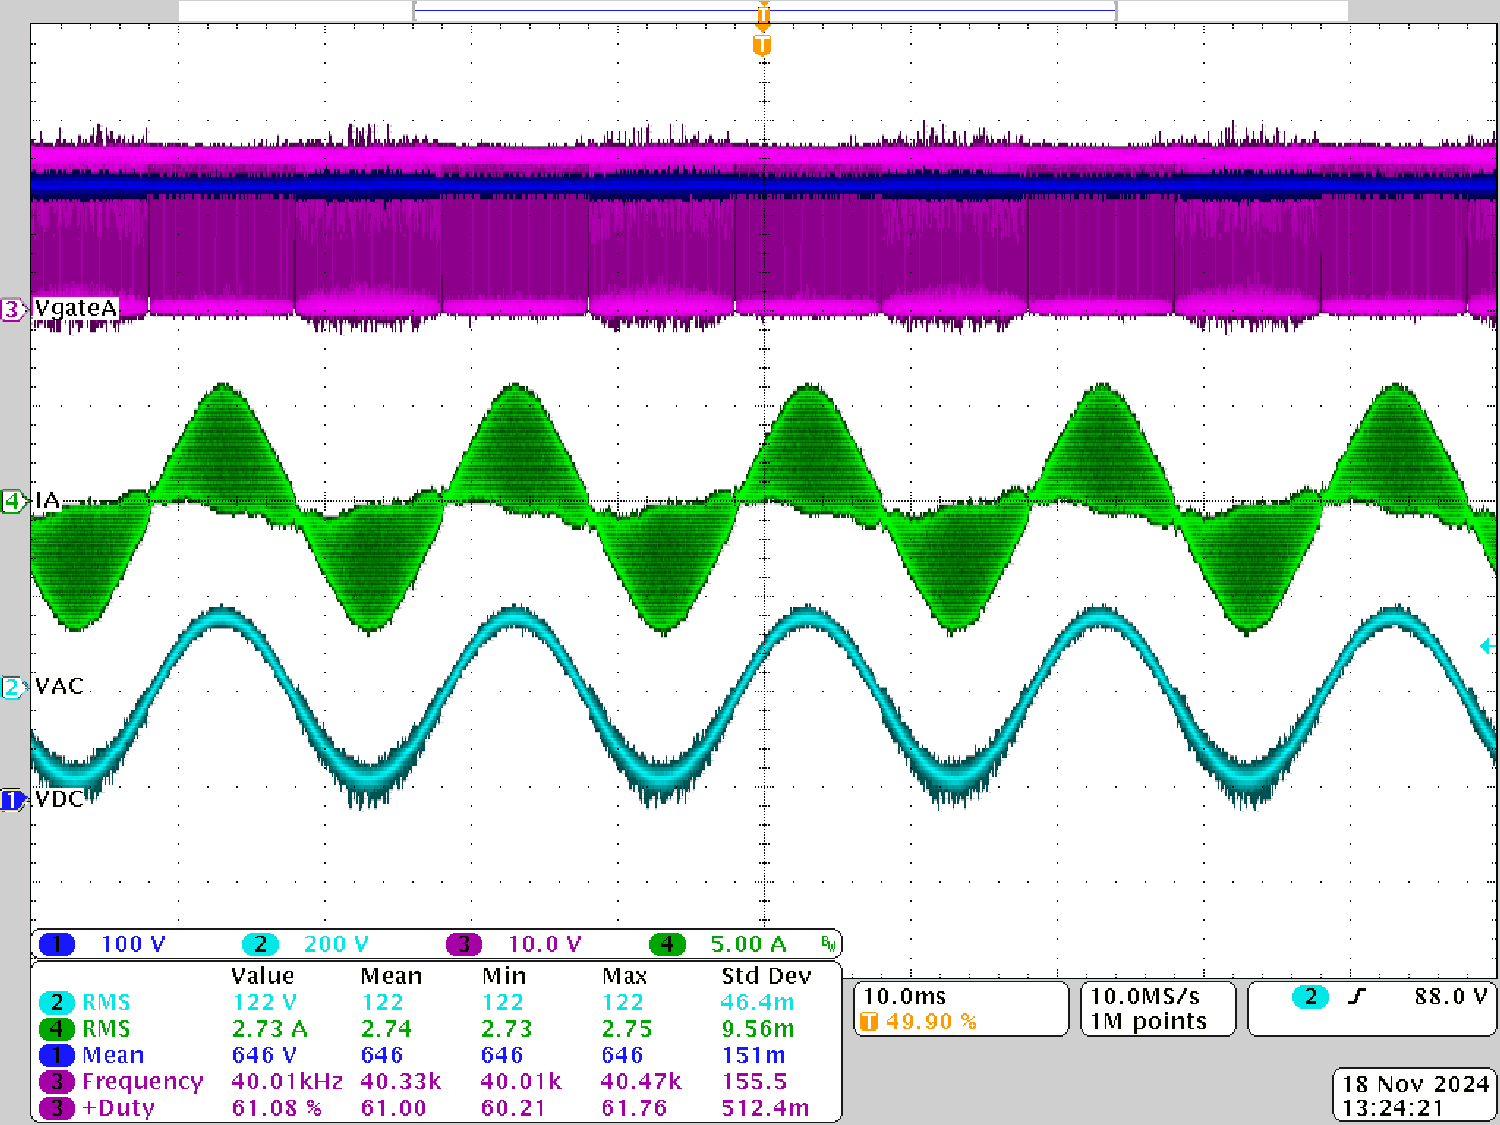
clearTripvariable. - The board now draws the sinusoidal current. Figure 3-31 shows the scope capture.
 Figure 3-31 Build Level 4: Scope Capture Ia and Va (120VRMS L-N) With Full PFC
- CH1 (Blue): DCBUS output voltage
- CH2 (Light blue): AC input phase A voltage
- CH3 (Pink): IGBT gate voltage
- CH4 (Green): AC Input phase A current
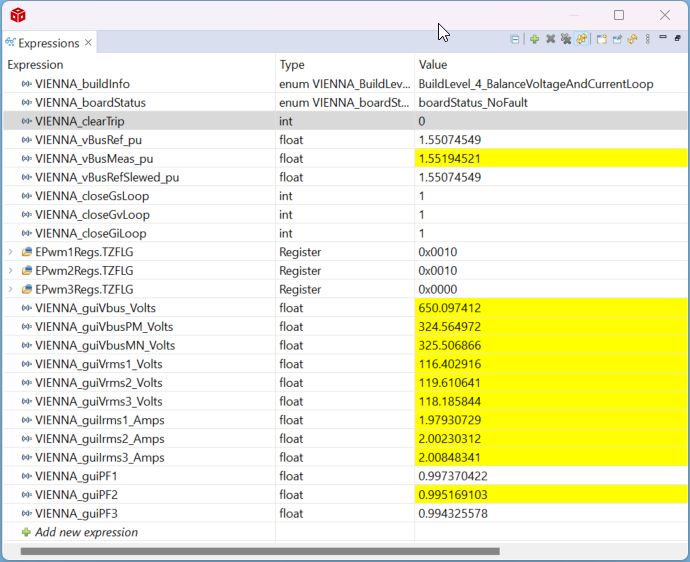
- Check the Expressions window shown in Figure 3-32. The DC bus voltages is also balanced, that is, the
guiVbusPMandguiVbusMNvariables are almost equal, which shows that the closed loop balance controller is working. Figure 3-32 Build Level 4:
Expressions Window With 120VAC and 650VDC
 - The balance loop open loop gain is controlled by the
Gs_GainKpvariable and can be adjusted in case the bandwidth is not enough. Though, for the balance loop, the bandwidth needs to be lower than the outer voltage loop and only 1Hz to 2Hz of bandwidth is sufficient. - To bring the system to a safe stop bring the input AC voltage down to
zero, observe the
guiVBusvariable comes down to zero as well. - Fully halting the MCU when in real-time mode is a two-step process. First, halt
the processor by using the Halt button on the toolbar (
 ) or by using
Target > Halt. Then take the MCU out of real-time mode by
clicking on the
  button. Finally reset the MCU by selecting the
  button.
 - Close the CCS debug session by clicking on Terminate Debug Session
(Target > Terminate all).
 .
.