DLPU132A October 2023 – March 2024 DLPC964
- 1
- Description
- Get Started
- Features
- Applications
- 6
- 1Evaluation Module Overview
-
2Hardware
- 2.1 DLPLCRC964EVM Power Supply Requirements
- 2.2
DLPLCRC964EVM Connections
- 2.2.1 J1, J2 - HPC FMC Connector (Male)
- 2.2.2 J3 - Input Power
- 2.2.3 J4 - TestMux Connector
- 2.2.4 J6, J8 - I2C Address Selectors
- 2.2.5 J7 - JTAG Boundary Scan
- 2.2.6 J9 - Micro-B USB Connector
- 2.2.7 J10 - I2C Connector
- 2.2.8 J11 - 3.3V GPIO Connector
- 2.2.9 J12 - 1.8V GPIO Connector
- 2.2.10 J13, J14, J15, J16 - DMD EVM Board Flex Cable Connectors
- 2.2.11 J17 - DMD_DMux Connector
- 2.2.12 J18 - FanSink Connector
- 2.2.13 Switches
- 2.2.14 DLP LightCrafter DLPC964 LEDs
- 2.3 EVM Assembly
- 2.4 Quick Start
- 3Software
- 4Hardware Design Files
- 5Additional Information
- 6Related Documentation from Texas Instruments
- 7Revision History
3.1.5.2 Programming the DLPC964 Controller
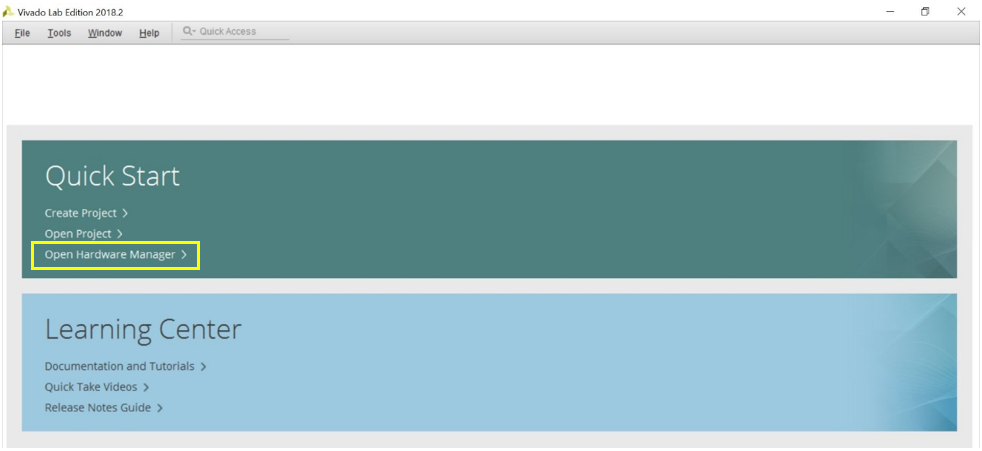
- Launch the Vivado Lab Solutions 2018.2
application. Once the application opens, select Open Hardware Manager
from the main window.Note: Click the link above to download Vivado Lab Solutions 2018.2. Once the web page is loaded, find the archived 2018.2 folder and then navigate to the Vivado Lab Solutions 2018.2 downloadable link and download the installation.

- Once the Hardware Manager is open, check that the JTAG is connected to jumper J7 on the DLPLCRC964EVM board and that the port is connected to a PC. Once JTAG is properly connected, plug the 12V DC power supply into the barrel jack on the board and power on.
- Once JTAG is properly connected and the board is powered on, the next step is selecting the target device that is going to be programmed.
- In the Hardware Manager
window, select Open Target > Auto Connect to find the target
device being programmed.

- Once the
target device is detected, the target device is going to be displayed in the
bottom left corner, showing current status of device.

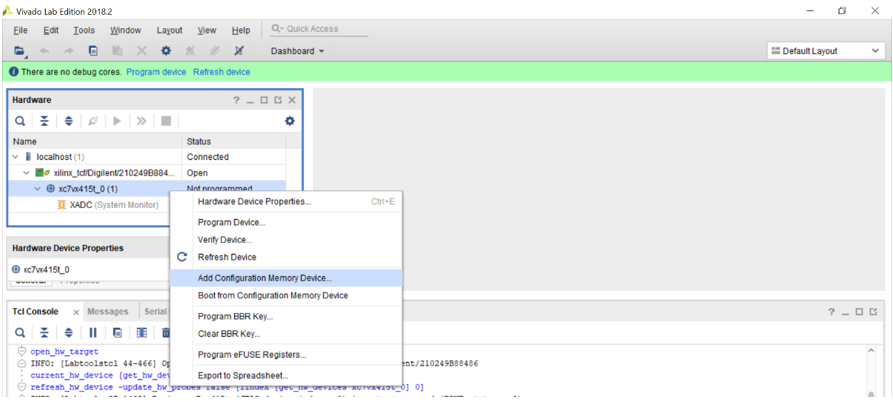
- Right-click on the FPGA and
select “Add Configuration Memory Device.”

- Select the correct flash device
that is connected to the FPGA device on the DLPLCRC964EVM board. Input the
parameters below to select the correct flash device.
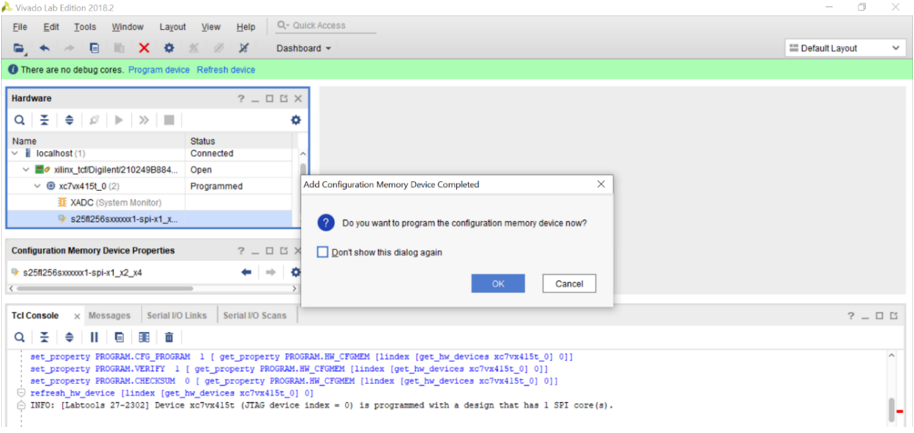
Manufacturer = Spansion Type = SPI Density = 256Mb Width = x1_x2_x4 Part Number = s25fl256sxxxxxx1 - Once the appropriate flash device
is selected, a dialog box is going to pop up asking if the user wants to program
the configuration device (SPI Flash). Click OK.

- Go to
Configuration file and select the appropriate
.mcsfile needed to program the flash device.Note: The.mcscan be downloaded from the DLPLCRC964EVM Tool Page. Locate and download the DLPR964-FW package which includes the appropriate.mcsto program the DLPC964 Controller. - After clicking OK, the
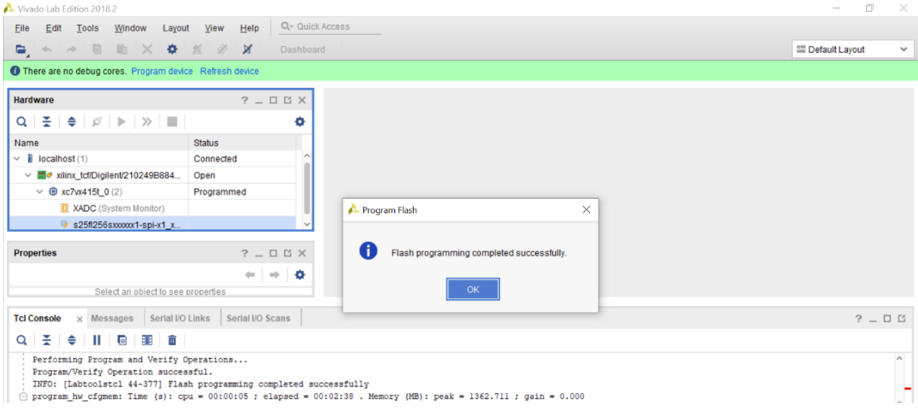
Vivado Hardware Manager is going to program the flash of the board and verify
that the flash was programmed successfully.

- Complete a power cycle on the DLPLCRC964EVM board. Unplug power from the barrel jack connector J3 and then plug power back into barrel jack connector. After the FPGA is programmed successfully, DLPC964 Done (D4) is going to illuminate green and the DLPC964 Heartbeat (D5) has a heartbeat that flashes on/off.