SLUUBM0D May 2017 – October 2020 TPS92518 , TPS92518-Q1 , TPS92518HV , TPS92518HV-Q1
- Trademarks
- 1Description
- 2Performance Specifications
- 3Performance Data and Typical Characteristic Curves
- 4Schematic, PCB Layout, and Bill of Materials
- 5Software
- 6Use of LEDSPIMCUEVM-879 Microcontroller Board for SPI Communications with the TPS92518
- 7Revision History
6 Use of LEDSPIMCUEVM-879 Microcontroller Board for SPI Communications with the TPS92518
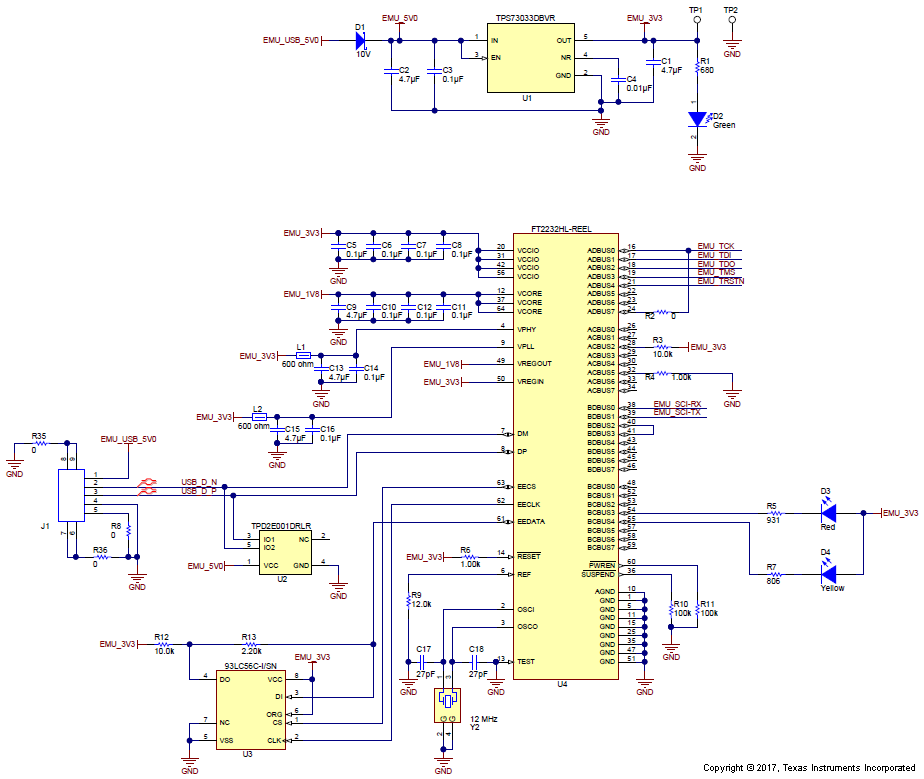
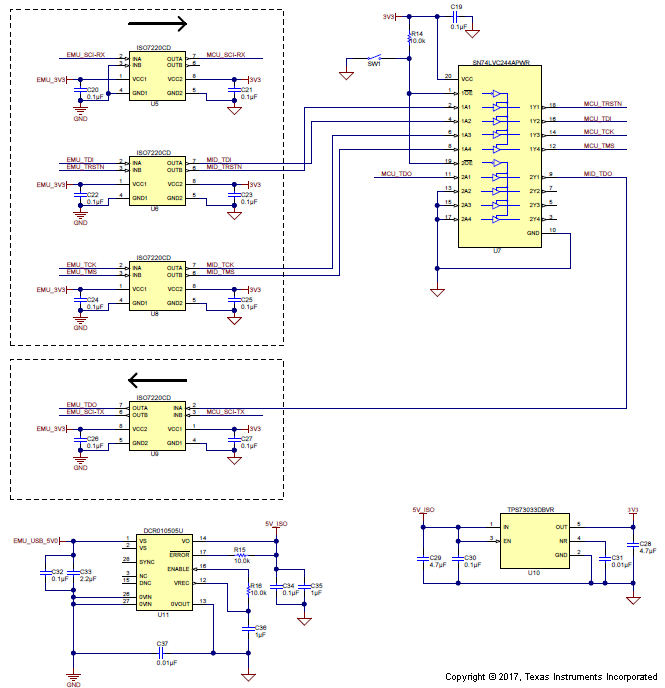
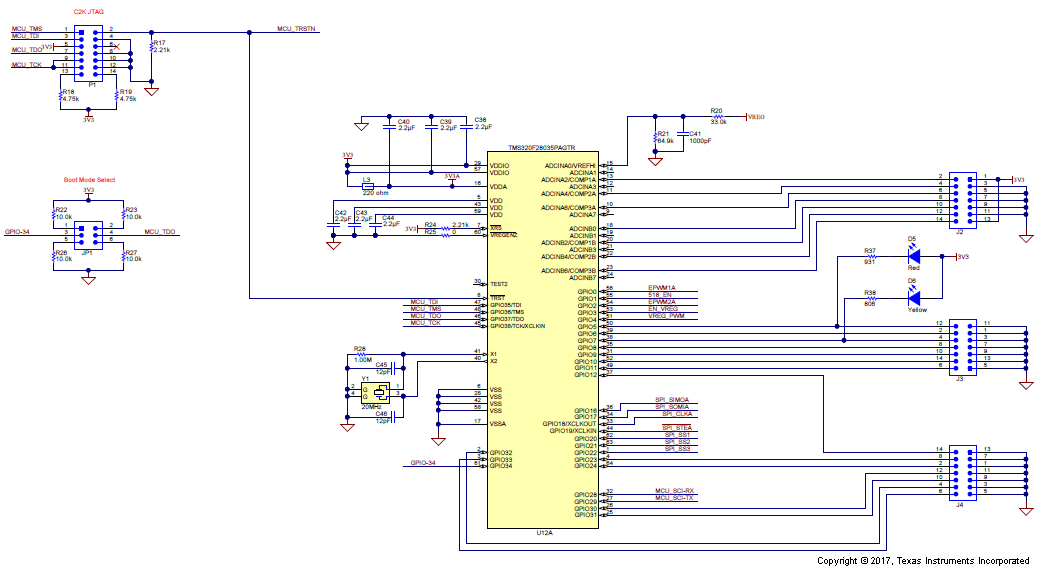
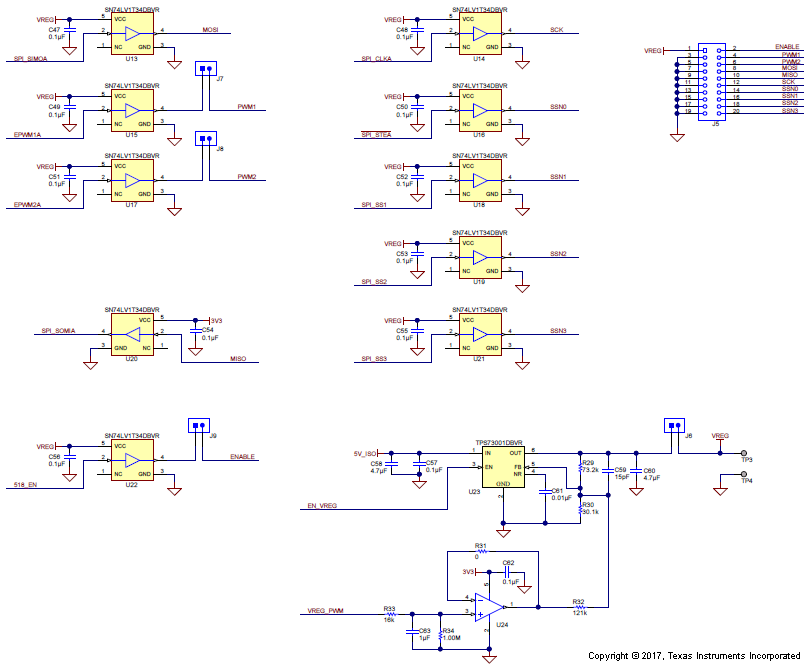
The LEDSPIMCUEVM-879 evaluation board is available separately to be used with TI's TPS92518 Bench Evaluation Software. It comes with firmware installed that converts the software settings into SPI and hardware-generated PWM signals to drive the TPS92518. It is set up correctly as packaged, but make sure that jumpers J6, J7, J8, and J9 are all shorted. These provide the power for the SPI pullup hardware, the PWM signals, and the enable signal to the TPS92518. Reprogramming the LEDSPIMCUEVM-879 is beyond the scope of this document, and firmware for reflashing the existing board is not supplied. The board has DC isolation between the USB section and the TPS92518 driver section, and voltage translators to handle the I/O logic level requirements of the TPS92518. Schematics are supplied as a guide to determining if the microcontroller board has been damaged and is not communicating correctly with the TPS92518 evaluation board.
 Figure 6-1 LEDSPIMCUEVM-879 Schematic, Page 1
 Figure 6-2 LEDSPIMCUEVM-879 Schematic, Page 2
 Figure 6-3 LEDSPIMCUEVM-879 Schematic, Page 3
 Figure 6-4 LEDSPIMCUEVM-879 Schematic, Page 4