SLUUCV7 December   2023 TPS1213-Q1


  1.   1
  2.   Description
  3.   Features
  4.   Applications
  5.   5
  6. 1Evaluation Module Overview
    1. 1.1 Introduction
    2. 1.2 Kit Contents
    3. 1.3 Specification
    4. 1.4 Device Information
  7. 2Hardware
    1. 2.1 General Configurations
      1. 2.1.1 Physical Access
      2. 2.1.2 Test Equipment and Setup
        1. 2.1.2.1 Power Supplies
        2. 2.1.2.2 Meters
        3. 2.1.2.3 Oscilloscope
        4. 2.1.2.4 Loads
  8. 3Implementation Results
    1. 3.1 Test Setup and Procedures
      1. 3.1.1 Startup in Low Power Mode
      2. 3.1.2 State Transition (LPM to Active Mode through Load Wakeup Trigger)
      3. 3.1.3 State Transition (LPM to Active Mode with LPMb Trigger)
      4. 3.1.4 Inrush Current Limit Test
      5. 3.1.5 Overload and Short Circuit Protection Test
  9. 4Hardware Design Files
    1. 4.1 Schematic
    2. 4.2 PCB Layout
    3. 4.3 Bill Of Materials (BoM)
  10. 5Additional Information
    1.     Trademarks

Inrush Current Limit Test

Use the following instructions to measure the inrush current during startup in low power mode.

  1. Populate R3 = 10 Ω and C1 = 15 nF on the EVM.
  2. Connect 220 µF at the output terminals of the EVM.
  3. Apply 12 V at the input of the EVM at no-load.
  4. Enable the EN/UVLO to HIGH.
  5. Observe the waveform at VOUT (TP3) with an oscilloscope to measure the slew rate and risetime with a given input voltage of 12 V.
  6. Repeat the same test with 0.5A load at the output to see the state transition from LPM to active mode.
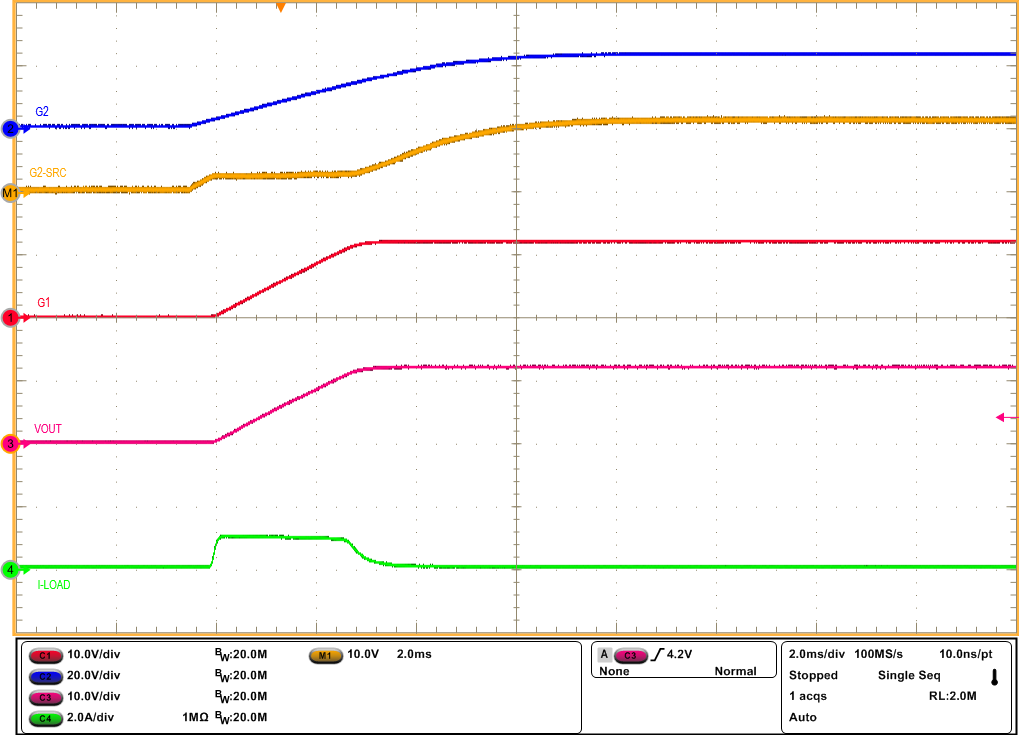
GUID-20231128-SS0I-NZ9D-RQLX-FPJ0CDZJZW3F-low.pngFigure 3-8 Inrush Current Profile with 220 µF at the Output (LPMb = Low)
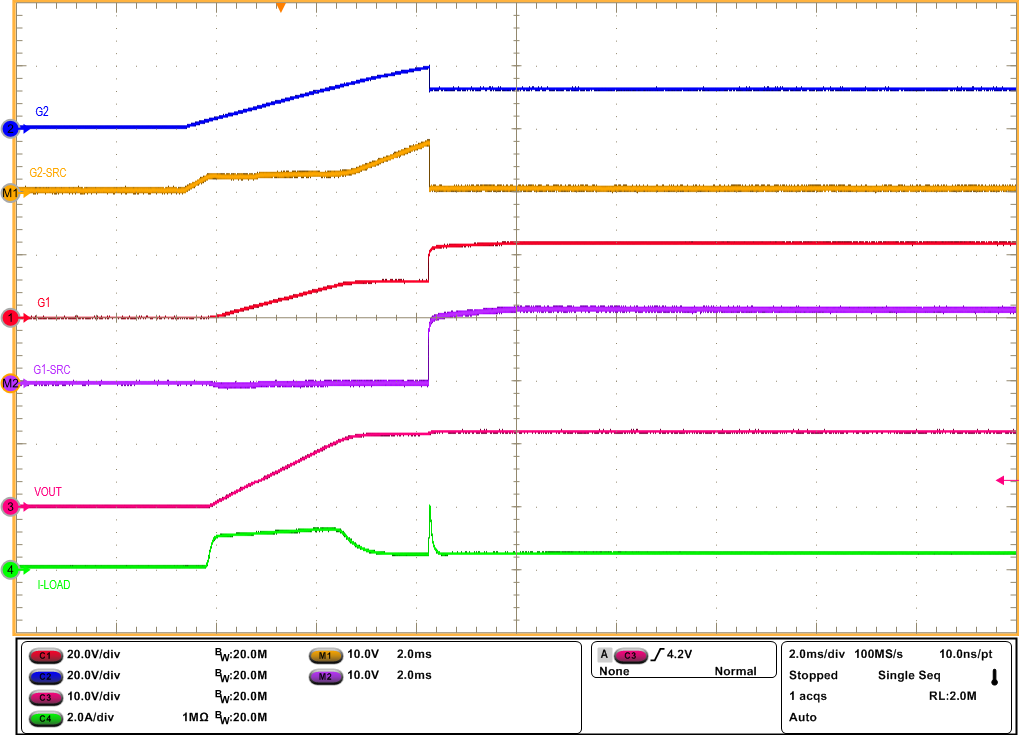
GUID-20231128-SS0I-FVZ2-3STD-QPQVXFGJDS35-low.pngFigure 3-9 Inrush Current Profile with 220 µF at the Output and 0.5A Load (LPMb = Low)