SLAA600E June 2013 – January 2024
- 1
- Abstract
- Trademarks
- 1Introduction
- 2Implementation
- 3Customization of MSPBoot
- 4Building MSPBoot
- 5References
- 6Revision History
4.2.3 Building the Target Project
- Select a target processor: MSP430F5529 or MSP430G2553.
- Select a communication interface: I2C, UART, or SPI with CC110x.
- Open CCS and select or create a workspace.
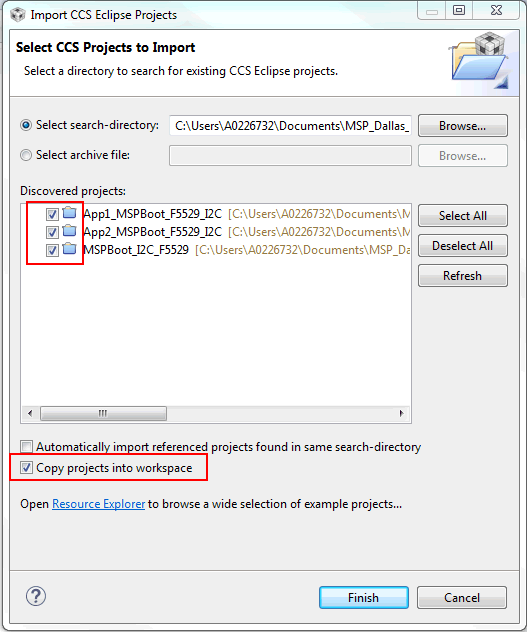
- Import the MSPBoot CCS projects into the workspace. The projects are located in MSPBoot\<target>_Examples\<communication_interface>\
- Select the Copy projects into workspace checkbox to ensure you're working on the project located within your workspace instead of somewhere else on your PC.
 Figure 4-6 Import MSPBoot CCS Projects
 - Build the bootloader
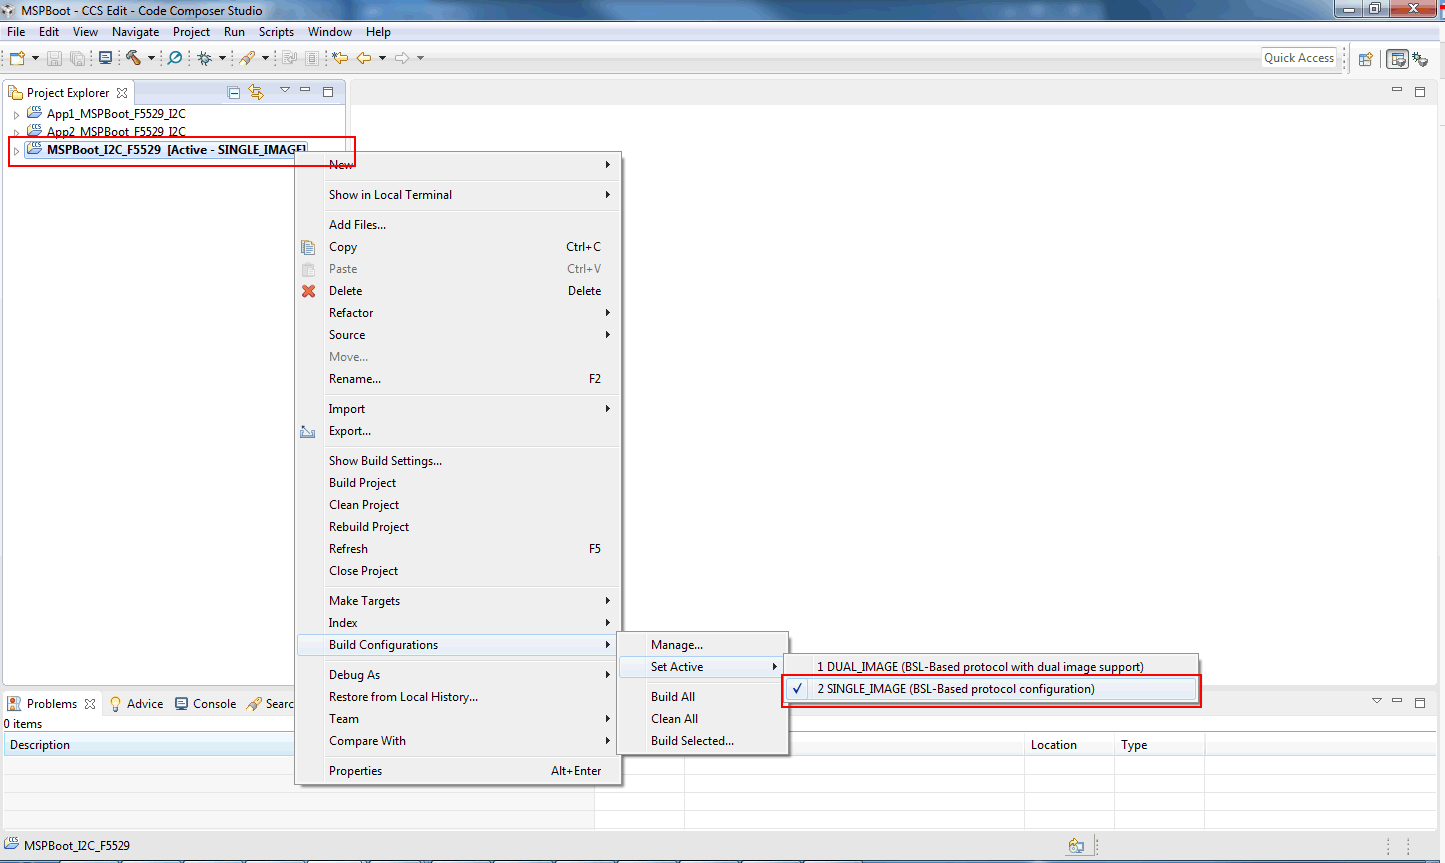
- Select the MSPBoot project
- Select the proper target configuration (single image or dual image)
 Figure 4-7 Select Target Configuration
 - Build
 and Download
  . Only the target LaunchPad development kit should be connected to the PC
 - Build both applications.
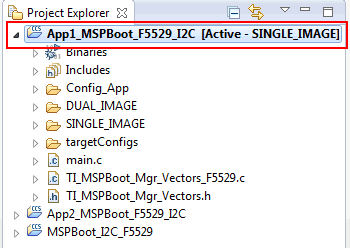
- Select the App1_MSPBoot project and select the same configuration as the bootloader.
 Figure 4-8 Select App1_MSPBoot Project
 - Click the Build
 project. The output is generated after this step, but the output will be converted and downloaded through the host processor. Section 4.1.2.1 explains how to convert the image and Section 4.2.4 explains how to download it using a host demo.
 - Repeat Step 6 for App2_MSPBoot