SLOU583 September   2024 OPT101 , OPT3001 , OPT3001-Q1 , OPT3002 , OPT3004 , OPT3005 , OPT3006 , OPT3007 , OPT4001 , OPT4001-Q1 , OPT4003-Q1 , OPT4048 , OPT4060


  1.   1
  2.   Description
  3.   Features
  4.   4
  5. 1Evaluation Module Overview
    1. 1.1 Introduction
    2. 1.2 Kit Contents
    3. 1.3 Specifications
  6. 2Quick Start Guide
    1. 2.1 Hardware Setup
    2. 2.2 Software Setup
      1. 2.2.1 Hardware Requirements
      2. 2.2.2 Software Installation
      3. 2.2.3 Launching the LIGHTSOURCE01EVM Software
      4. 2.2.4 Software Operation
        1. 2.2.4.1 LIGHTSOURCE01 GUI
    3. 2.3 LIGHTSOURCE01EVM Light Sensor Calibration
      1. 2.3.1 Mounting and Setup
      2. 2.3.2 Calibration Procedure
  7. 3Software
    1. 3.1 Scripts Window
      1. 3.1.1 Hidden IDE Window
      2. 3.1.2 devInit.py
      3. 3.1.3 mLightController.py
  8. 4Serial Commands
    1. 4.1 Latte Command Line
    2. 4.2 Terminal Application
    3. 4.3 List of Commands
  9. 5Hardware Design Files
    1. 5.1 CAD Drawings
  10. 6Compliance Information
    1. 6.1 Compliance and Certifications
  11. 7Additional Information
    1. 7.1 Troubleshooting
      1. 7.1.1 Microsoft Windows 7 Manual Driver Installation
    2. 7.2 Trademarks

Mounting and Setup

To begin calibration using the LIGHTSOURCE01EVM, fix the EVM on to a mounting fixture. The EVM has a rail mount on the bottom, which can be used to screw the device on to the test setup. For more information on the dimensions of the mounting fixture, please refer to the Section 5.
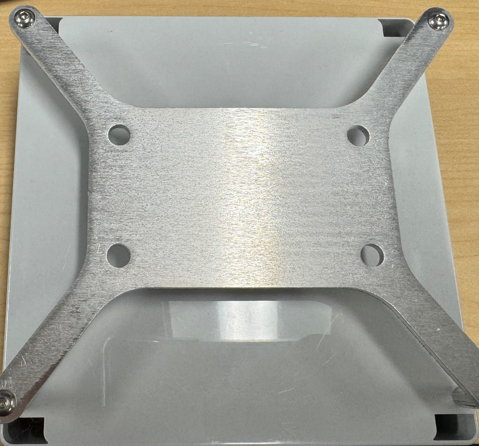
LIGHTSOURCE01EVM Rail Mount Figure 2-13 Rail Mount

Below is an example of a mounting fixture that can be used to fix the EVM in place.
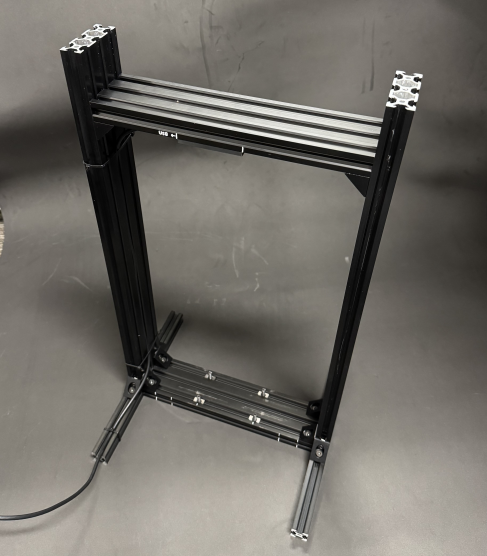
LIGHTSOURCE01EVM Mounting Fixture Figure 2-14 Mounting Fixture

The EVM can then be screwed on using the screws at the bottom such as in the figure below.
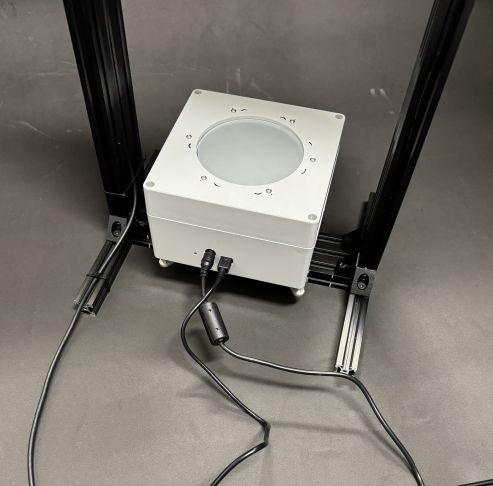
LIGHTSOURCE01EVM LIGHTSOURCE01EVM
                    Mounted Figure 2-15 LIGHTSOURCE01EVM Mounted