SLUUCF8 March 2021 TPS53676
7 Fusion GUI
Fusion GUI allows the user to change several parameters of the TPS53676 controller.
This section describes the Fusion interface. For more details on the parameters modifications, please refer to the datasheet.
The Fusion GUI restores user preferences and data during startup.
 Figure 7-1 Launch Fusion GUI
The Fusion GUI associates the rail with the TPS53676 controller on the [System View] screen as shown in Figure 7-2. For power systems that are populated with multiple Fusion GUI compatible devices, all of them show up in the System View window. if TPS53676 controller configured for only RAIL#1 like N+0, only RAIL#1 display as shown in Figure 7-2. For two rail N+M configuration display as shown in Figure 7-3
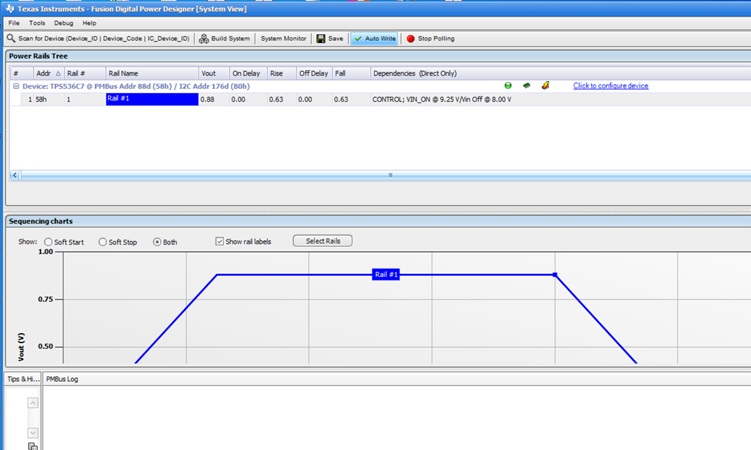 Figure 7-2 System View for N+0 phase configuration
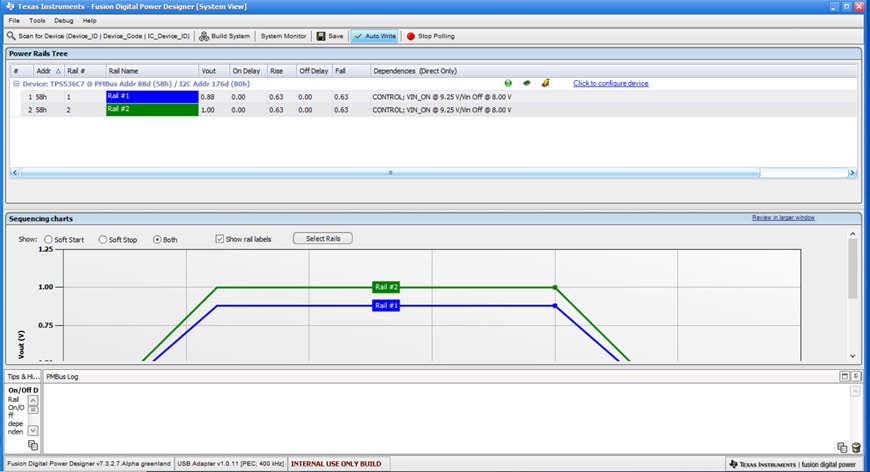 Figure 7-3 System View for N+M phase configuration
Select System Monitor from the System View to add a new window. This window displays real-time system level information about all Fusion compatible devices connected as shown in Figure 7-5.
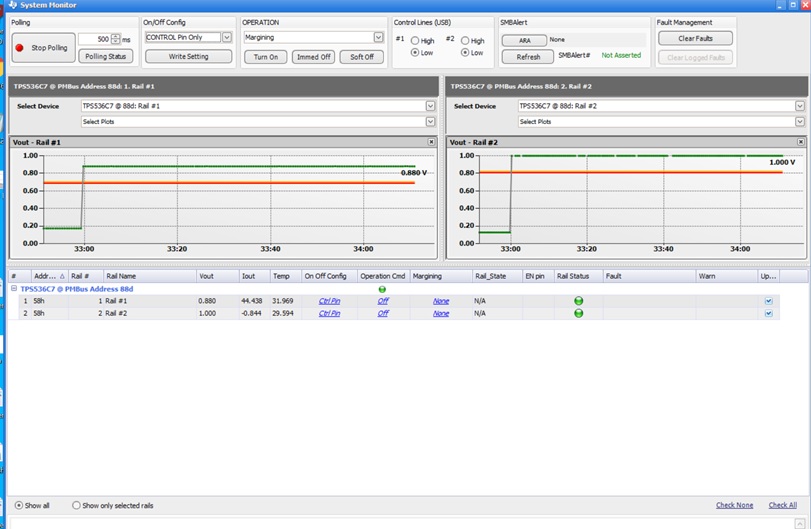 Figure 7-4 System Monitor for N+M phase configuration
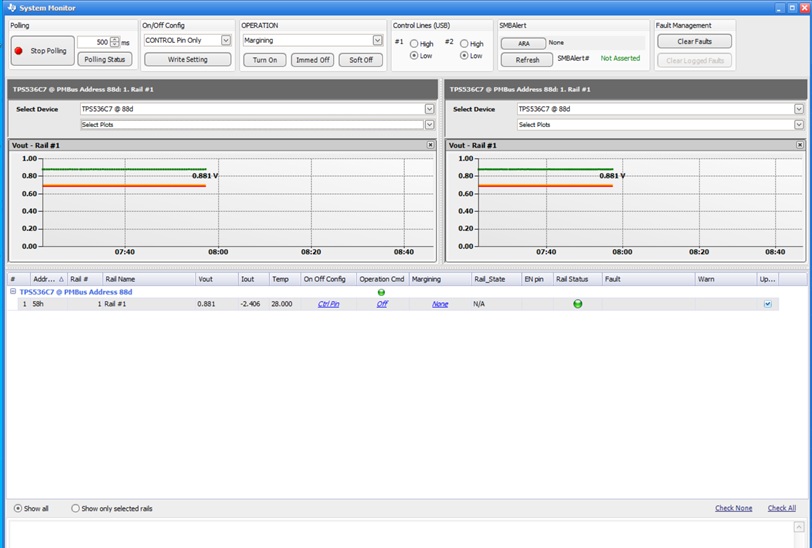 Figure 7-5 System Monitor for N+0 phase configuration
Click to Configure Device in the System View to access a specific device. A new window opens to the [General] tab on the [ System Configuration] page of the GUI as shown in Figure 7-6. Click Rail Configuration to change different parameters of a Rail. The illustrations below show Rail A's parameters. To configure these parameters on the other Rail, simply change options in the drop-down menu on the top- right corner.
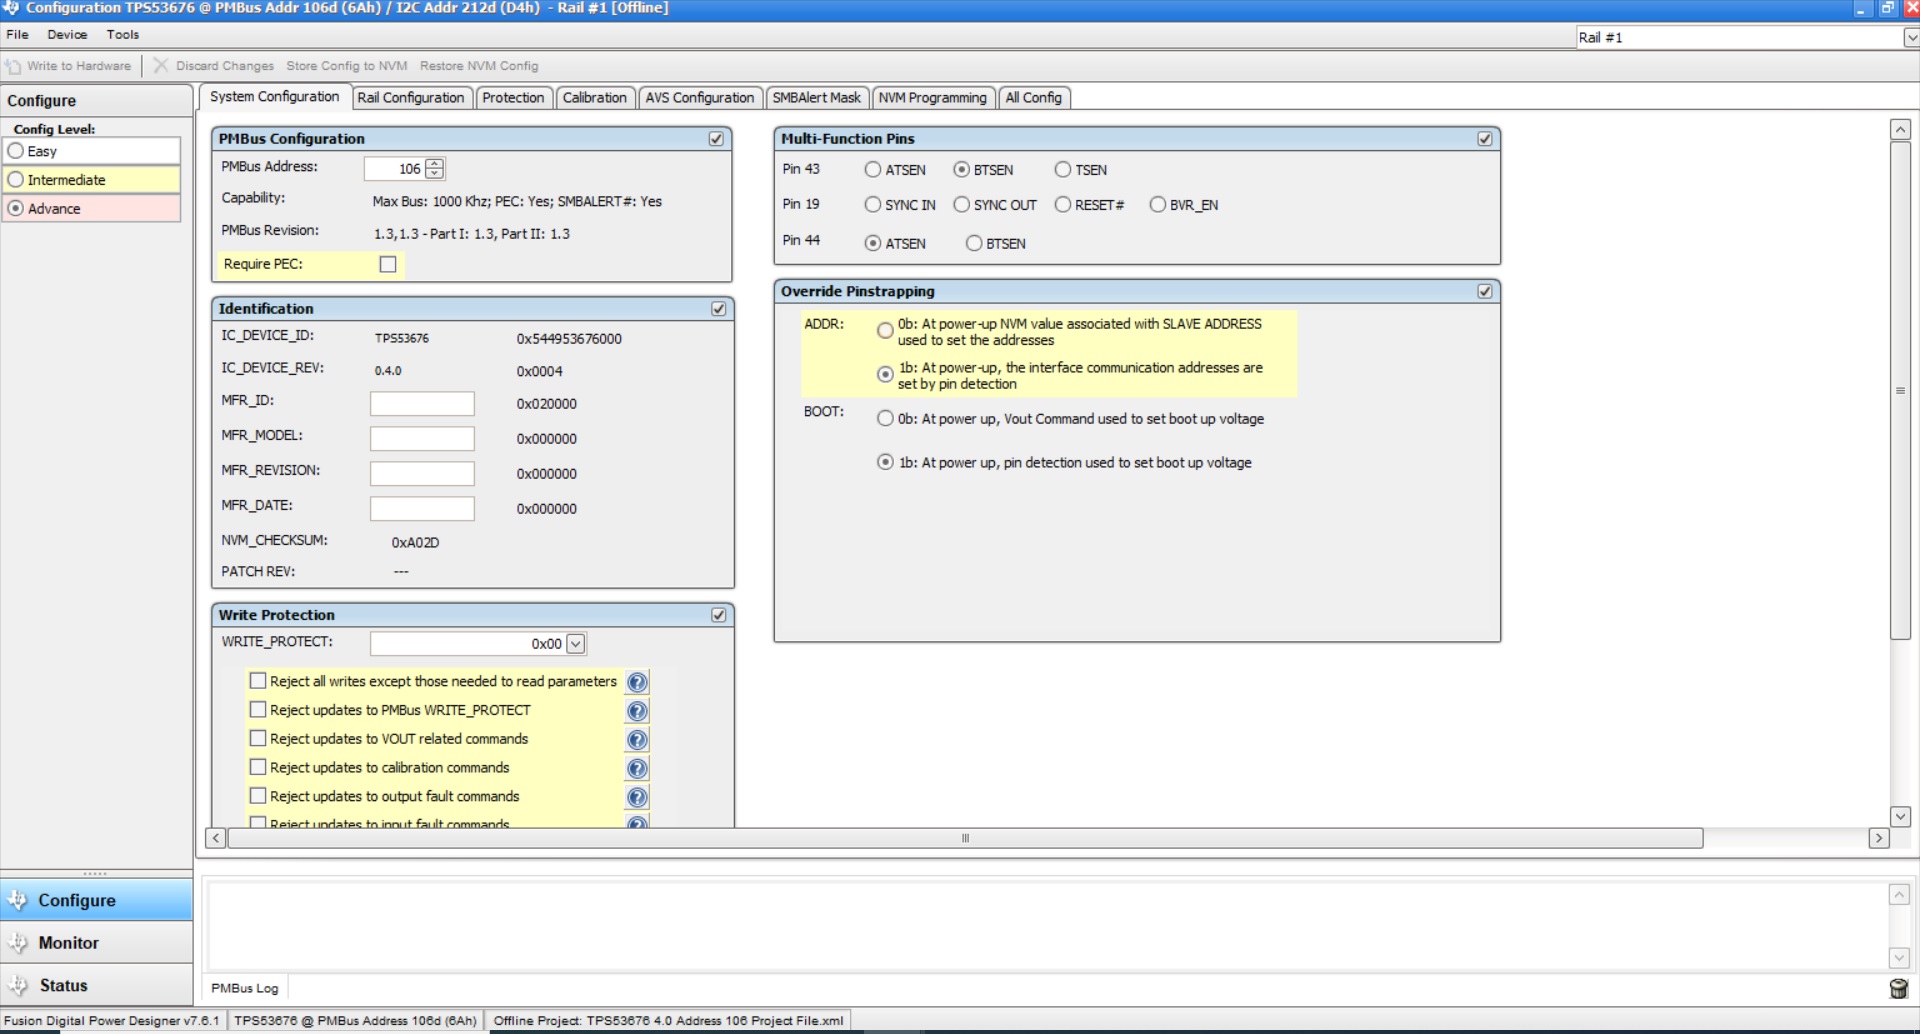 Figure 7-6 General System Configure Tab
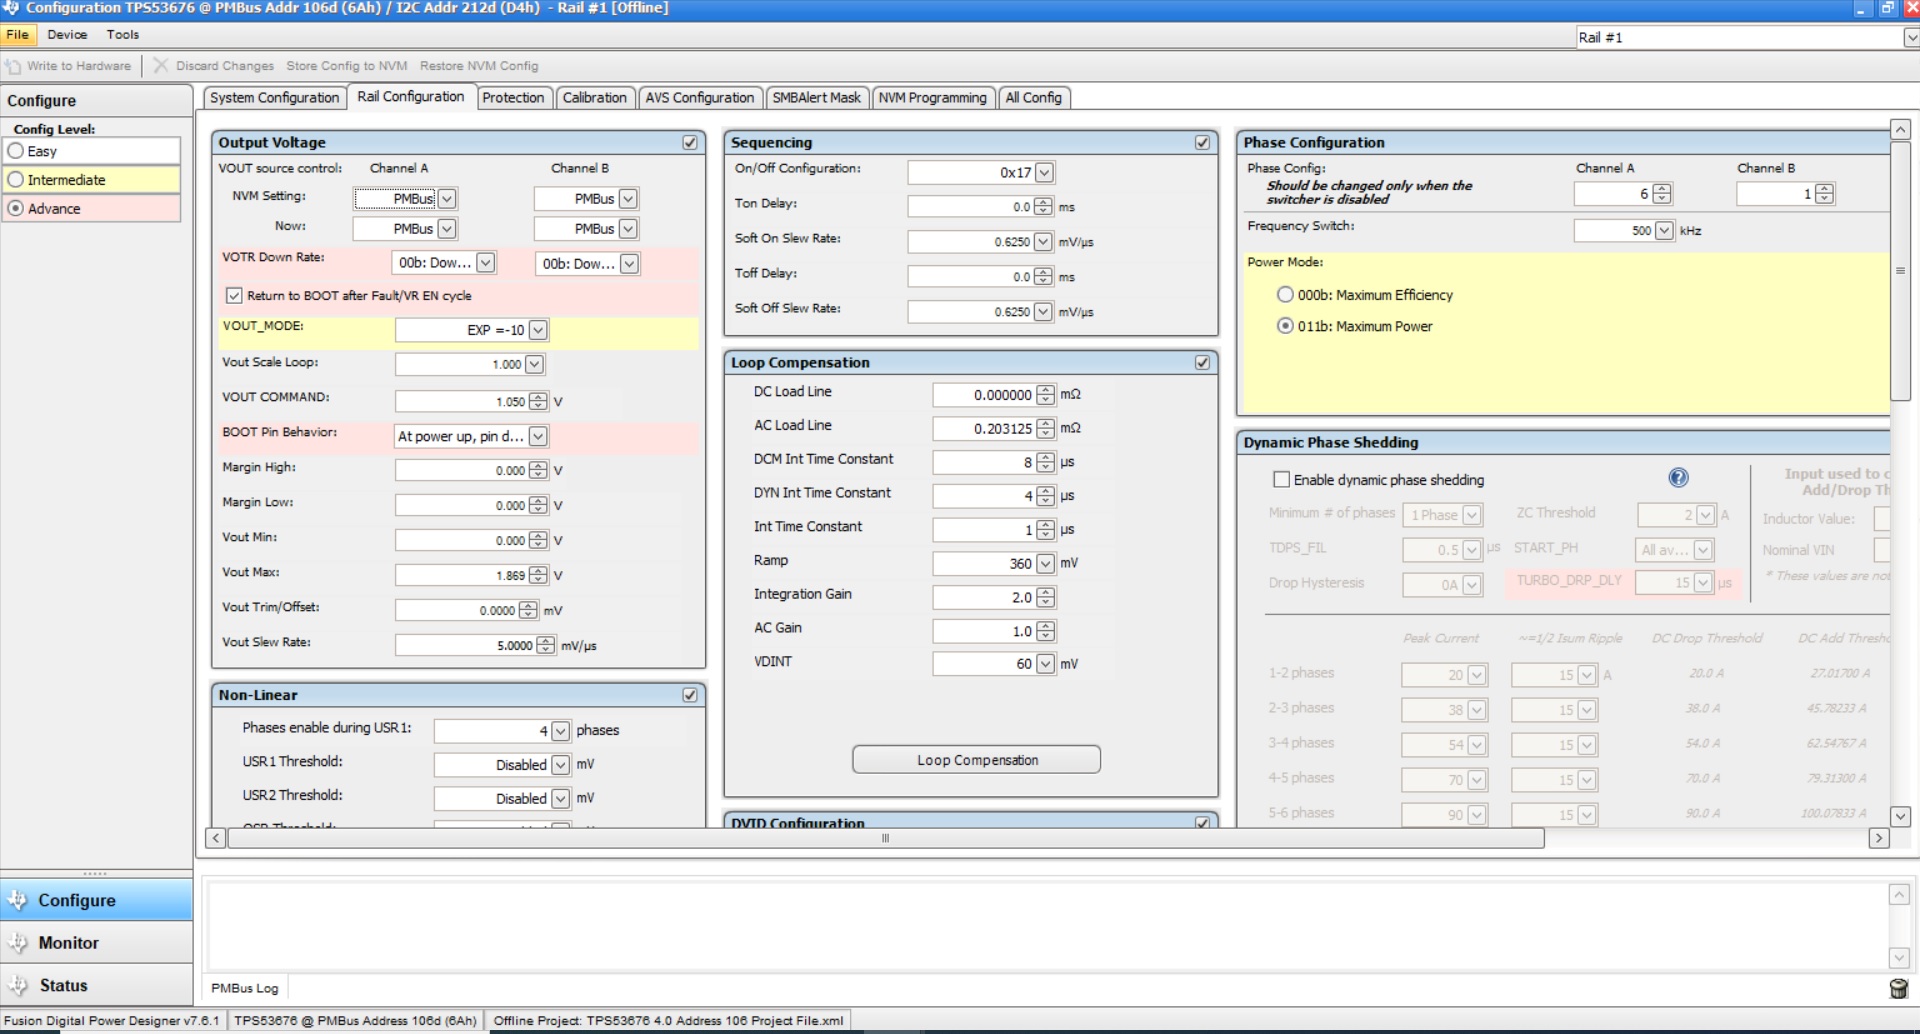 Figure 7-7 Rail Configuration Tab
Click the Advance option to select the Phase configuration as shown in Figure 7-8 . Each phase can be selected as enabled/disabled, RAIL0/RAIL1 and firing order. For more details refer to TPS53676 datasheet.
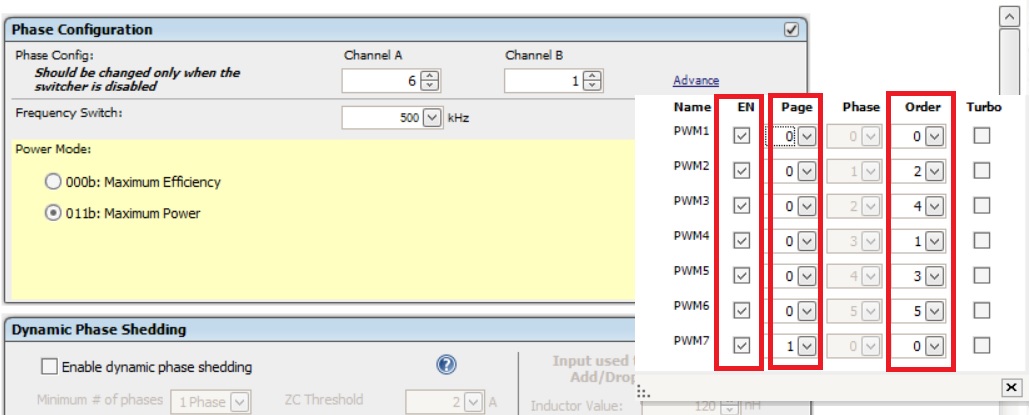 Figure 7-8 Phase N+M Configuration
Protection tab: Click the Protection tab to select parameter as shown in. Depending on your application's features, available protections can include
Input voltage
output voltage.... selected as shown in Figure 7-9.
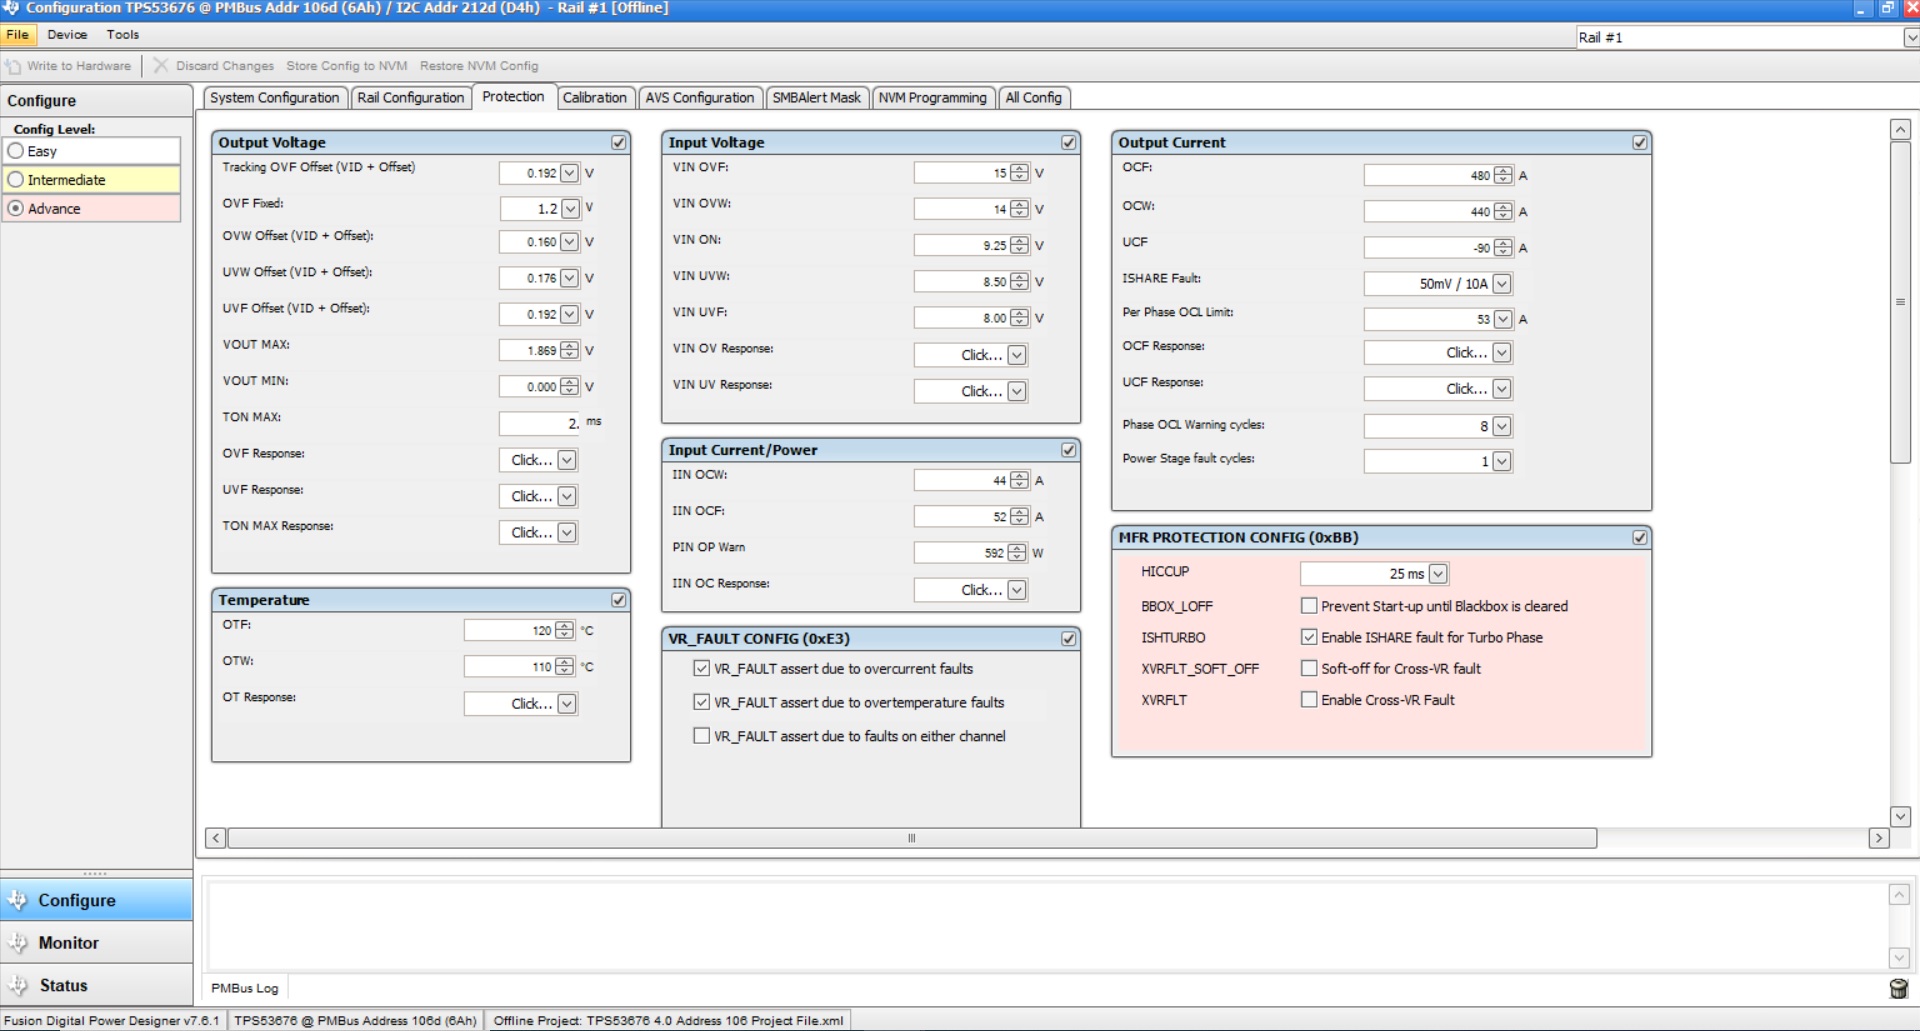 Figure 7-9 System Protection parameters config
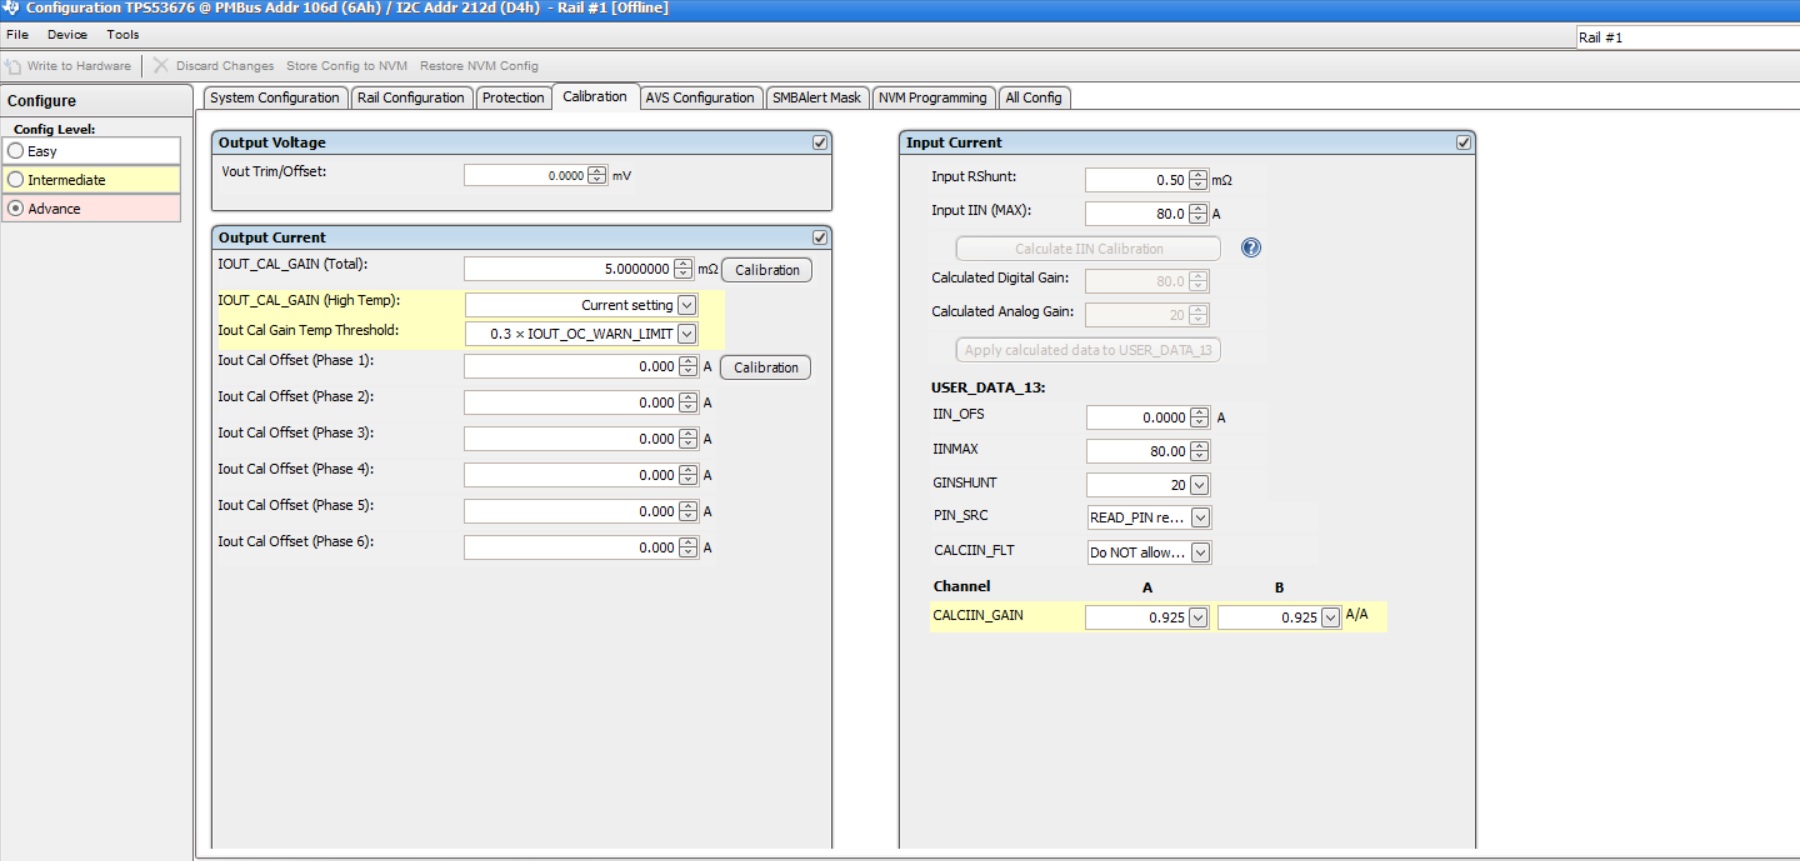 Figure 7-10 Calibration tab
The [All Config] tab on the [Configure] page as shown in Figure 7-11 summarizes all the configurable parameters. This screen contains additional details such as the Hexadecimal encoding for the parameters.
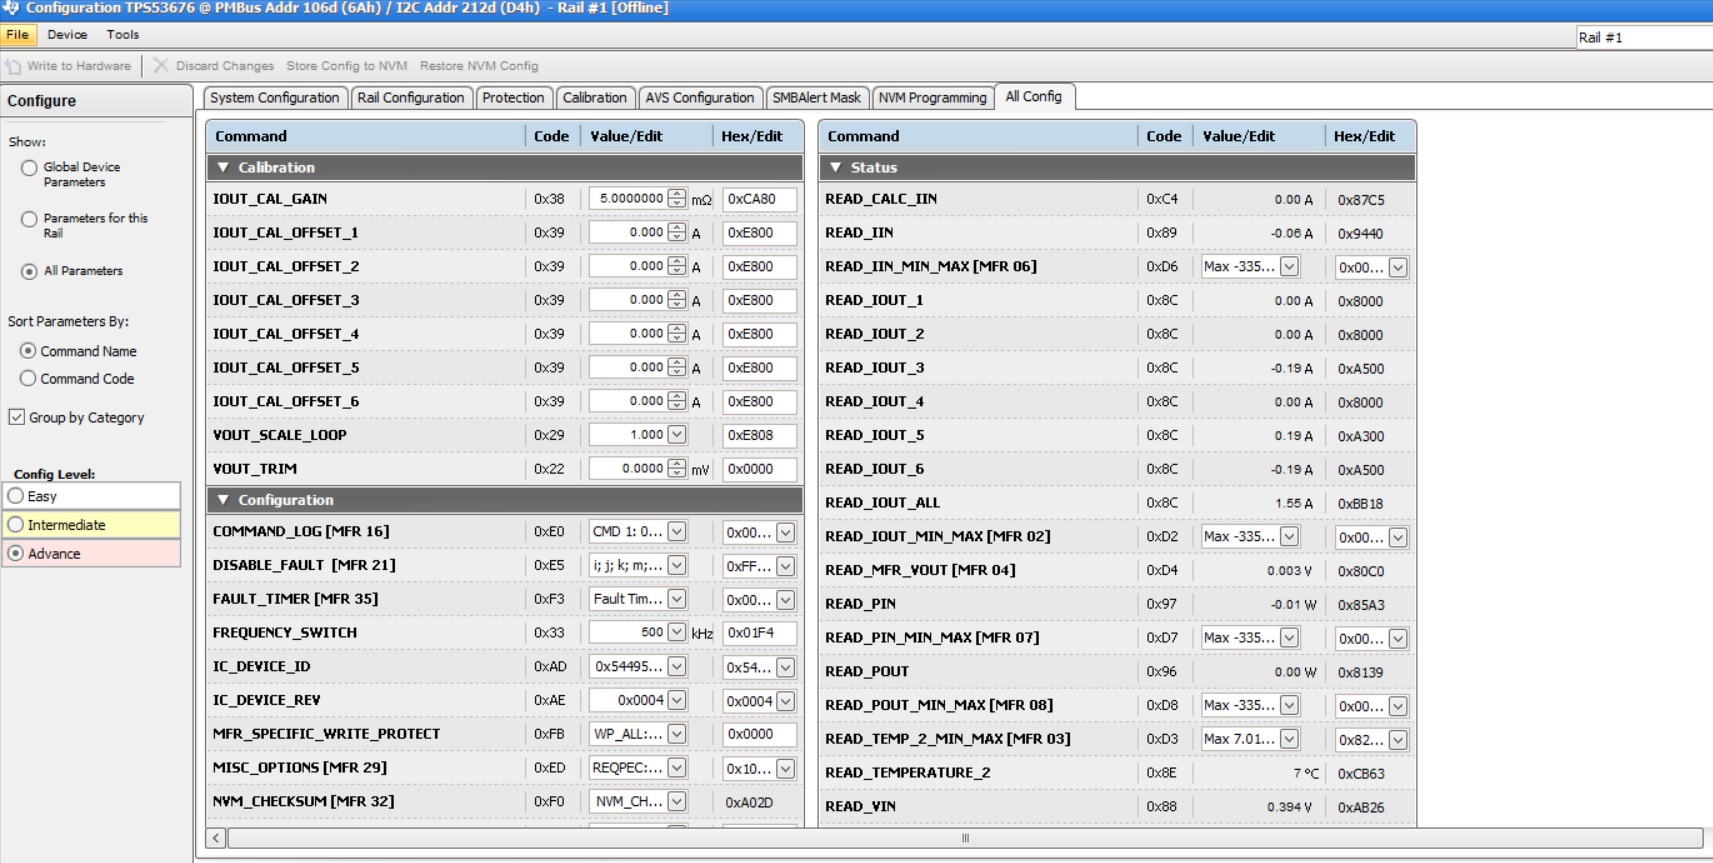 Figure 7-11 All Configuration tab
If the user selects to change a parameter then the GUI will display an orange “U” icon, which is offering an [Undo Change] option, as shown in Figure 7-12. The software will not update the controller with the change until the user performs a [Write to Hardware].
When a [Write to Hardware] is performed, the change will be implemented in the controller and stored in it's volatile memory. Given that the parameter is stored in volatile memory, if the EVM is power cycled, the parameter will revert back to the previous setting.
If the user wishes to make this the new default value for the parameter then a [Store Config to NVM] must be performed, which commits the value to non-volatile memory.
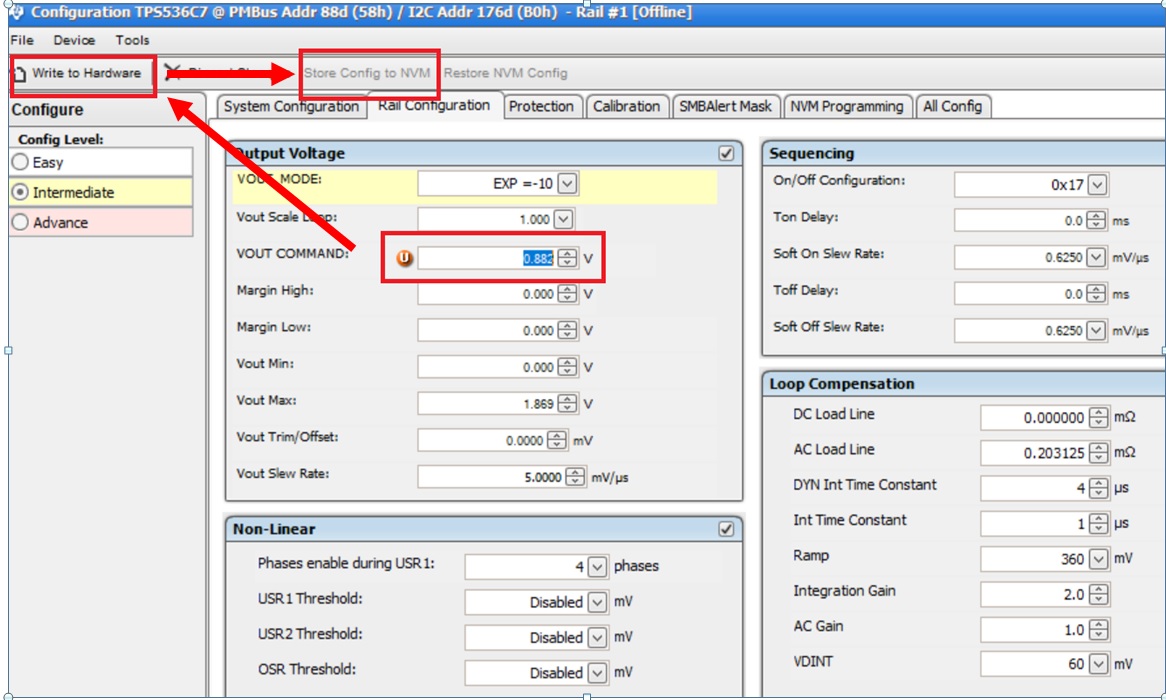 Figure 7-12 Static Configure Pop-Up
Selecting the [Monitor] page from the lower left corner of the TPS53676 Configuration window will display the Figure 7-13 which shows real-time parameter data as measured by the controller. Note that one can switch between monitoring Rail A and Rail B. This screen provides access to the following parameters:
- Graphs of
- VIN
- IIN
- VOUT
- IOUT
- Temperature
- Start/Stop Polling controls the updating of the real-time display of data
- Quick access to ON or OFF configuration
- Control pin activation and OPERATION command
- Margin control
- Clear Fault clears any prior fault flags
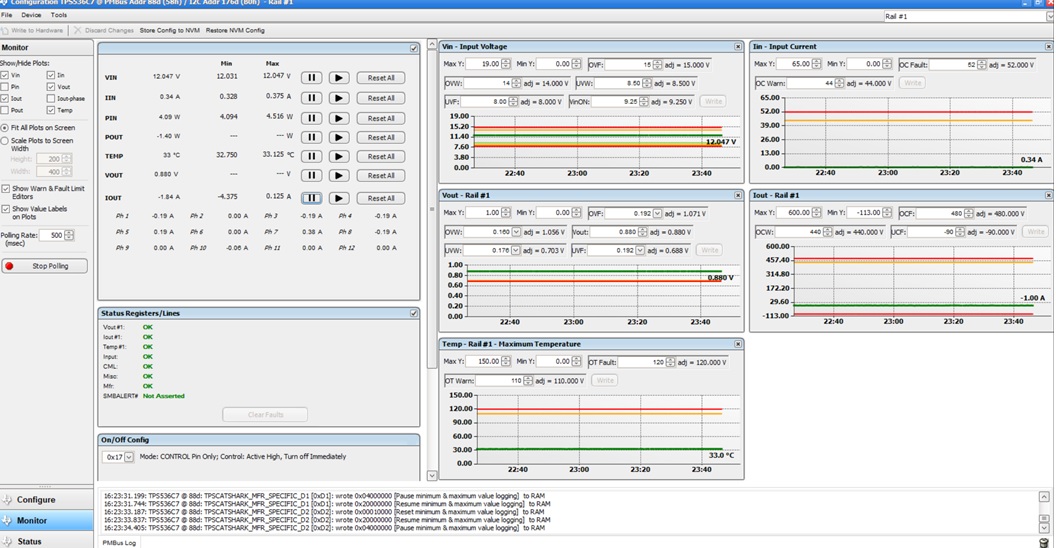 Figure 7-13 Monitor tab
Selecting [Status] from lower left corner shows the current status of the controller as well as any prior faults or warnings which had not been cleared, as shown on the Figure 7-14.
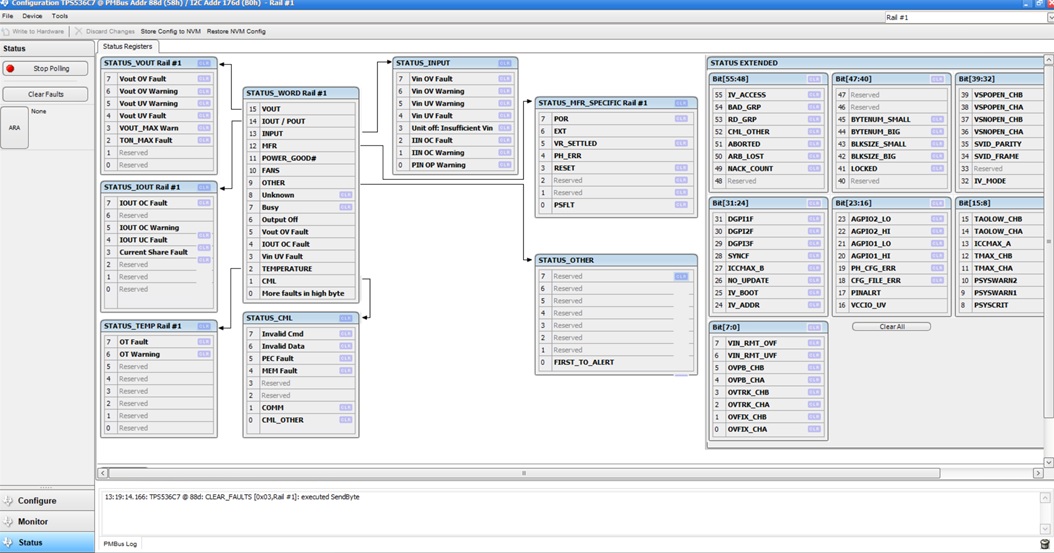 Figure 7-14 Status tab