SPRADH0 August 2024 AM625 , AM6442 , AM69 , TDA4VM
- 1
- Abstract
- Trademarks
- 1Introduction
- 2Evaluation Platform and Methods
- 3Performance Metrics
- 4Optimizations
- 5Summary
- 6References
- 7Appendix A: How to Setup TI Embedded Processors as EtherCAT Controller Using the CODESYS Stack
- 8Appendix B: How to Enable Unlimited Runtime on CODESYS Stack
7.4.3 CODESYS Development System Project
- Set up an EtherCAT network similar to what is shown in Section 7.3
- Start the CODESYS control service on the EtherCAT controller with one of the
following
commands
$ /opt/codesys/bin/codesyscontrol.bin /etc/CODESYSControl.cfg $ systemctl start codesyscontrol.service $ /etc/init.d/codesyscontrol start - Open CODESYS Development System V3 on your Windows PC
-
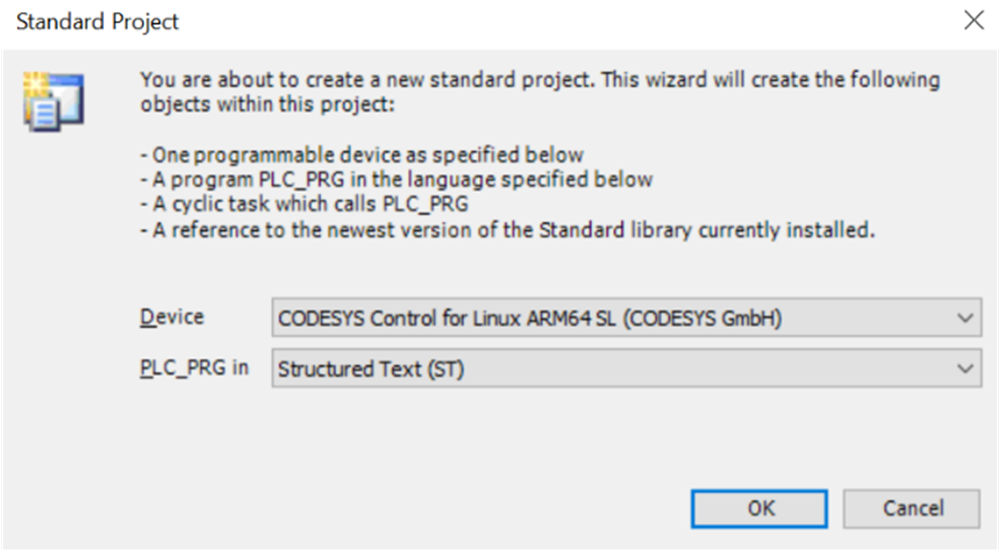
Create a new standard project with the following steps
- Click on "File > New Project"
- Select "Standard project"
- Select a name for the project and where to store the project
- Select "CODESYS Control for Linux ARM64 SL (CODESYS GmbH)" for "Device" entry
- Select "Structured Text(ST)" for "PLC_PRG in" entry
- Click "OK"
 Figure 7-3 CODESYS
Standard Project
- Add the EtherCAT device ESI (EtherCAT Slave Information) files to the project
with the following steps
- For AM243x/AM64x as EtherCAT device
- Verify that AM243x MCU+ SDK or AM64x MCU+ SDK have been installed
- Click on "Tools > Device Repository > Install"
- Navigate to and select
(Similar step for AM64x EtherCAT
devices)
<path-to-AM243-MCU+-SDK>/source/industrial_comms/ethercat_slave/stack/esi/'TI AM243X.R5F Simple.xml'
- Click "Open"
- Click "Close"
- For other EtherCAT devices (for example, Beckhoff devices), obtain and download the ESI files and install to Device Repository in a similar manner
- Scan for EtherCAT controller
device ("Origin" Device) with the following steps
- In the "Devices" window, double click "Device (CODESYS Control for Linux ARM64 SL)"
- Go to the "Communication Settings" and click on "Scan Network" tab
- The name of the EtherCAT
controller device running the CODESYS control service shows up under
Gateway-1
- If the EtherCAT controller does not appear, uncheck "Hide non-matching devices, filter by Target ID" then click "Scan Network"
- Select the device and click "Ok"
- If prompted about
"user management":
- Click "Yes"
- Create a username
and password
- The username and password can be changed by right clicking "Device (CODESYS Control for Linux ARM64 SL)" and clicking "Reset Origin Device [Device]"
- Click "OK"
- Log in
- Add an EtherCAT_Master device
with the following steps
- In the "Devices" window, right click "Device (CODESYS Control for Linux ARM64 SL)"
- Click "Add Device"
- Expand "Fieldbuses > EtherCAT > Master > EtherCAT Master"
- Click "Add Device"
-
Setup your EtherCAT controller as the EtherCAT_Master by matching the MAC address of the Ethernet port that is connecting with the rest of the EtherCAT devices.
- In the "Devices" window, double click "(CODESYS Control for Linux ARM64 SL)"
- Click the "General > EtherCAT NIC Settings > Source address (MAC) > Select" button
- Select the MAC address and ethernet port that connects to the rest of the system
- Setup the rest of the EtherCAT
devices in network through scanning for devices
- Click "Toolbar >
Login (gear icon)" or "Alt + F8"
- Click "Yes", if a window appears that states: "No online change possible due to severe changes: Do you want to perform a download?"
- Within the "Devices" window, right click on "EtherCAT_Master (EtherCAT Master)"
- Click "Scan for Devices..."
- Click "Copy All Devices to Project"
- If the EtherCAT devices
do not appear under the list of scanned devices
- Try to power cycle the EtherCAT devices
- Try to reflash the boards
- Click "Toolbar >
Login (gear icon)" or "Alt + F8"
- Obtain process data from the
EtherCAT devices with the following steps
- Click "Toolbar > Start" or "F5"
- In the "Devices" window, double click one of the EtherCAT devices
- Select "General > Address > Additional > Expert settings"
- Click "Expert Process Data > Load PDO from the Device"
- Repeat these steps to select "Expert Process Data" for each EtherCAT device
- Press "Ctrl + S"
- Click "Toolbar > Stop" or "Shift + F8"
- Click "Toolbar > Logout" or "Ctrl + F8"
- Mapping the variables within the
"EtherCAT I/O Mapping" tab for each device can be accomplished by
writing a custom PLC_PRG program
- In the "Devices" window, double click “PLC_PRG”
- Contact CODESYS for more details on how to write a PLC_PRG program