SPRUJE4B August 2024 – December 2024 F29H850TU , F29H859TU-Q1
- 1
- Description
- Get Started
- Features
- 5
- 1Evaluation Module Overview
- 2Hardware
- 3Software
- 4Hardware Design Files
- 5Additional Information
- 6References
- 7Revision History
2.1.2 Configuration 2: C2000 controlCARD Backward Compatibility Configuration
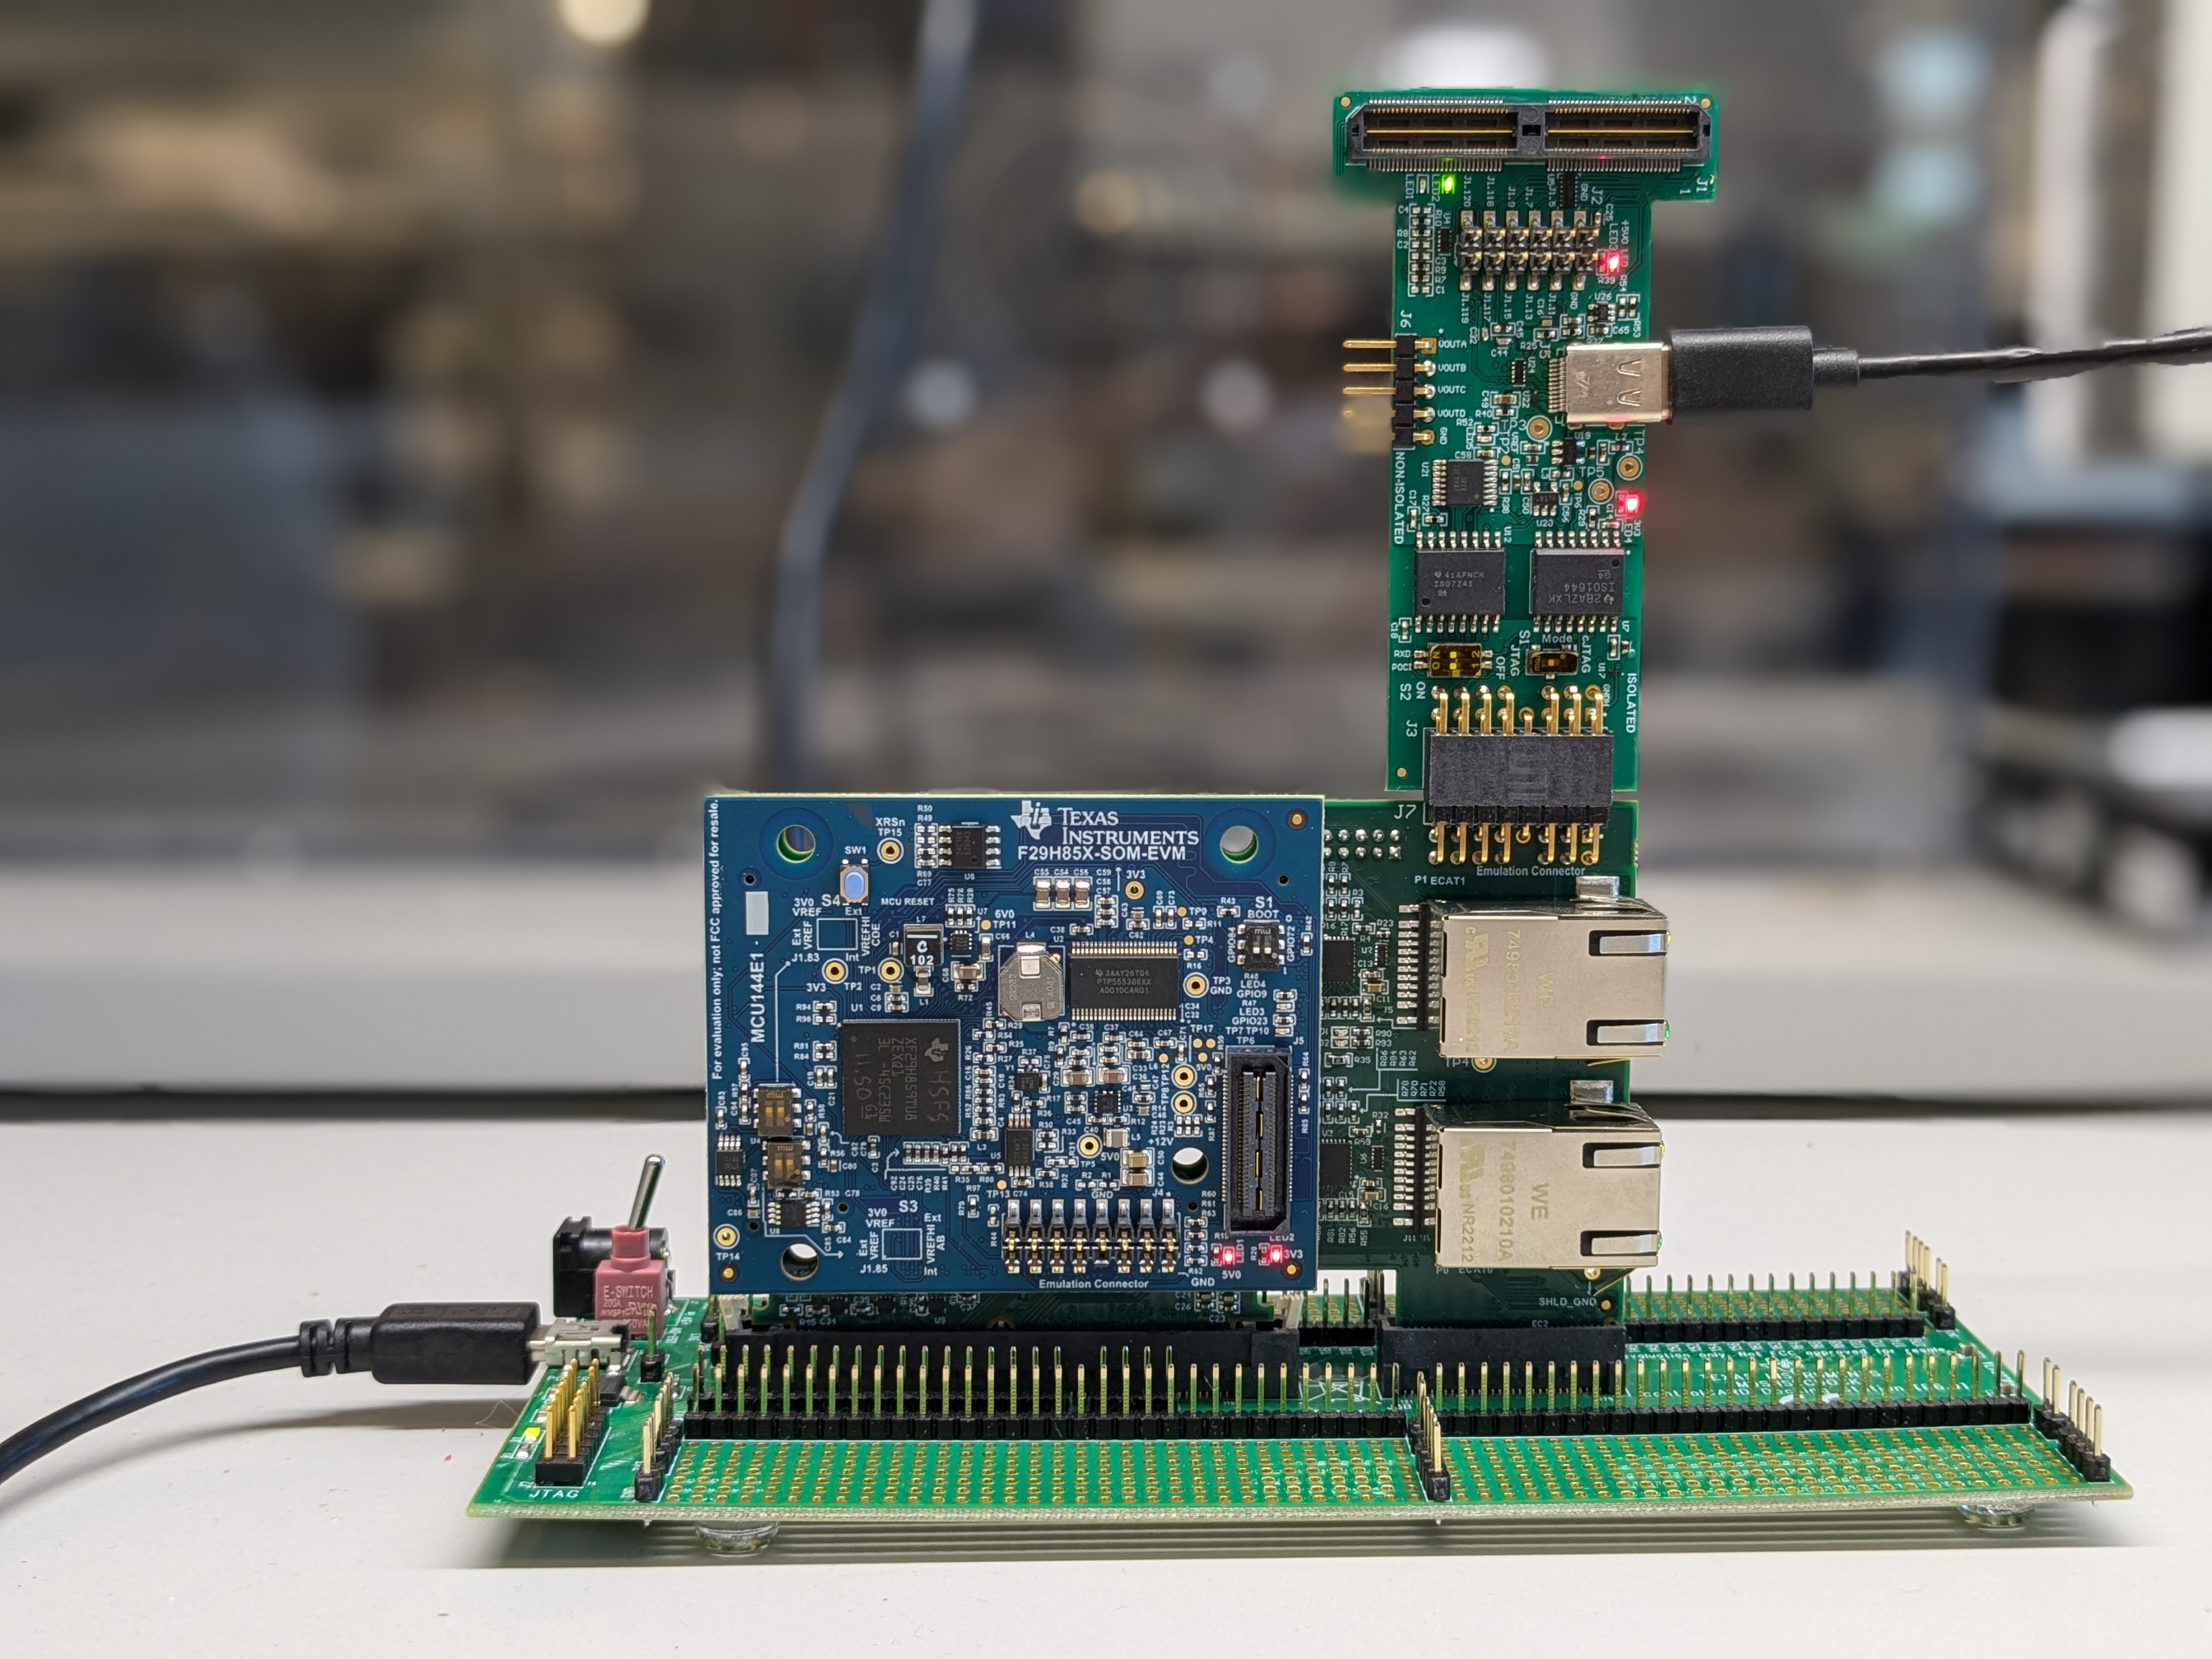
The backward compatibility configuration is used for cases which require the controlSOM to interface to a C2000 controlCARD compatible baseboard or docking station. A HSEC adapter board (HSEC180ADAPEVM) is required for this configuration. Power is provided to the controlSOM through the baseboard. An emulation debug-probe such as the XDS110ISO-EVM is required to provide debug connectivity to the MCU. The HSEC adapter board and XDS110 debug-probe are sold separately.
In this configuration, Code Composer Studio™ Theia connects to the controlSOM via JTAG and enables software development. The XDS110 debug-probe also enumerates a virtual COM port (VCP) for communication with the MCU via UART.
Multiple prototype headers on the HSEC adapter board provide access to many of the MCU ADC and GPIO signals for prototyping (refer to the HSEC adapter board user guide for more details).
Follow these steps to enable this configuration:
- The following equipment is required:
- F29H85x controlSOM (F29H85X-SOM-EVM)
- HSEC-180 adapter board (HSEC180ADAPEVM)
- C2000 controlCARD compatible baseboard or HSEC-180 docking station (TMDSHSECDOCK)
- XDS110 isolated debug probe (XDS110ISO-EVM)
- 2 USB Type-C cables
- (Optional) DC 5V power supply
- Verify the switch settings are
correct on each EVM.
- F29H85X-SOM-EVM:
- Use S1 to select the desired boot mode.
- Use S3/S4 to select the desired ADC voltage reference mode.
- XDS110ISO-EVM:
- S1 selects JTAG mode – set to JTAG mode.
- S2 enables UART/SPI connection – set to ON mode.
- F29H85X-SOM-EVM:
- Attach the controlSOM to the HSEC-180 adapter board.
- Ensure the controlSOM is correctly oriented. The J1 header on the controlSOM should connect with the J1 header on the HSEC-180 adapter board.
- Insert the HSEC-180 adapter board into the baseboard or TMDSHSECDOCK docking station.
- Connect the XDS110ISO-EVM into the connector J7 of the HSEC-180 adapter board.
- Connect the USB cable into connector J5 on the XDS110 isolated debug probe. The XDS110 isolated probe is powered on.
- Connect a USB cable into the connector J17 on the TMDSHSECDOCK.
- Flip S1 to the USB-ON position on the TMDSHSECDOCK.
- Verify the power status LEDs (LED1 and LED2) on the controlSOM are turned on.
- The controlSOM is ready for use. Follow the steps in Software to get started developing software.
 Figure 2-2 C2000 controlCARD Backward
Compatibility Configuration