TIDUEZ4 May   2021


  1.   Description
  2.   Resources
  3.   Features
  4.   Applications
  5.   5
  6. 1System Description
  7. 2System Overview
    1. 2.1 Block Diagram
    2. 2.2 Highlighted Products
      1. 2.2.1 SimpleLink MCU
        1. 2.2.1.1 CC3235MODS
        2. 2.2.1.2 CC1352R LaunchPad
          1. 2.2.1.2.1 CC1352R
      2. 2.2.2 Power
        1. 2.2.2.1 TPS63802
        2. 2.2.2.2 TPS63900
        3. 2.2.2.3 TPS62825
        4. 2.2.2.4 TPS7A03
        5. 2.2.2.5 TPS7A20
        6. 2.2.2.6 TPS62840
        7. 2.2.2.7 TPS22919
        8. 2.2.2.8 LM66100
      3. 2.2.3 Peripherals
        1. 2.2.3.1 OPT3004
        2. 2.2.3.2 DRV8837C
        3. 2.2.3.3 TPA2011
        4. 2.2.3.4 TLV61048
      4. 2.2.4 OmniVision Video Encoder OA7000
      5. 2.2.5 OmniVision Image Sensor SP2329
      6. 2.2.6 YTOT Lens Module
    3. 2.3 Design Considerations
      1. 2.3.1  Input Power: Battery and USB
      2. 2.3.2  Power Requirements
      3. 2.3.3  Camera Wake-up and Day or Night Sensing
        1. 2.3.3.1 PIR and MSP430 Based Motion Detection Design for Low Cost and High Performance
      4. 2.3.4  Battery Gauging
      5. 2.3.5  IR LED Illumination
      6. 2.3.6  IR Cut Filter
      7. 2.3.7  Audio
      8. 2.3.8  System Operation
      9. 2.3.9  Wi-Fi and Host Subsystem
      10. 2.3.10 Firmware Control
        1. 2.3.10.1 Application Flow
  8. 3Hardware, Software, Testing Requirements, and Test Results
    1. 3.1 Hardware
    2. 3.2 Software
    3. 3.3 Setup
      1. 3.3.1 Configuration Steps for Video over Wi-Fi
      2. 3.3.2 (Optional) Flash OA7000 With Latest Firmware or Stream Video Over USB
      3. 3.3.3 Audio Streaming
      4. 3.3.4 LPSTK-CC1352R Configuration Steps for Camera Module
    4. 3.4 Test Results
      1. 3.4.1 Power Supply Rails and Current Consumption
      2. 3.4.2 Battery Life Calculations
      3. 3.4.3 Video Streaming
      4. 3.4.4 IR LED Drive
  9. 4Design and Documentation Support
    1. 4.1 Design Files
      1. 4.1.1 Schematics
      2. 4.1.2 Bill of Materials
    2. 4.2 Software
    3. 4.3 Support Resources
    4. 4.4 References
    5. 4.5 Trademarks
  10. 5About the Author

Audio Streaming

The OA7000 firmware can be used to stream audio in the following manner:

  1. In the Func Test tab of the OA7000 GUI (Figure 3-16), click the Speaker button to select the audio file. The Wav format is supported.
  2. If the audio is playing, PLAY is displayed on the right side of volume scroll bar. When the play is over, DONE is displayed, and if reading audio file failed NO FILE is displayed.
  3. The user can change the volume via the scroll bar. (Speaker: –62 dB to approximately 4 dB)
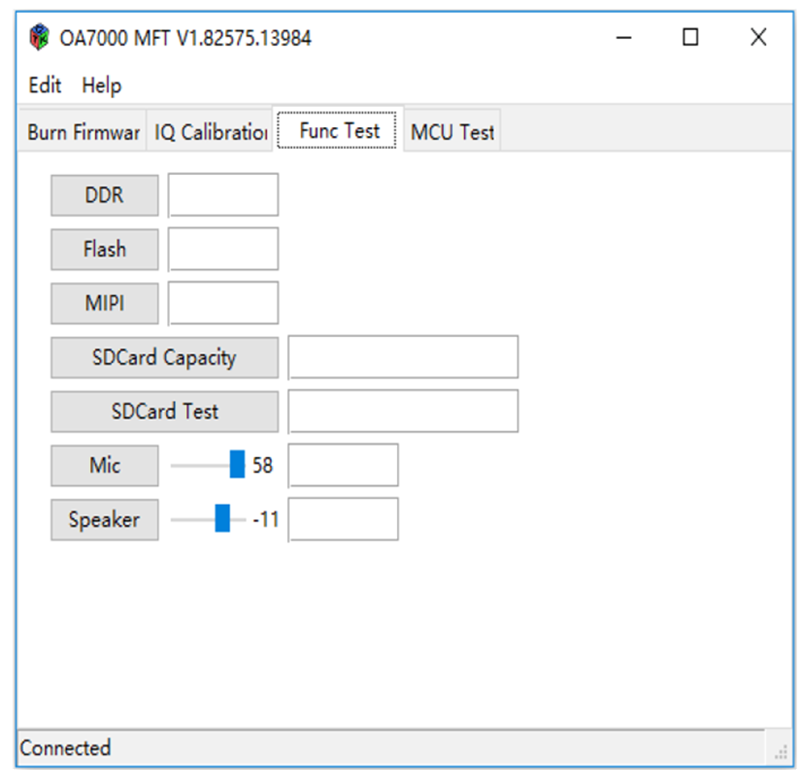
GUID-20210422-CA0I-ZHR7-FF1W-HWB7BHXQG2NF-low.png Figure 3-16 Functional Test Func Test tab from OA7000 GUI

The onboard microphone can be used with the OA7000 firmware to record and store an audio stream:

  1. In the Func Test tab of the OA7000 GUI, click the Mic button (Figure 3-17), start to record the stream.
  2. Click the Mic button again to stop recording.
  3. The recorded file will be stored in the audio_stream file at directory ..\MFT.
    Note: The format supported is PCM, the sample-rate is 16 kHz.
  4. The user can change the volume via the scroll bar. (Microphone: –17 dB to approximately 29 dB)
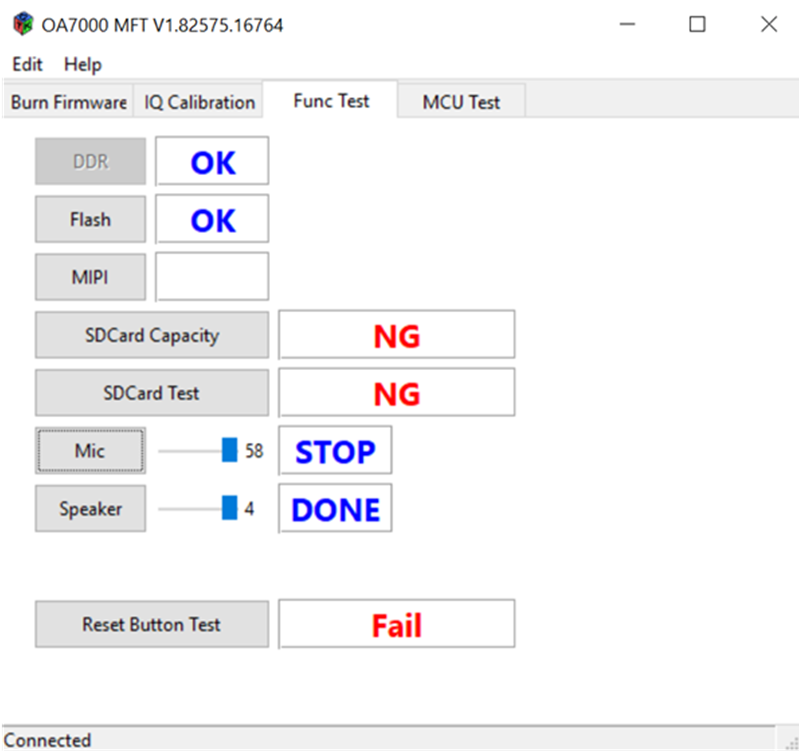
GUID-20210422-CA0I-BL9B-FMVV-LTQB1VQPDL2W-low.png Figure 3-17 Functional Test Func Test tab from OA7000 GUI Demonstrating the Functions Available - Flash, MIPI, MIC, and Speaker