DLPU105 March 2021 DLP471TP , DLPC6540
PRODUCTION DATA
5 Quick-Start Procedure
This quick-start procedure considers default conditions as shipped.
- Power up the DLP LightCrafter
Display 471TP EVM by applying an external DC power supply (19-V DC, 4.74A)
to the J1 connector.
External Power Supply Requirements:
- Nominal Output Voltage: 19 VDC
- Minimum Output Current: 2.5 A
- Maximum Output Current: 4.74 A
- Efficiency Level: VI
- Connector Barrell Size: 2.5 x 5.5 x 8.25 [ID x OD x L(min)] mm
- Connector Polarity: Center +
Note:
- TI recommends using an external power supply that complies with applicable regional safety standards such as UL, CSA, VDE, CCC, and PSE.
- The P19VIN (D3), PWRGOOD (D5) and POSENSE (D8) LEDs on the Formatter board will turn on to indicate that input and standby powers are applied.
- Move SW1 switch to the ON position to turn on the DLP LightCrafter Display 471TP EVM. When the DLP LightCrafter Display 471TP EVM is turned on, the POSENSE (D8) LED will turn off and PROJ_ON LED (D7) will turn on. The HEARTBEAT LED (D8) will start blinking.
- After the DLP LightCrafter Display 471TP EVM is turned on, the projector will default to displaying a DLP LightCrafter Display splash image.
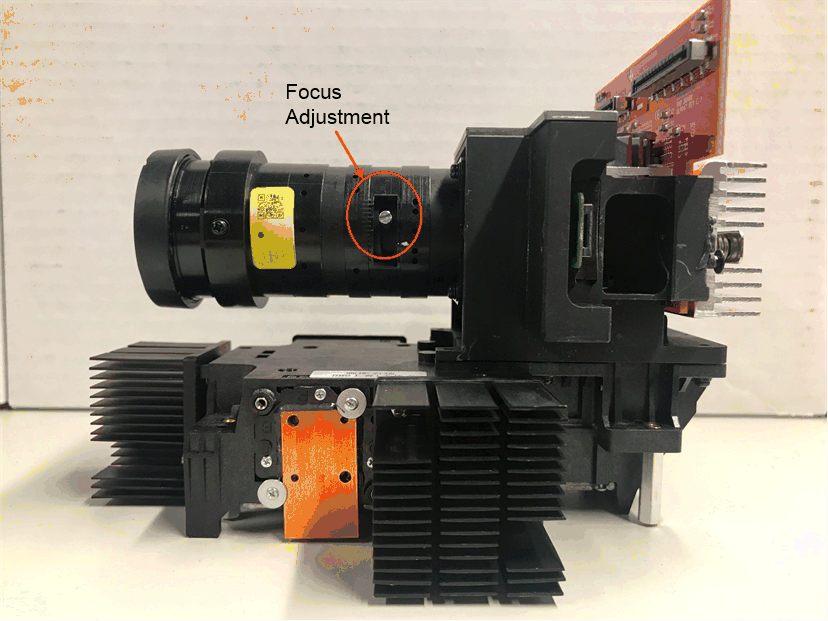
- The focus of the image can be
adjusted manually on the optical engine.
 Figure 5-1 Optical Engine
with Focus Adjustment
 - Connect the USB to the DLP LightCrafter Display 471TP EVM and open the latest GUI on your computer. If needed, connect an HDMI source to the EVM and communicate to the EVM via the GUI software.
- When turning off the
projector, turn off the SW1 switch prior to removing the power cable. Note: To avoid potential damage to the DMD, it is recommended to turn off the projector with the SW1 switch before disconnecting the power.
There are eight indicator LEDs on the DLP LightCrafter Display 471TP EVM (Formatter and Front-End boards), and they are defined in Table 5-1.
Table 5-1 Status LEDs on the DLP
LightCrafter Display 471TP EVM
| Board | LED Reference | Signal Indication | Description |
|---|---|---|---|
| Formatter | D1 |
LOCKN | Vx1 Interface locked. |
| Formatter | D3 |
VIN | Input 19 V power. |
| Formatter | D4 | HEARTBEAT | BLINKING after SW1 Switched ON and ASIC is running. |
| Formatter | D5 | PWRGOOD | ON when 19 V is applied and PMIC is up. |
| Formatter | D6 |
FAULT | Indicates ASIC SW fault has occurred. |
| Formatter | D7 | PROJ_ON | ON when SW1 switched ON. |
| Formatter | D8 | POSENSE | ON (Red) when 19 V power applied but PROJ_ON is still OFF. |
| Front-End | D4 |
SCDT_DR5 | HDMI Input stable. |