SLYU058D May 2021 – February 2024 TMAG5173-Q1 , TMAG5273
3.1 Quick Start Setup
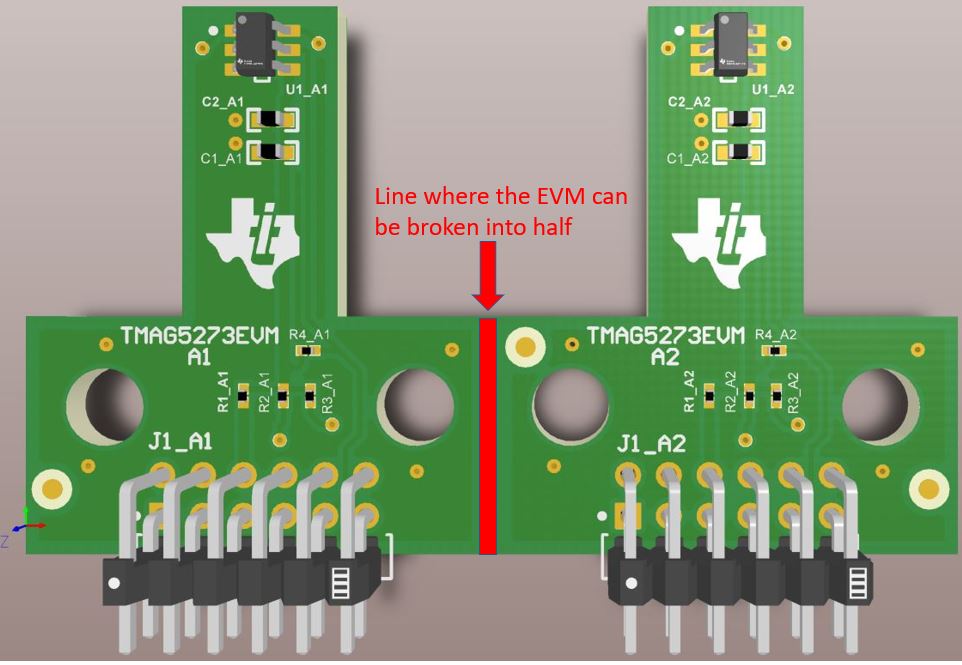
 Figure 3-1 TMAG5x73 EVM With A1 and A2
Parts of Board Still Joined Together
Figure 3-1 TMAG5x73 EVM With A1 and A2
Parts of Board Still Joined TogetherTo set up and use the EVM, follow these steps:
Gently flex the panel at the score line shown in Figure 3-1 to split the board in half for a more compact form factor. This split provides separate boards for the TMAG5x73A1 and TMAG5x73A2 portions of the original board.
- Download and install the driver as a one-time step per PC: http://www.ti.com/tool/download/sbac253
- Attach the EVM to the Sensor Control Board (SCB). To evaluate the TMAG5x73A1 on the EVM, attach header J1 of the Sensor Controller board to header J1_A1 of the EVM (see Figure 4-1). To evaluate the TMAG5x73A2 on the EVM, attach header J1 of the Sensor Controller board to header J1_A2 of the EVM (see Figure 4-2).
- Use a USB cable to connect the SCB to a PC
- Insert the micro USB cable into the USB receptacle J2 that is on the SCB Controller onboard.
- Plug the other end of the USB cable into a PC.
- Access the GUI in either the Google Chrome® or Firefox® browser by clicking on the following link: https://dev.ti.com/gallery/info/PositionSensing/TMAG5x73EVM_GUI/
- To quickly view results on the GUI, do the
following:
- Modify the MAG_CH_EN bits in the SENSOR_CONFIG_1 register to enable the desired channels to read from. The GUI has drop-down boxes to configure these bits when the SENSOR_CONFIG_1 register is selected in the register tab of the GUI.
- Select the desired result plots under the Results to collect/show box in the Results Data tab, and press Collect Data to trigger the read.
- Apply a magnetic field to the sensor by doing one
of the following:
- Wave the included handheld magnet around the sensor.
- Attach either the Rotate & Push module or the Joystick module to the EVM (see Section 4.2 and Section 4.3). For more details on how to use these modules, see Section 4.2 and Section 4.3.
- Observe the outputs in the GUI.