SNVU875A October 2023 – February 2024 TPS38700 , TPS389006
2.3 EVM Jumpers
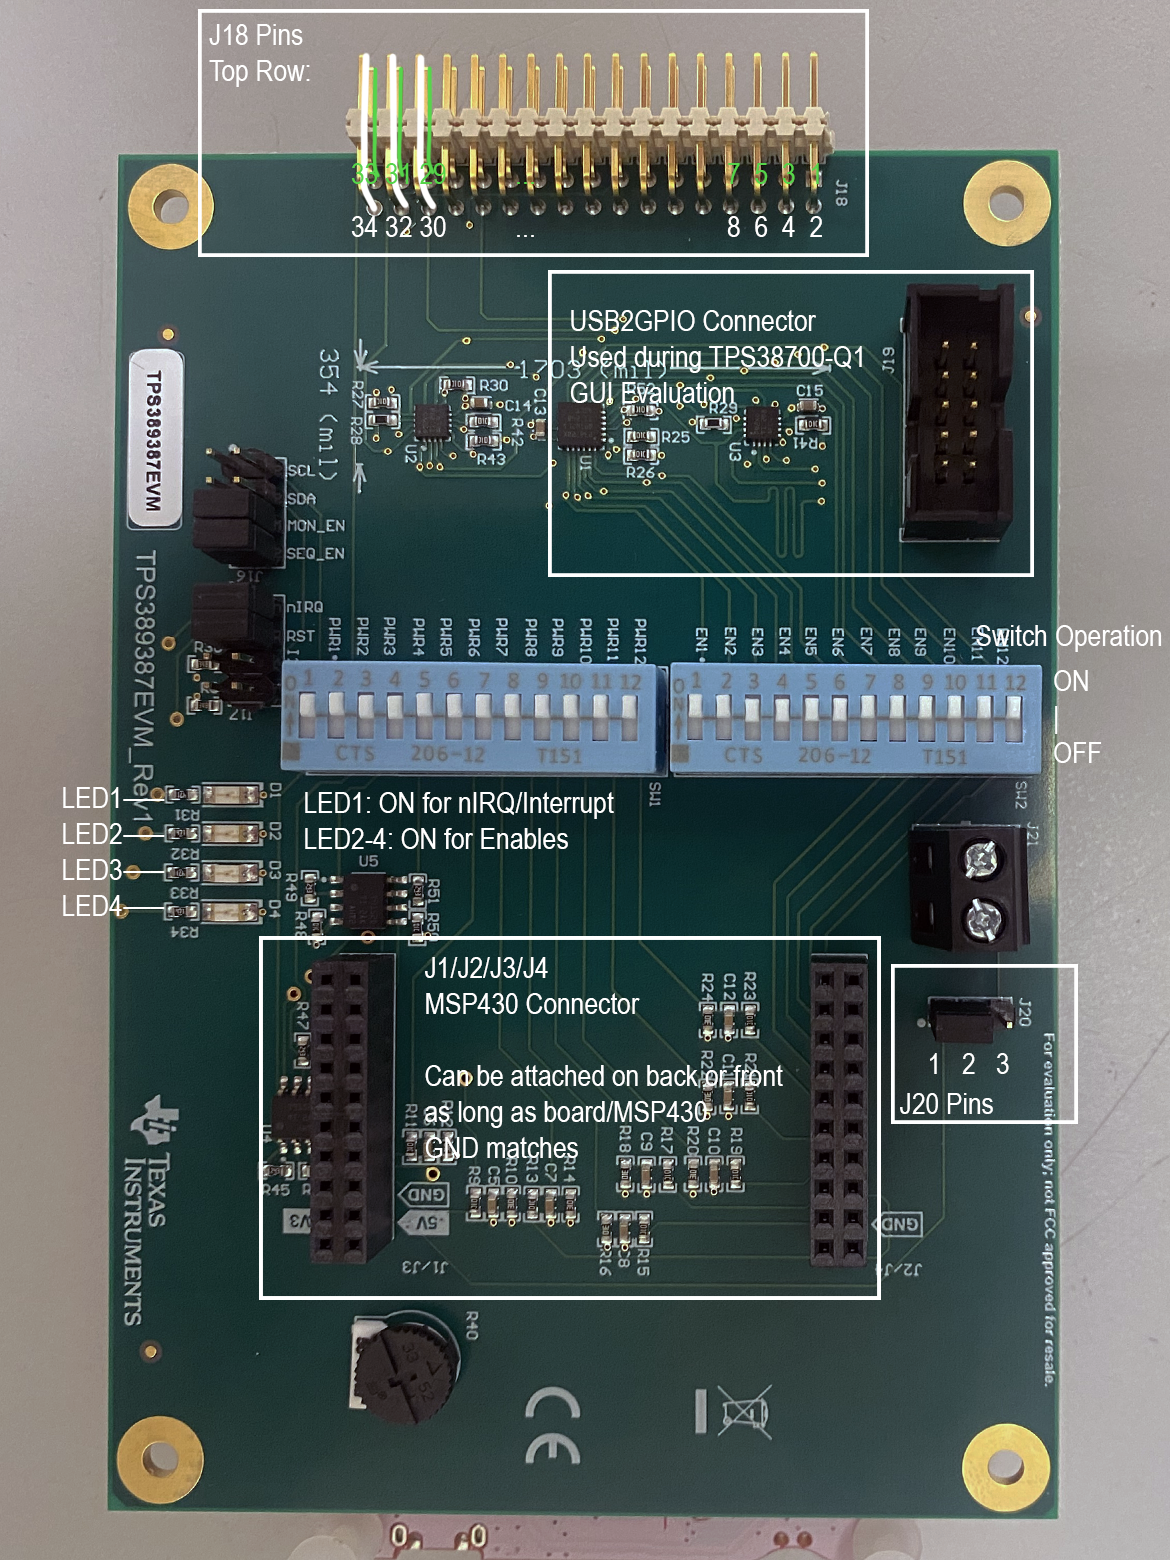
Table 3-2 lists the jumpers on the TPS389387EVM. The EVM has five jumpers installed.
Table 2-2 Jumper Configuration
| Jumper | Pins/Silkscreen Label | Jumper Configuration |
|---|---|---|
| J16 | SCL | Open |
| J16 | DA | Open |
| J16 | MON_EN | Shunted |
| J16 | SEQ_EN | Shunted |
| J17 | nIRQ | Shunted |
| J17 | RST | Shunted |
| J17 | I2C Pullup | Open |
| J20 | 1-2 | If Shunted, then external power supply is 5 V. |
| J20 | 2-3 | If Shunted, then external power supply is 6 V. |
 Figure 2-1 Labeled TPS389387EVM Pins and Connector Locations