SLUUC37C july 2019 – august 2023 BQ75614-Q1 , BQ79616 , BQ79616-Q1 , BQ79656-Q1
- 1
- BQ79616-Q1 and BQ75614-Q1 Evaluation Modules
- Trademarks
- General Texas Instruments High Voltage Evaluation (TI HV EVM) User Safety Guidelines
- 1 General Description
- 2 Theory of Operation - Stackable BQ79616EVM
- 3 Theory of Operation - Standalone BQ75614EVM
- 4 Connectors
- 5 Quick Start Guide
- 6 Physical Dimensions
- 7 BQ79616EVM Schematic, Assembly, Layout, and BOM
- 8 BQ75614EVM Schematic, Assembly, Layout, and BOM
- 9 BQ79656EVM Schematic, Assembly, Layout, and BOM
- 10Revision History
4.1.4 GPIO or Thermistor Inputs
There are 8 GPIO pins, which can either be floated, connected to a thermistor and 10k pullup, or forced to certain voltage for a measurement. This can be determined by using the J4 header as shown below. Insert a shunt from pins 1 and 2 to connect GPIO1 to the thermistor, pins 3 and 4 to connect GPIO2 and so on for the other GPIOs. Jumper J5 must also be connected to pull the GPIOs up to the TSREF reference voltage for ratiometric NTC measurements.
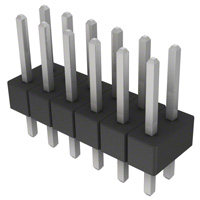
 Figure 4-3 Sullins Connector Solutions PEC08DAAN (Reference Image Only)
Table 4-5 Connector Information
| Designator | Manufacturer | Part Number | Mating Connector |
|---|---|---|---|
| J4 | Sullins Connector Solutions | Manufacturer: PEC08DAAN | N/A |
Table 4-6 Pin Description - J4
| Pin | Name | Comments |
|---|---|---|
| 1 | GPIO1 | GPIO1 Pin of BQ79616-Q1 or BQ75614-Q1 |
| 2 | GPIO1_R | Connection for GPIO1 to 10k pullup and thermistor |
| 3 | GPIO2 | GPIO2 Pin of BQ79616-Q1 or BQ75614-Q1 |
| 4 | GPIO2_R | Connection for GPIO2 to 10k pullup and thermistor |
| 5 | GPIO3 | GPIO3 Pin of BQ79616-Q1 or BQ75614-Q1 |
| 6 | GPIO3_R | Connection for GPIO3 to 10k pullup and thermistor |
| 7 | GPIO4 | GPIO4 Pin of BQ79616-Q1 or BQ75614-Q1 |
| 8 | GPIO4_R | Connection for GPIO4 to 10k pullup and thermistor |
| 9 | GPIO5 | GPIO5 Pin of BQ79616-Q1 or BQ75614-Q1 |
| 10 | GPIO5_R | Connection for GPIO5 to 10k pullup and thermistor |
| 11 | GPIO6 | GPIO6 Pin of BQ79616-Q1 or BQ75614-Q1 |
| 12 | GPIO6_R | Connection for GPIO6 to 10k pullup and thermistor |
| 13 | GPIO7 | GPIO7 Pin of BQ79616-Q1 or BQ75614-Q1 |
| 14 | GPIO7_R | Connection for GPIO7 to 10k pullup and thermistor |
| 15 | GPIO8 | GPIO8 Pin of BQ79616-Q1 or BQ75614-Q1 |
| 16 | GPIO8_R | Connection for GPIO8 to 10k pullup and thermistor |