SLOA284A january 2020 – may 2023 AFE5832 , AFE5832LP , ISO7741 , ISOW7841 , LM25037 , LM25180 , LM5180 , LM5181 , LM5181-Q1 , TX7316 , TX7332
5 Layout Guidelines
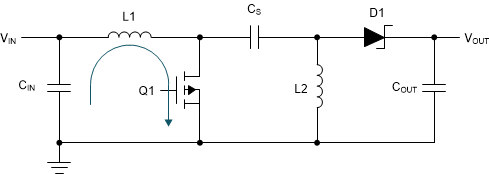
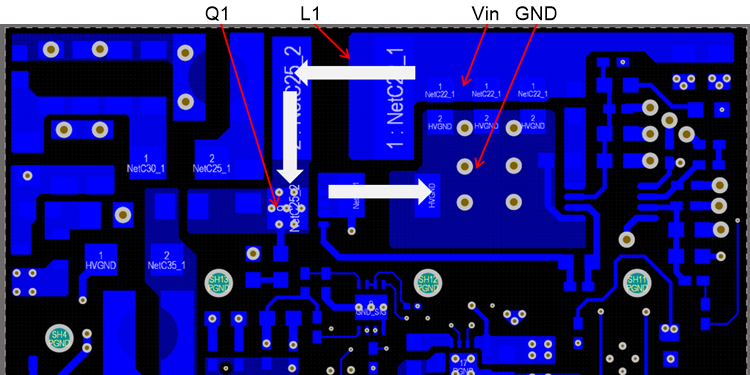
Layout in SEPIC is very critical. While designing, the most important rule is to reduce the noise in the high current switching loop, which is shown in Figure 5-1. The current flows from the input supply to the primary inductor and through the MOSFET. To minimize induced EMF due to switching currents, it is desirable to keep parasitic inductance of this loop as low as possible. Components (primary inductors, input electrolytic capacitors, and FET) must be placed as close as possible to each other. In this layout, a single ground plane was used, and all the signals return onto this low impedance plane, as shown in Figure 5-2. In case the HV circuit is placed in proximity to the transducer, shielding might be necessary to minimize effects of radiated interference from HV section.
 Figure 5-1 Hot Loop in SEPIC
Configuration
 Figure 5-2 Layout Section of HV